Page 2 ........i550 hull 87 older stuff from 2009-2008
8.30.09...Decision Time
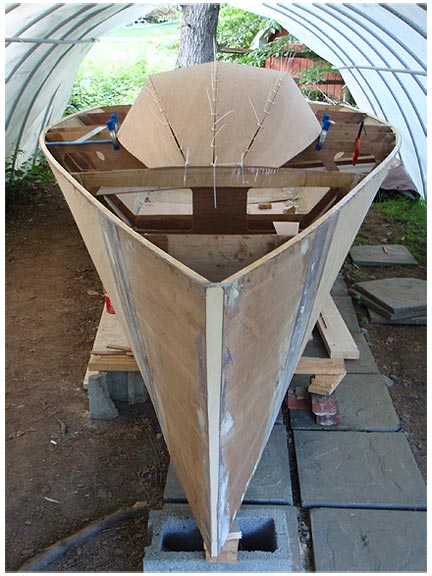
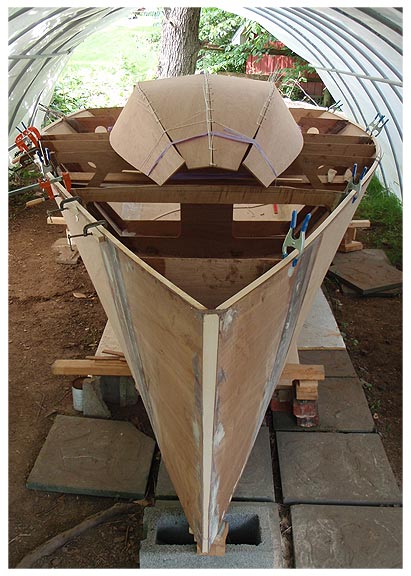
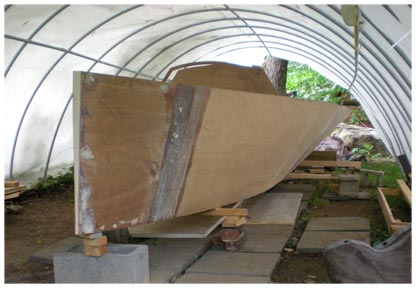
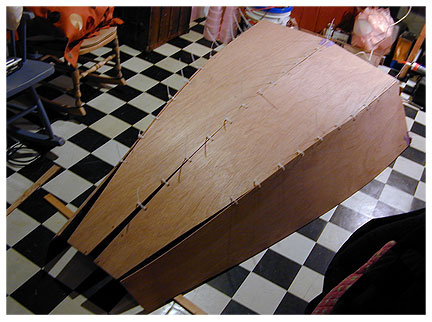
One thing I get fed up with is my tendancy to lapse into "paralysis due to analysis." For about the last 3 months, I've been looking at the other Build Blogs trying to decide how to configure the cockpit on hull# 87. I like the aesthetics of the original design, which leaves frame 124 intact, but I love the idea of a bigger, wider cockpit forward. Plus, in all honesty, the latter option looks a lot simpler to build.
So, after over-thinking this for a few months I decided what the hell, I'm just going to perform surgery on frame 124 and live with it.
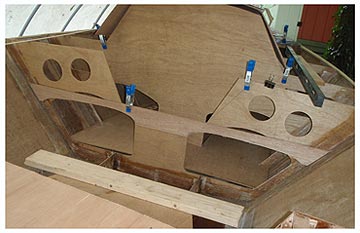
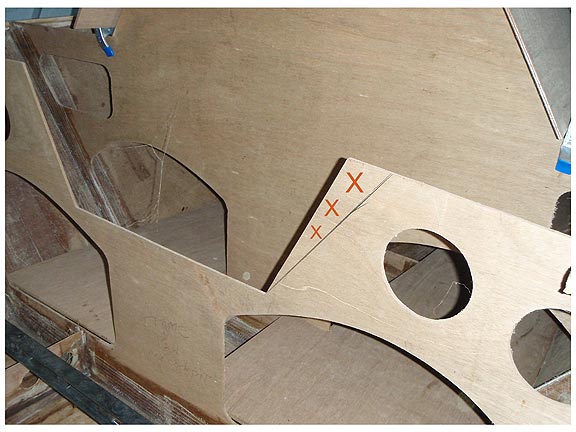
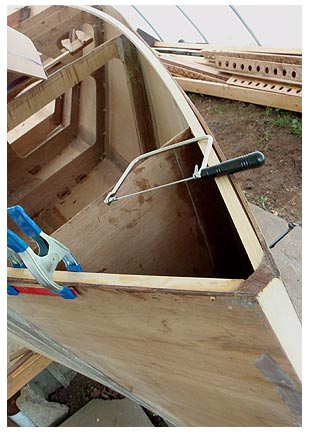
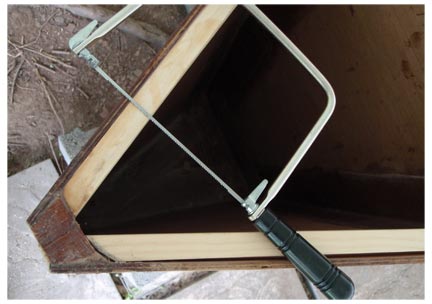
Cutting away frame 124 leaves....uh...some gaps! So I had to engineer a thwart to span the sections that would be missing once the surgery was done. I figured this would be a pretty loaded up section and decided to go with a 6mm ply laminate. So I fiddled around with fitting a single piece of 6mm to sister on to the existing frame. Then when I got the shape I wanted, I just used it as a template, cut the 2nd piece to match and laminated it overnight in my basement.
single piece of 6mm ply cut to fit the section.
ply from above used as a template on a 2nd piece of 6mm meranti 1088
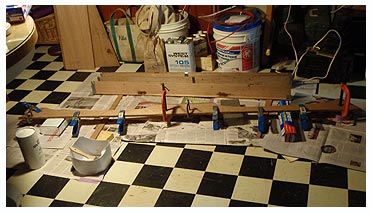
Evening glue and clamp session in the basement.
Here's the thing all ready to get glued and screwed into place.
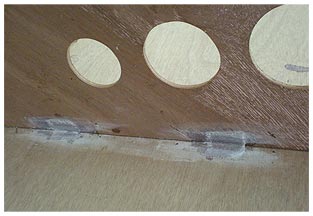
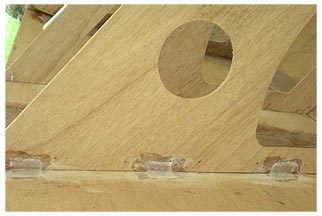
I'm definitely getting addicted to using my hole saw. I knew I couldn't install this thing without putting a bunch of ventilation in it. I mean, the weight savings is about that of one English Sparrow. But, like I already said, it looks fast.
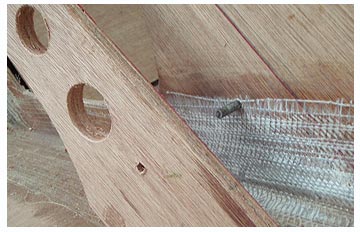
I'm not a huge fan of slathering epox all over something and then trying to line it up while the pox is getting smeared all over the place and dripping on my hands, so on each end of the engineered thwart I drilled a hole and left the drill bits in as registration pins. Then when the glue goes on you can line up the installation almost instantly. Plus if done correctly it's accurate as hell.
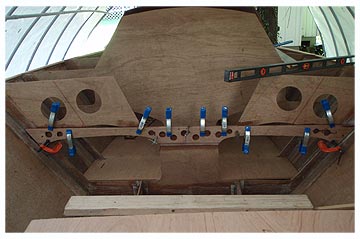
Glued and clamped, with a few #6 3/4 inch brass screws in places where the clamps didn't quite reach. The sections that get sawed off are clearly marked inboard of the red diagonal line.
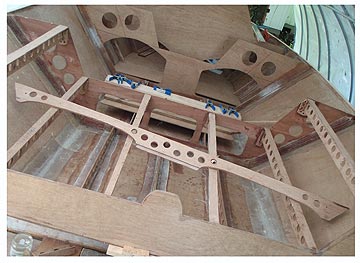
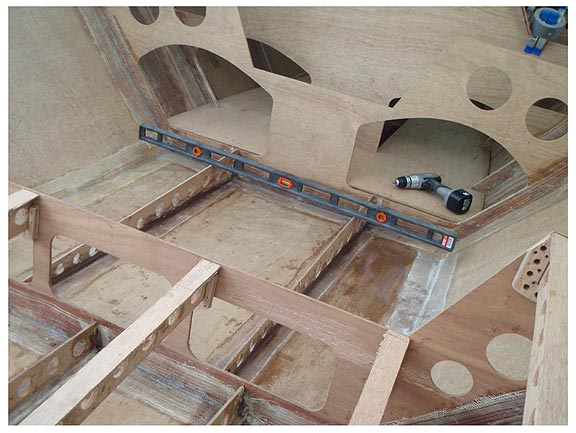
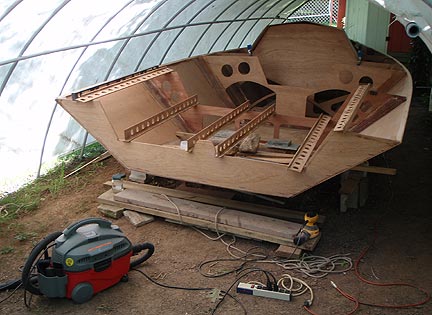
After the pox kicked, I spent a few minutes with the jigsaw and removed the parts of frame 124 that are no longer relevent. Now I'm ready to hang the cockpit sole supports and grow myself a sole!
While waiting for the pox to kick, I put on the hazmat suit and carved some Coosa-composite into stringers. As much as I like this stuff for boat building, it is an absolute menace to work with due to it's capacity to serve as a fairly nasty skin irritant. Nothing like putting on the white suit when it's 85 degrees...but it could have been worse as it was a relatively cool August day in Baltimore.
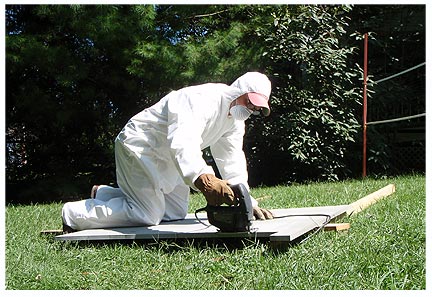
Besides being a great way to make stringers, this might become a new fad for crash dieting. I think I sweated off 10 pounds in about 15 minutes.
Coosa may be a pain to work with but it seems to fit the bill perfectly for stringers that need to match a curve. This took about 45 seconds to cut once the guidelines were scribed on the board. These get tabbed in with 4inch 6oz tape.
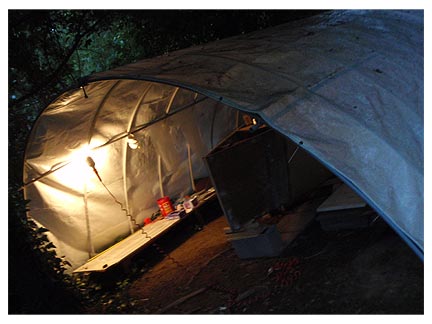
8.23.09...Bugging Out
It was great to be in Charleston for a week, but it put a serious crimp in my sked for getting some progress made on the Stunted Blunt.
I was glad to get home and resume work, but in all honesty I felt slow and stupid....I didn't get much done this weekend and also I had to drive to NYC and back all in one day, yesterday.
One nice thing about being back is the lack of 4 inch spiders on location. I pictured what it would be like, doing the build outside, in a place like Charleston, with these bastids lurking in the V-birth.
BUT: turns out, B'more has been pretty bad with the bugs, too, this summer. I don't remember mosquitos as fierce as this summer's and plus they are striped...which is the West Nile Fever vector, I believe. Fortunately for me, I once spent 2 months along the Nile, so I think I'm immunne. But the bites still itch, and now I'm super-sensitive to the feeling of insects crawling on me.
So, when a massive Termite Hatch burst on the scene late this afternoon, I threw in the towel. This photo (below) shows about a quarter of a square foot, so if you extrapolate the termite population over the size of the backyard you get about 800,000 thousand of these little effers, most of whom felt obligated to wander over, close to the boat, to check out the progress, or else climb on my arms and shoulders for a piggy-back ride in to the kitchen.
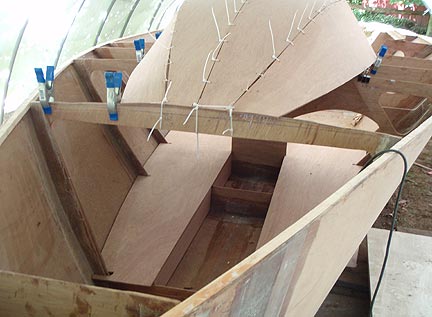
Nonetheless, I was able to get some more work done on the stringers and I decided to build some more of these plywood T-beams, instead of doing the deck supports in Coosa-composite....I figure I'll save the Coosa for stringers tied into the topside panel. The T-beams are so light and strong, it's hard to bail on their sheer functionality at this point.
A luta continua, brother. The struggle continues.
You can't see the insect life in this shot....but trust me, they're there, the sonsa beeches. I'm really starting to envy the folks with 2-car garages and other, more functional boats sheds.
Yet, in all honesty, the challenge of doing this completely outdoors is fun. I just hope the tropics stay calm for these lat-lons (as "Bill" goes scurrying by way to the east!)
Whatever...for the next 3-4 days, I'll be inside, laying up 5 more T-beams for the forward section of the cockpit and deck supports.
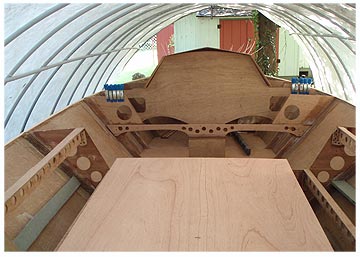
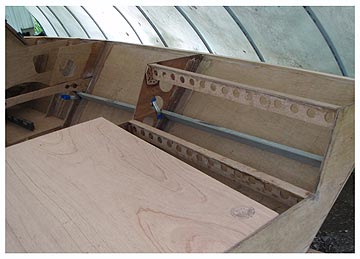
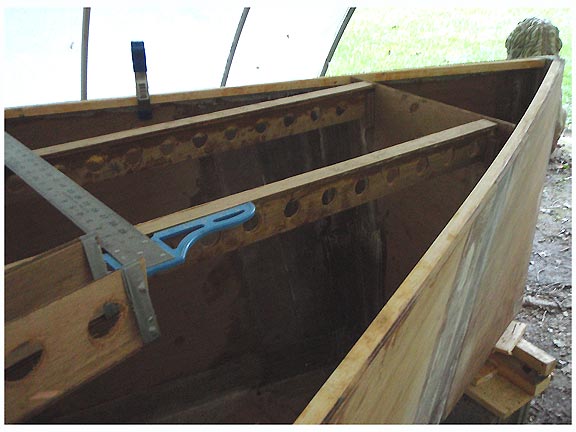
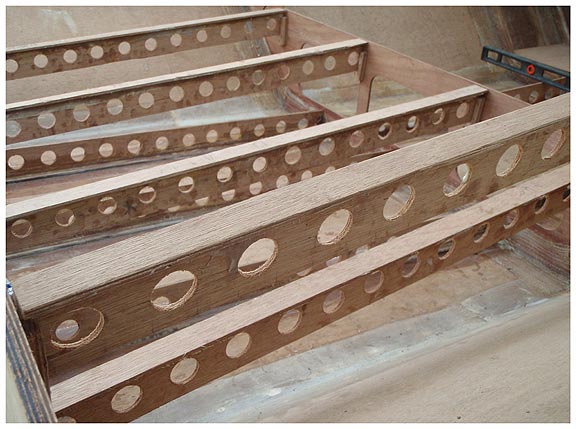
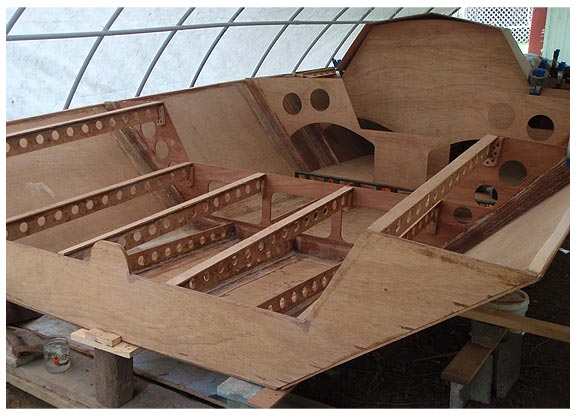
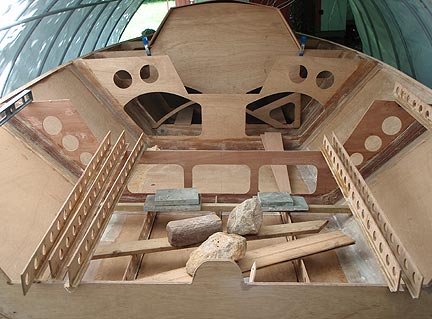
8.09.09.....Sea of Holes
Some pix with the holy stringers, cockpit and deck support well hung.

from
So what, exactly, is the weight savings from approx 150 holes made of meranti 1088 6mm plywood? About 6 oz.
Still it looks cool....
8.03.09....Nite Moves
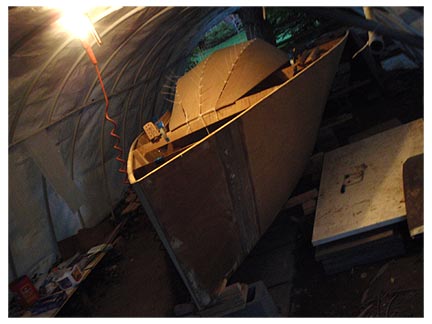
In a triumph of ambition over judgement, I tried to get 12 feet of tabbing done starting at dusk tonight. I didn't count on the inadequacy of a single 60 watt bulb, a new influx of hungry mosquitos & every moth in North America feeling obligated to check out the build shed. Yet, I think I got the tape down pretty nicely. Tomorrow will tell, in better lighting.
I just hope the tape doesn't have six thousand insect body parts glued to it.
Bottom line, I'm making good progress on the stringers and bunks and stuff and am looking at maybe putting in a cockpit sole and some decking soon! Yah mon!
7.04.09......Blocked
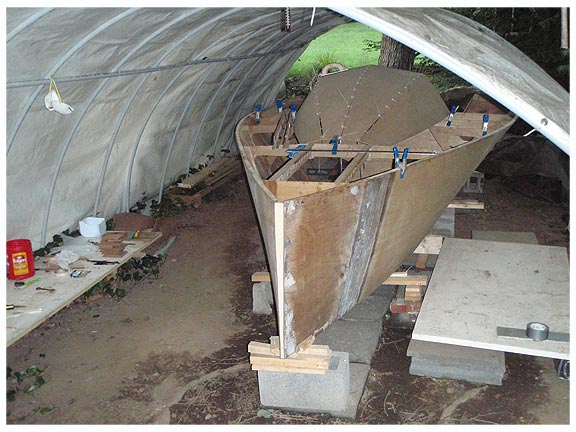
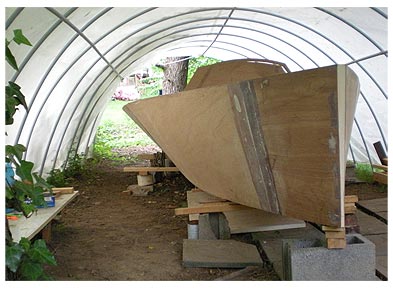
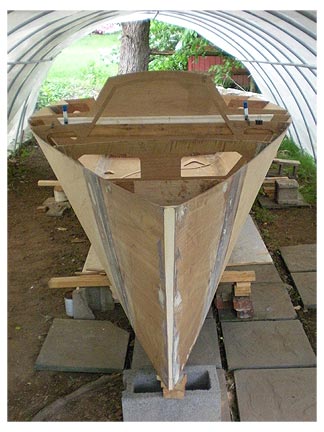
Got back from the aptly named Block Island last Sunday. The trip effectively ate up 3 straight weekends where nothing happened on the i550. So, I am taking chunks of time out of this 3-day holiday weekend to put some hours into the boat. I am happy to say that this is sort of a new phase in the project, in that, I'm mainly working inside the hull to attach stringers and bunks and make a cabinet for the microwave.
Just kidding about the microwave.
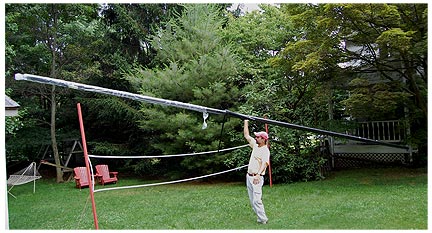
6.13.09 Some Assembly Required
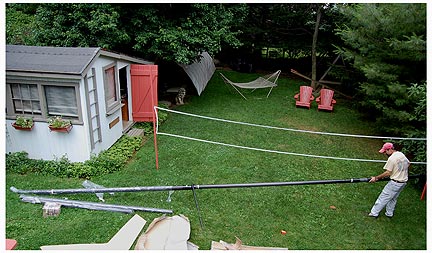
Picked up the rig today.
C-Tech did a great job and all the sections line up. Even in this day of instant planetary communications and trade and commerce on a global scale, I'm still impressed that this thing was in NZ two months ago.
That's the boom and the prod laying on the ground on the left, including the sleeve for the prod.
The mast is in 3 sections approx 10'6", 10'6", and 4'
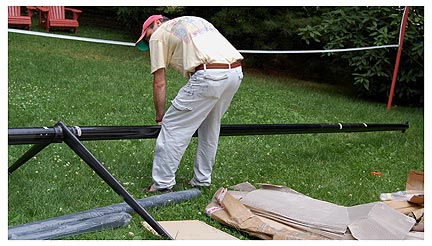
I did a quick pre-assembly just to get an idea of how it goes together and how much it weighs when all the bits and bobs get put in their right places.
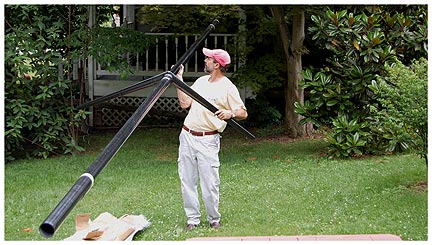
Swept-backs mean longer spreaders, but I was surprised how big these actually ended up being.
Quite light.
Something like this seems to suggest PBO, but I don't know if it's available in small enough diameters now to warrant using it on an 18' boat (22' seems to be the low end in the literature I've seen thus far) and it the weight savings enough to justify PBO instead of wire?
Will have to find out.
6.07.09 small steps
 Stuff has been happening, but it just isn't quite as obvious, at this point.
I leveled off the sheer clamp, flush with the ply, with a jig saw. This is not the preferred tool for the job, but it is adequate. I'm actually pretty happy with the way it turned out, the clamp is flat and allows for a bit of radius to the gunnel, now.
This coming weekend I'll:
- get my rig!
- take out the last 3 or 4 cable ties, yay, finally!
- get started on the bunks and stringers.
Progress: I like it.
5.30.09 Torqued
Still messing with the house.
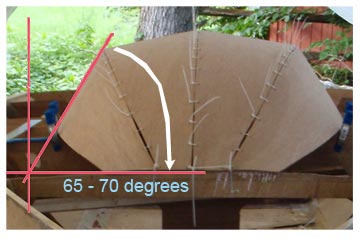
The sides need to get twisted about 70 degrees in less than 5 feet of board run to conform to sitting flush on frame 53.5
I elected to do this over the course of 2 weeks and finally clamped the thing flat with cable ties wrapped around frame 53.5.
Those cable ties are loaded up!
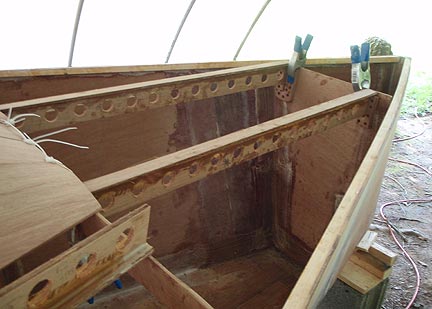
Also made a lot of progess with the tabbing, and I'm ready to start on glassing in the bunks and stringers and cockpit sole supports.
5.23.09 Housing Project
 We needed space in the basement to store stuff recently emptied out of a dorm room, so the house is on the boat. Sort of...it's just sitting there and it'll probably be a while before anything is done with it, aside from moving it out of the way from time to time.
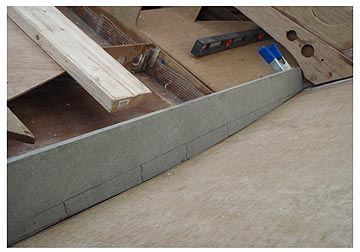
In the meantime, the idea of a sheer clamp began to become more and more of a priority. I was definitely in "paralysis due to analysis mode," pondering what wood to use and where to get it. Finally, I saw one of the other builders had just gone ahead with pine. Pine? Well, why the hell not!
I was at the Depot, trying to find some plumbing parts for the "Dripping Shower From Hell" issue, that kept me from doing much work on the boat last weekend. As a bit of a departure (and reward) from sifting thru ten thousand different plumbing parts, none of which the ones I needed, I took a little hike down to the lumber section, just for grins, to see if by some miracle there was something I could use for a sheer clamp. I started with the racks of 12 foot long 1x4's, thinking well, this is a waste of time, as there was some pretty ulgy pine dimensional lumber all boogered up and knotty.
Then, by some miracle, a piece looked promising...turned out to be a 12 foot section as clear as you're ever gonna find, completely devoid of anything even faintly resembling a knot. Had a friend rip it into strips the next morning on his band saw, and there I had it: 48 board feet of usable sheer clamp stripping.
Yesterday I scarfed two pairs of 12 foot sections into two 24 foot long strips, and today I notched the frames with a coping saw (total time ~ 20 minutes) and glued those puppies in.
There has been some discussion, on the class site forum, about when's the best time to install the sheer clamp, and based on what I experienced this weekend. I'd defintely have to throw my hat in with the Sooner the Better crowd.
The clamps really fair out the body panels and add rigidity and symmetry to the roughed in frames. The boat snaps into a more "finished" look, and well, just looks better!
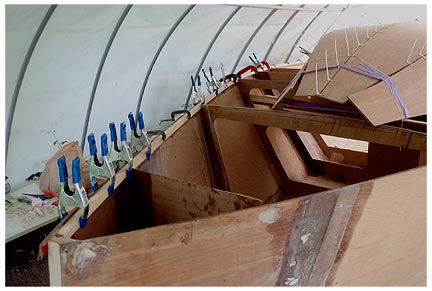
Don't underestimate the number of clamps you'll need to glue in the sheer clamp. I scrounged about 22, including 4 or 5 binder clamps I begged from one of my kids. That's 22 per side. Still, could have used a few more, but I feel OK about the way the thing fit in and the attachment, once the glue kicked, is absolutely bullet-proof. Plus, it'll get some 6 oz tabbing along the underside, and clear-coated on top.
Citizen coping saw is your friend for this job (or a Fein Multimaster, if you're lucky).
I used it to shape the forward end of the clamp and to notch the frames to receive the 24 foot section....then I just lopped off the overly long remaining 5 or so feet that were overhanging the transom. I tried to keep the scarf joint well aft, where the remaining run of the sheer is relatively straight and the scarf isn't torqued too badly outward. It's important to keep the scarf joint oriented vertically...I had it turned 90 degrees with one of the strips and it broke.
 A shot from above, over the stem. I've glassed in the 5/4 piece of oak pretty heavily, so I used the coping saw, again, to get it to conform as tightly as possible to the stem. I got it to fit almost perfectly, they sanded and wiped anything resembling epoxy from older fiberglassing sessions, all the way back to the transom to insure a decent epoxy bond along the length of the sheer clamp.
I am definitely beginning to feel like I'm getting somewhere!
5.17.09 Un-Tied
Very happy to report that there are no more cable ties on the hull!
OK, maybe 2 or 3 left up at the gunwhale in some places because I was too lazy to cut them out, but for all intents and purposes, the hull and frames are now either completely tabbed together OR, in a few remaining cases, spot welded with small pieces of 6 oz glass.
This is something that, if I could go back in time, I'd have done differently, e.g., I'd have used these "spot welds" early on, with far fewer cable ties. I've found that, once the glue kicks and these small patches of e-glass set-up, I can sand then down and lay biax right over top of them pretty seamlessly and not have to worry about embedding a cable tie in glass or having to work between them. They don't have to be beautiful and you can fillet in a bunch of them in no time.
Quick and easy and all but invisible once the biaxial stuff goes on overtop. Next time around I'd use an even lighter e-glass for these "spot-welds."
 The foam bulb is also starting to morph into a usable shape...it still needs a LOT of work, shaping with the hot-wire knife, but at least this one holds together and has potential.
There are no shortage of things to work on with the i550, but it's all a kick!
5.11.09 Carbon Credit
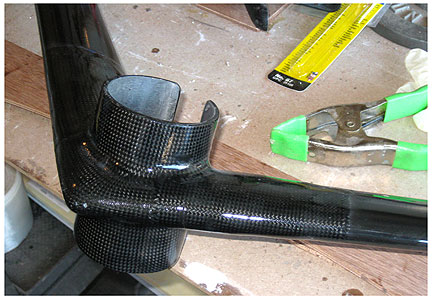
The masts have arrived from NZ!
The bulk of the order is in Madison WI and then will go to Chicago, and I'll have to figure out how to transport it from there to B'more.
But here's a shot of the spreader section. There is something very sexy about CF, especially when it's well made stuff and C-Tech seems to have the knack, no lie.
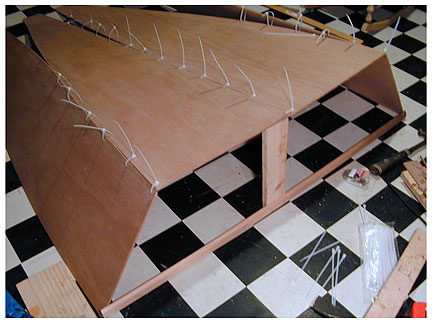
5.04.09 House Party
Pretty awful weather, what else is new. The J24 Worlds are starting and the Wx is putrid. I know what it's like big-fleet racing off the Severn in a 20 kn northeasterly in 50 degree temps and it's work!
So, it felt OK not being in Annapolis (we didn't qualify, anyway) and getting some stuff done on the i550. While it rained, I decided to move part of the project indoors and have a go at the cabin trunk. Went together pretty easily, once I figured out how to support it with an external frame (which remains on long enough to move the structure outside and on to the hull).
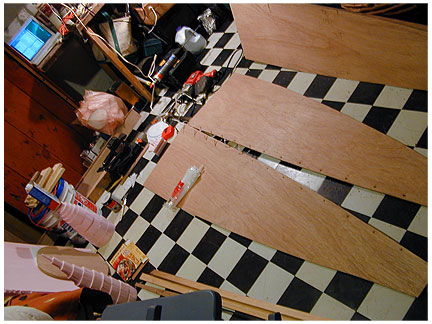
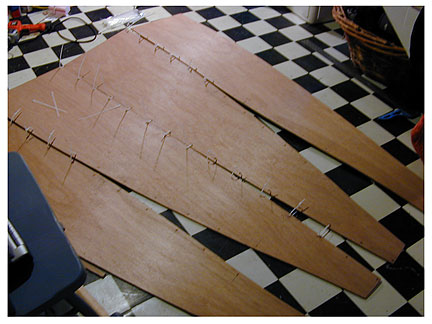
Drill some holes, insert some ties, cinch them up, Voila! a house. A bunch of inches get cut off the rear of this because I am building the long cockpit version. I'm thinking: maybe a portlight too?
__________________________
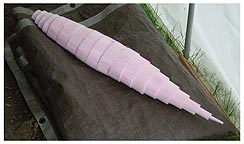
5.03.09 Again with the foam!
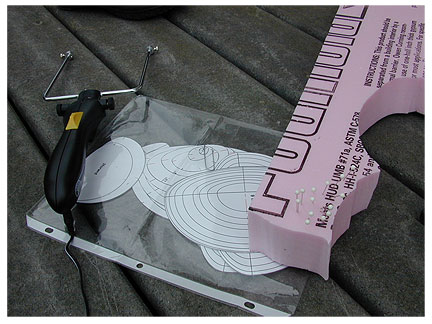
I made a complete and utter hash out of things the last time I tried this. Plus these freaking wire knives are pieces of crap. Not to mention the Home Deputz dude who sold me the wrong glue. (see 4.07.09)
So, anyway, after the 3rd knife proved to be operational instead of fritzing out after 5 minutes use, like the first two, I pinned the sections I'd carefully cut out with scissors on to the 2" pink foam and had at it with the wire knife.
Nice!!!! The wire knives may be fussy, but once you get the hang of this, the sections come out pretty nicely. You have to remember that the ones in the middle don't get much of a taper, so I had to cut a few of the middle sections twice. No biggie...it takes about a minute to carve out the foam for each section. Maybe less.
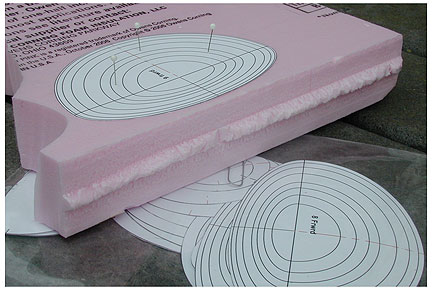
Just pin the sections on to the foam. I used a pretty thick, coated paper that is stiff enough to act as a guide for the hot wire.
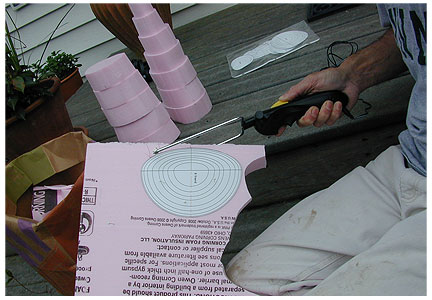
Soon enough, you get a stack of these things and the shape begins to morph into something bulbular.