i550 Sportboat . . . . . . . . . . . . . . . . . . . . . Hull # 87 (5.5 Meters = 18.044619422572175 Feet)
Visit the i550class.org site for the class forum and more info on how to build an i550. The list of building blogs, at the bottom of the page, is a great resource.
All things i550 (plans, kits, etc) can be purchased here at Watershed Sailboats
 Jeff, from the "Alchemy" build, made this nifty map of all the licensed hulls, worldwide.
HULL #87 recommends and supports these quality businesses:
 Jamestown Distrib .
  Ullman Sails Virginia (Latell Sails)
  Spinsheet
 C-Tech New Zealand
  Boulter Plywood Corporation
----------------------------- Building i550 hull #87 ------------------------------
Comments, criticism, advice, annoying spam? Contact me at: webwolf a t nbayracing daht com
NOTE: now that the boat is BUILT and floating, no sense posting to this BUILD LOG. Instead, follow the exploits, trials, tribulations and just pure joy of sailing this thing at nbayracing.com.
If there are repairs and upgrades that are worth sharing, I'll continue to post them here on the BUILD LOG. Thanks for following and always feel free to email me with any questions. And don't forget the class website and forum at i550class.org
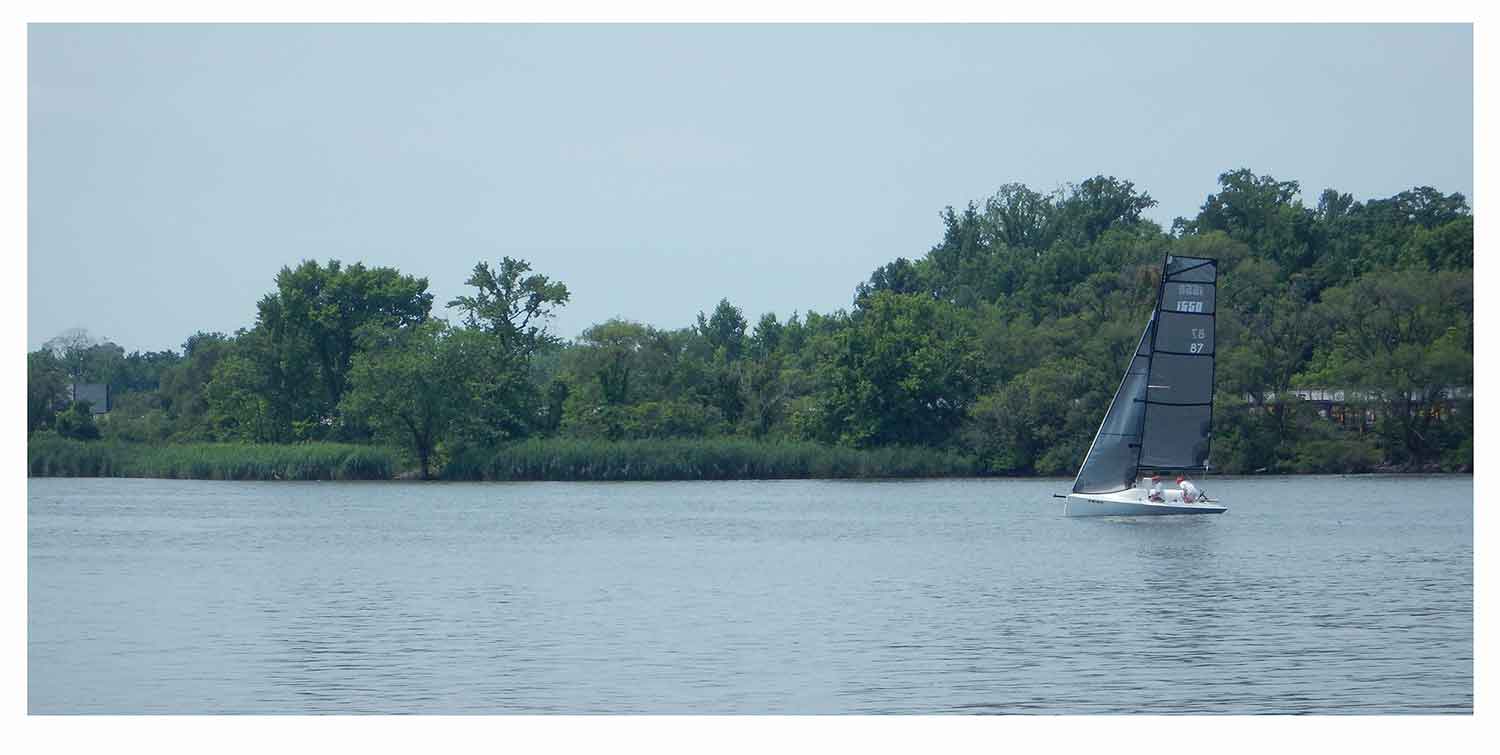
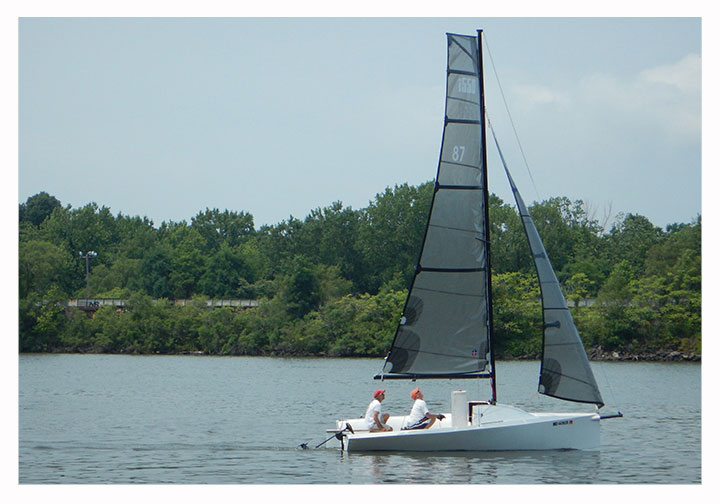
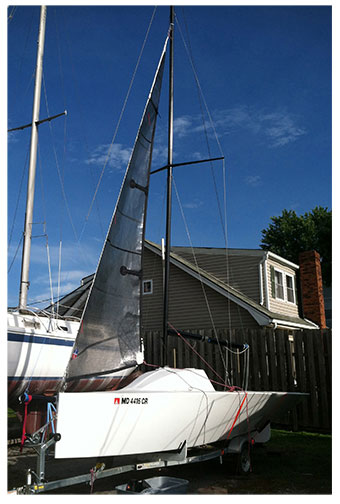
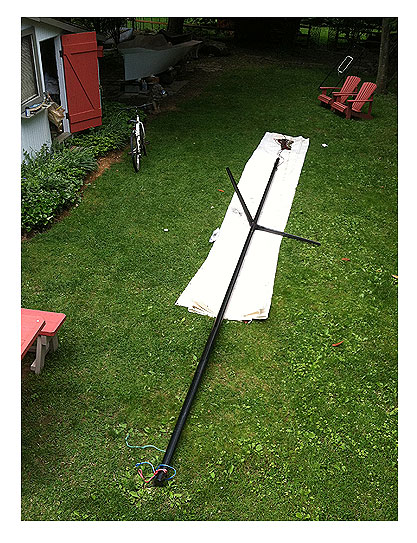
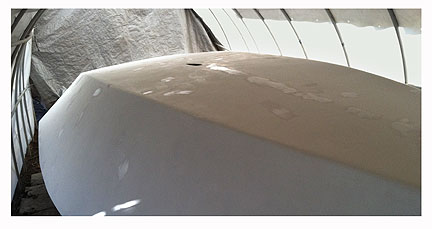
9.07.15...One laborious day
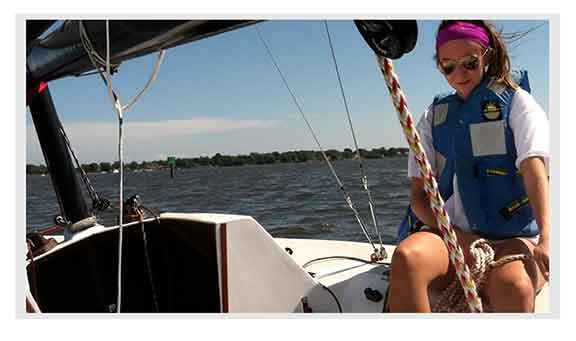
One of the kids went out with me on Labor Day. The plan was to sail and then rig some dock lines and let the boat live in a slip for the next couple months for some quick and easy sails.
Well, that didn't work out too well.
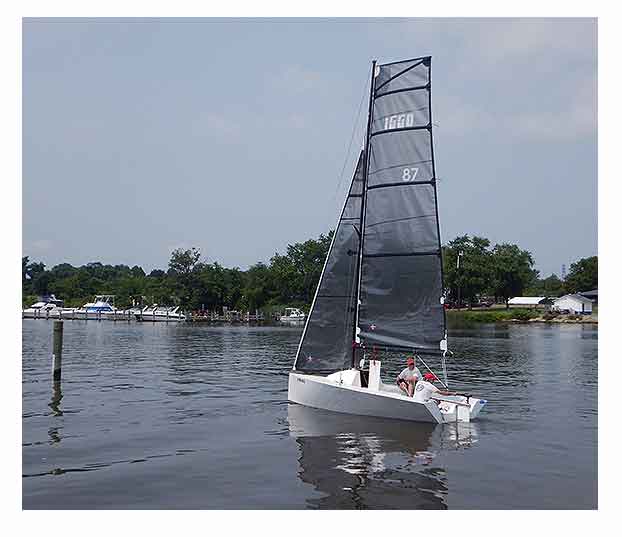
We went out in 12 - 16 kn of breeze. This was the first time the boat had seen breeze over 12 True. Have to say, with just us sailing two-up, total crew weight probably 250 max, the boat was a blast. We were on our ear a lot but feathered the big main and sailed pretty fast until one of the halyard clutches worked a bit loose (my fault) and we turned around and jib-reached back to the boatyard....that took about 15 seconds, it felt like.
 the breeze from Key Bridge which was probably a bit less than we experienced out at the mouth of the river
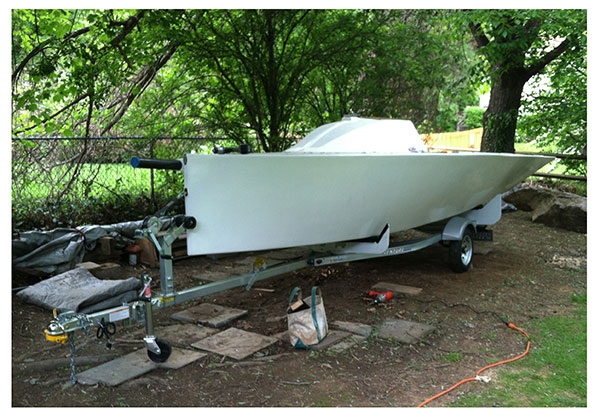
Even with the breeze it was really hot and the two of us were dishrags by the time we got her tied up and fairly well deployed with various dockline, springs and stuff included. Remember, at this point the boat doesn't have any proper cleats for dock lines.
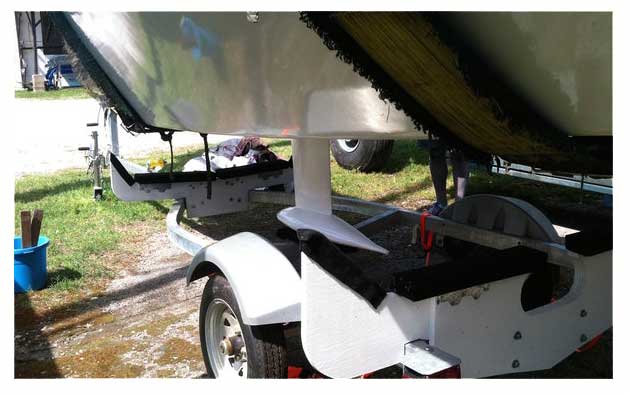
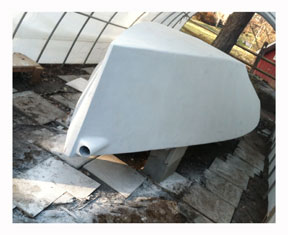
Cut to 48 hours later when I came down on the 9th to race sailboats. My friend Tom was already there. He said, "it's listing to the left a little bit." I saw that and said, "hmmmmm." Went below and there was like seven gallons of water sloshing around aft of the keel box. This was worrisome.
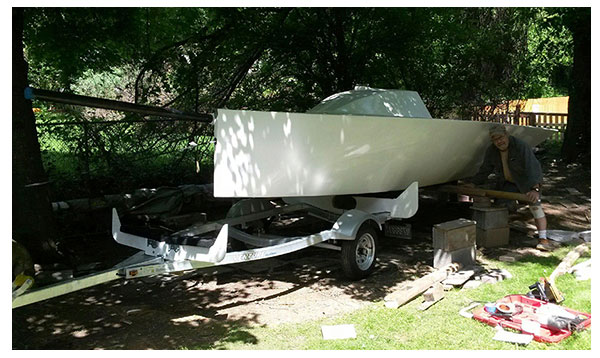
So we yanked the boat and she is on the trailer and I need to figure out what's leaking.
Cause something is.
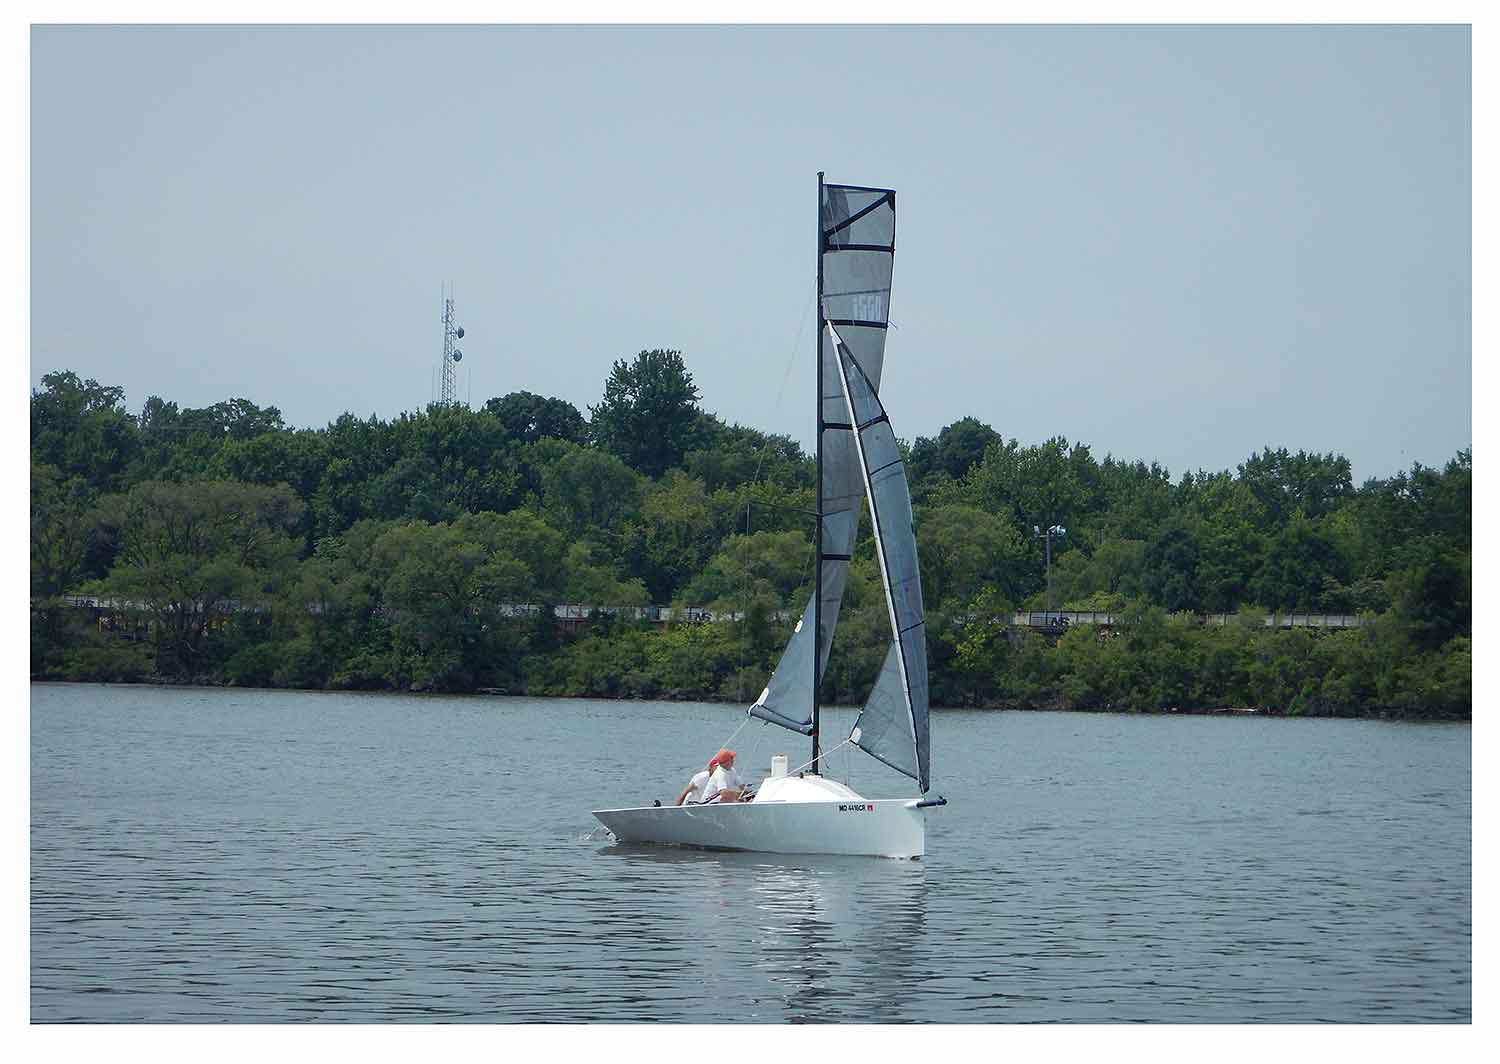
8.30.15....a proper shake-down afternoon
Tom and I worked for about 2 hours today, affixing more hardware and making "crucial" decisions about jib lead placement and tackline line fairleads.
After two hours, we wanted to go sailing. So we did.
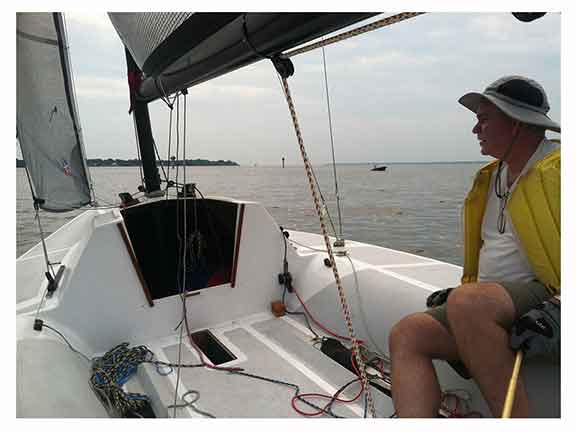
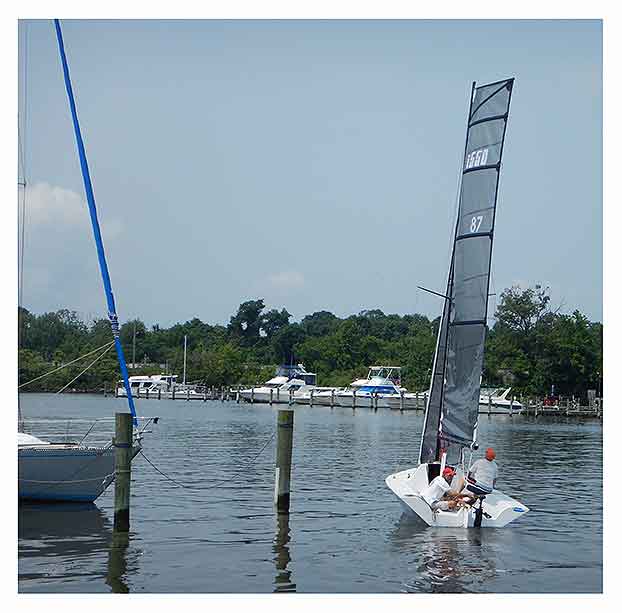
We went out in a shifty 4 - 8 kn breeze, which, while soft, was not a bad set of conditions for starters. Breeze out of the south, we had to tack a bunch to get out of Jones Creek and Old Road Bay. The small, class jib and the 2:1 jib sheet arrangement makes tacking super easy.
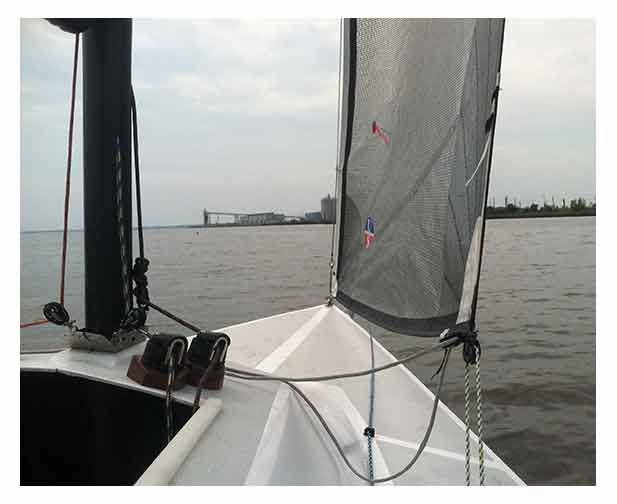
We made it over to the far side of the Brewerton Channel, pretty close to the white rocks, then turned around and launched the assym. I hadn't noticed but the corners were never marked and it was a bit of a leap of faith as to where the tackline, sheets and halyard got tied in.
Luckily and by forces of deduction, we got the kite hoisted rightside-up.
Had a great kite run back in 4 - 10 of breeze. The boat has no trouble at all in getting free, e.g., lifting off, in 8 -10 kn of breeze. I think we probably saw 9-10 knots of boatspeed at some point, and we surfed some commercial shipping and big powerboat wakes. Definitely a hoot!
The helm is very light. Getting the boat heeled over on to the chine produces weather helm, otherwise there isn't much. The boat is INCREDIBLY sensitive to crew weight and placement. Want some more leeward heel? Just put a body down there. Need the boat flat? Hike out a couple more inches.
We were fine just two-up, but another crew member would be super for the spin set and douse. The boat gybes effortlessly.
All this in light 4 - 10 kn of breeze. Going to be a whole 'nother thing in 18 -20!
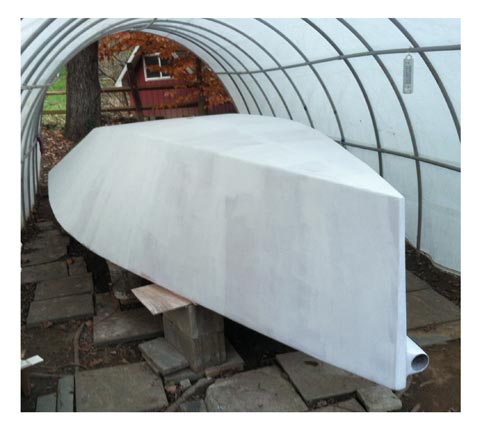
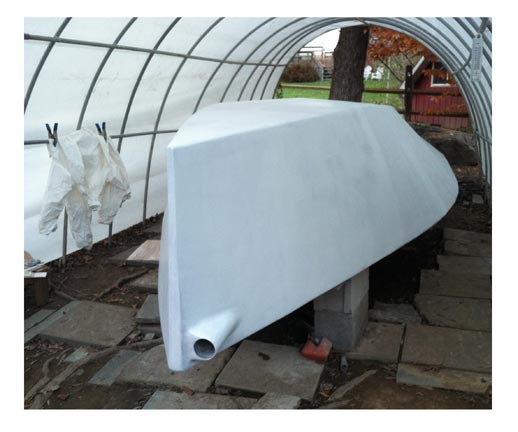
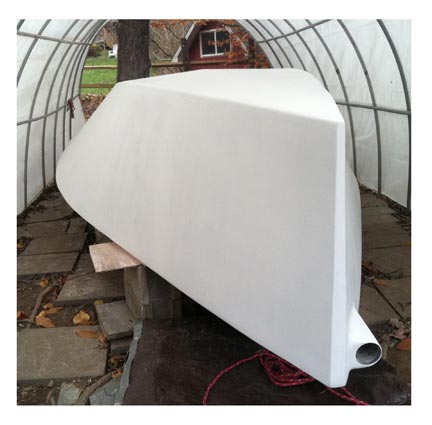
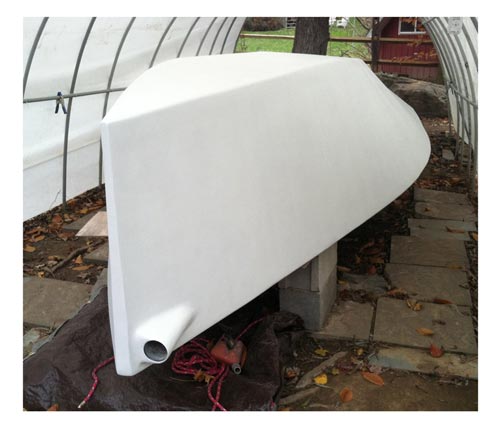
 A good washing is always nice after a sweaty day on the river.
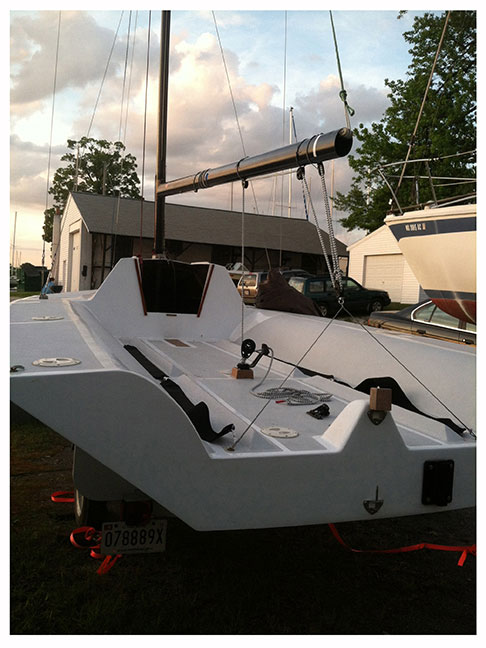
8.29.15...a few more snaps from the first outing and stuff.
First minor issue was the stiff batton staying inverted in light air. That's Russ wailing on that sucker to get it to flip...we ended up just removing it.
Second issue was the low risers or lack of any risers on the halyard cleat. They just don't hold a line at that angle. Had to fix that.
First tack ever! Not a thing of beauty, but OK....and having the keel raised is not a great way to sail to weather.
Boat moved nicely DW (with the board up) in very light breeze....unfortunately the trolling motor was dragging. It has a quick-release pin, so that's easily remedied.
Been working on a lot of other fixes and ran the vang back under the cockpit, so we're hoping for sail number 2 this weekend. It's been awhile!
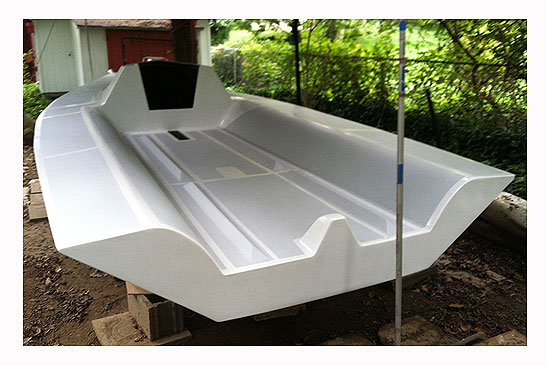
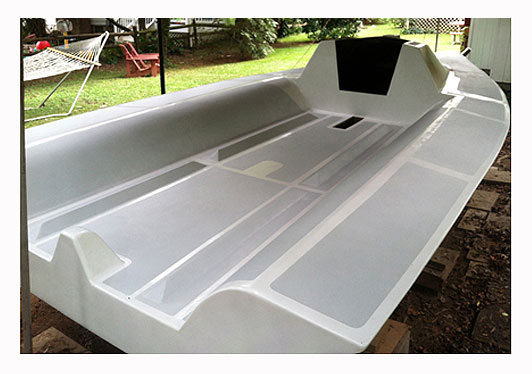
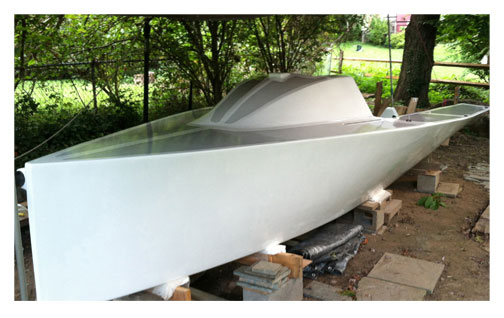
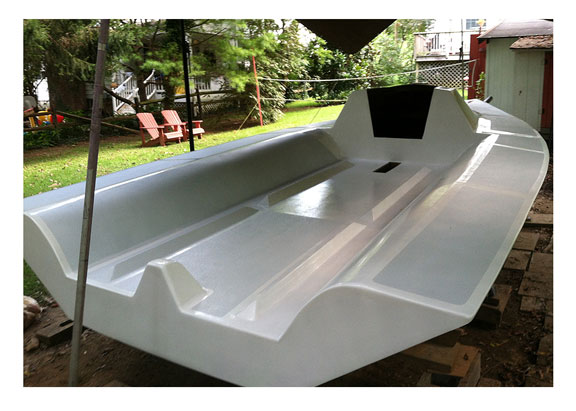
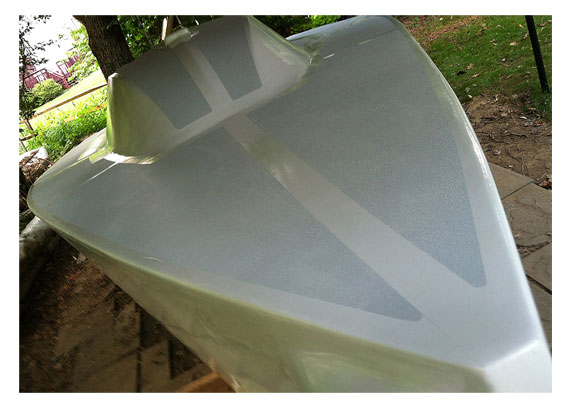
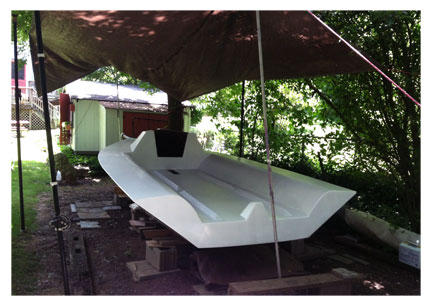
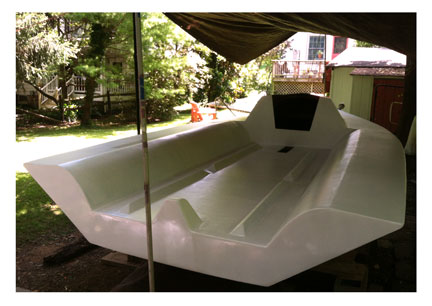
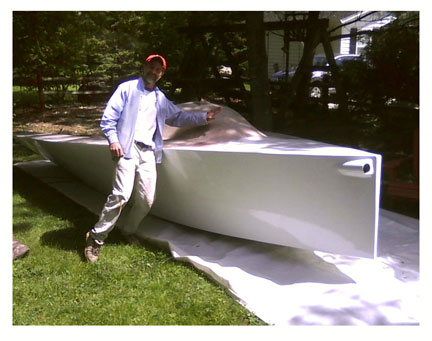
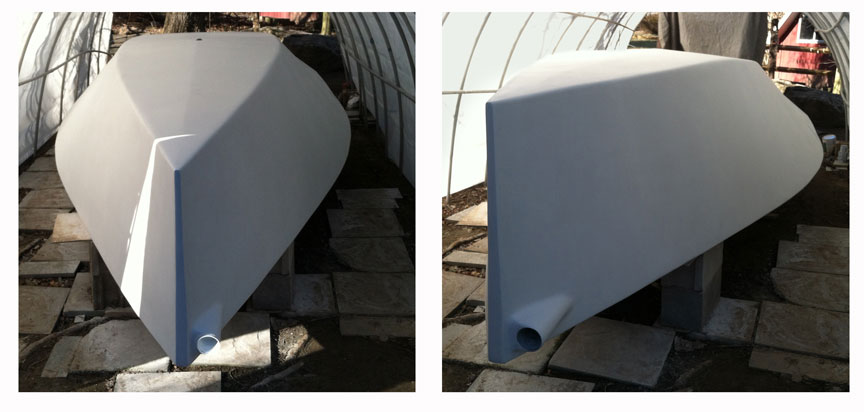
7. 5. 2015 IT FLOATS!!! (for a little while, at least...)
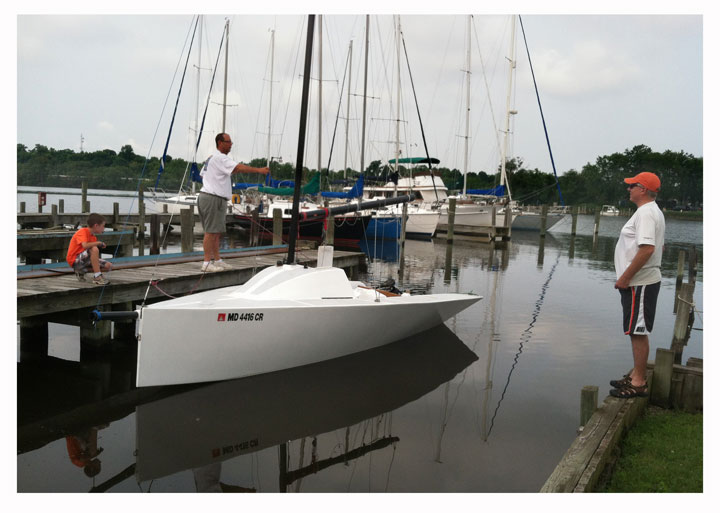
With the help of Jay Tyson and Russ Wesdyk, we got the boat off the trailer and went for a preliminary, unofficial launch, to save the kind of public humiliation I'd expect to encounter at the Official Launching Party (date TBA) without having done so first. Bunch of issues:
- missing parts and bits
- a keel, reluctant to get lifted in order to re-trailer the boat
- poor lead angle for the halyard cleats
- stuff like that
BTW, it sails, too, as Russ and I take it for a ride :
Thanks a million Jay and Russ, and stop back when there is actually a more functional version of hull #87 !!!
6.9.15...A Lot Has Happened.
Sort of abandoned this build log, sorry, but a lot has happended over the past 4.5 months: boat is gone from the backyard, rig is up with the Dyneema shrouds in place, hardware is going on and rudder and keel are ready to go. Keel is in the boat! Hope to launch in a week or so...

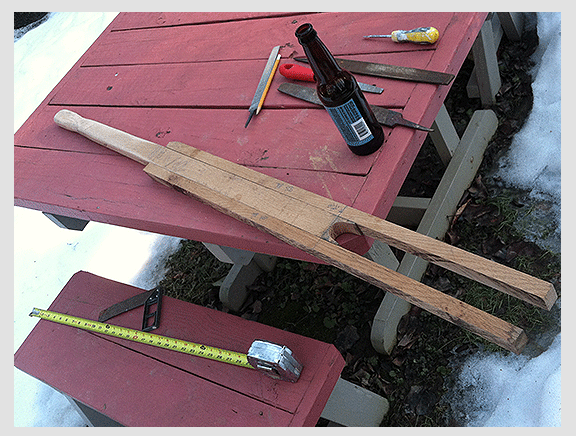
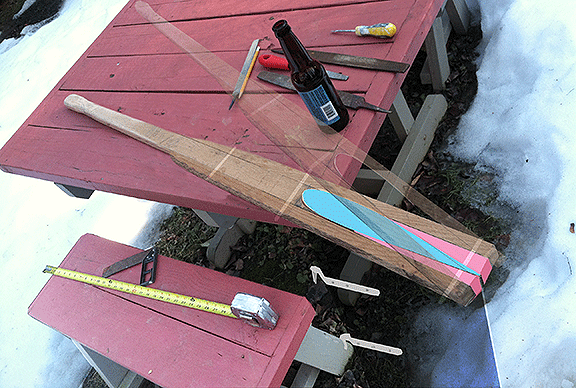
1.30.15.....Boom Back
I got the boom back from Trevor The Rigger and I was a little nervous because I had put no small amouunt of time into making these small parts. And since I had been working from a drawing Trevor had mailed me of the boom section/outside dimension, instead of the boom itself, I wasn't sure these parts were going to match the radius exactly.
They do.
I am stoked.
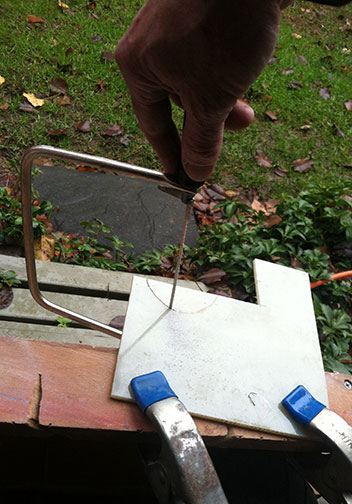
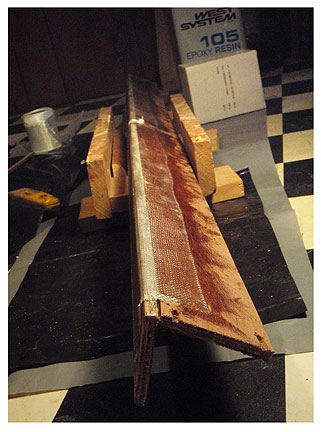
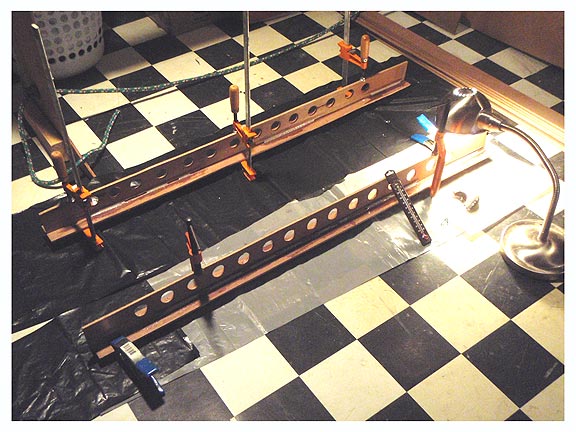
12.18.14....Art of Small Parts
I have to admit, small parts are a bitch! Not sure if I'm just getting fumble-fingered in my dotage or what, but this turned out a LOT less elegant than I had expected. On the other hand, they're not quite done and they weigh next to nothing! (these are "strop-stops"...they attach to the top of the boom and keep lines from sliding along the top of the boom when the lines get loaded)
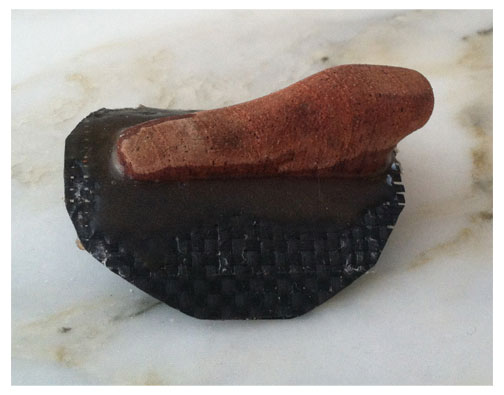
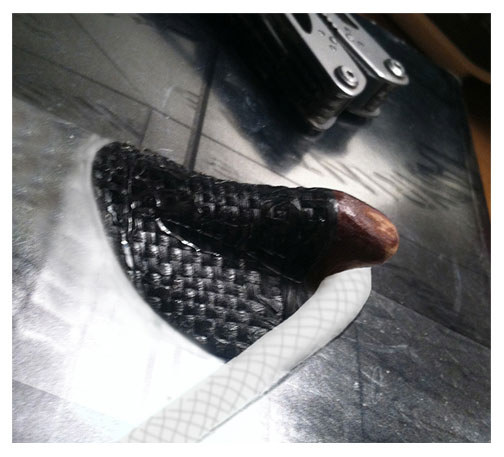
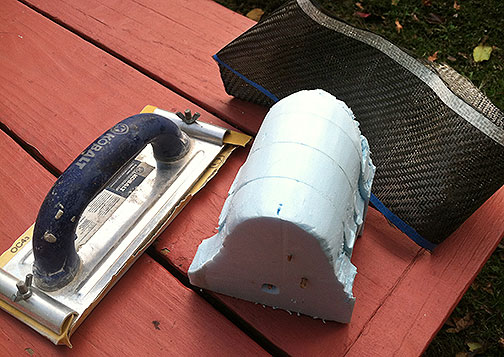
The saddle lay-up was done, so I took a chunk of spanish cedar and carved it down to rest on the CF. It's too big, but I can stil cut it down a bit. Then I used neat epoxy on the base and ran some filleting material along the sides. I taped the thing up to apply pressure on the whole affair.
After that kicked, I then I doubled up on some CF strips layed over the wooden part, let it cure and then cut it into a disk. I'm going to sand the wood down a bit more, then slather a graphite/epoxy mix over the entire thing so it should be very slippery. I need four of these and now that I think I know what I'm doing, I should be able to knock them out quickly.
Put some finish on the mainsheet block riser, too. And the first rudder ding happened! I dropped the g.d. thing! This won't be the first, I'm sure. A bit of West high-density pox mix and some sandpaper....may as well get the routine down.
12.12.14...Dog Crap Days (The weather, nothing wrong with dogs)
The kids and dogs descended on the house, that was fun...and also seeing the creek way up during some torrential episodes...but when everyone cleared out it was nice to get back to the project. In fact, if this is going to be splashed in April, I've gotta get going on some parts and bits.
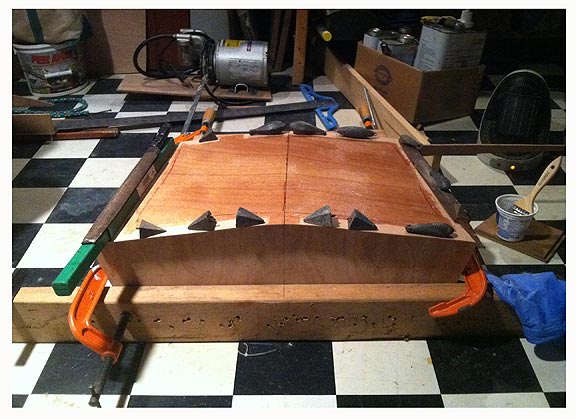
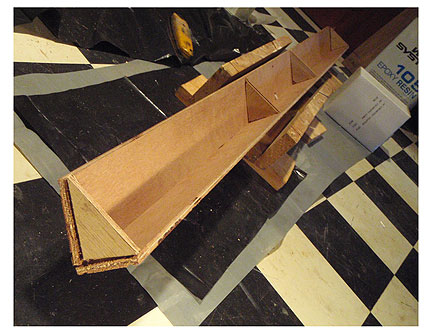
Current need is for an outhaul/reef line two-sheave part to get installed at the aft end of the boom. Here's how that's going:
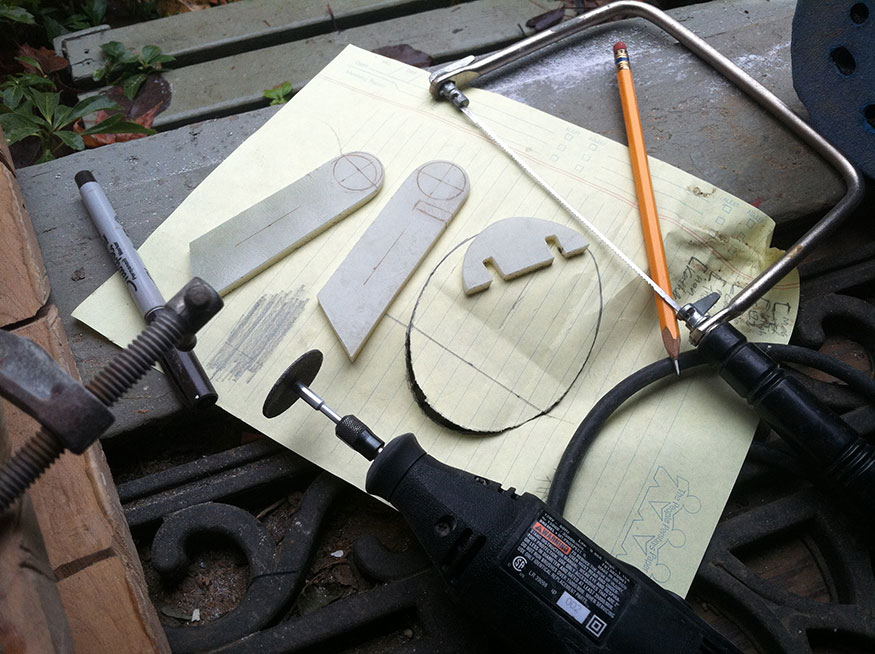
^ First thing was to cut up some 5mm G10 to a plan I had drawn, using a tracing of the inside of the boom (Trevor has the boom now and he mailed me the tracing a few weeks ago)
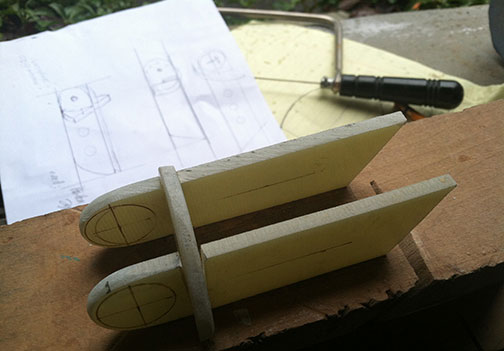
^ Next thing was to dry fit everything together and tweak the sections that didn't want to match up. Then glue it all up using clamps to make sure it all stayed put and the proper alignment of the aft end, where the two Harken micro-blocks get installed.
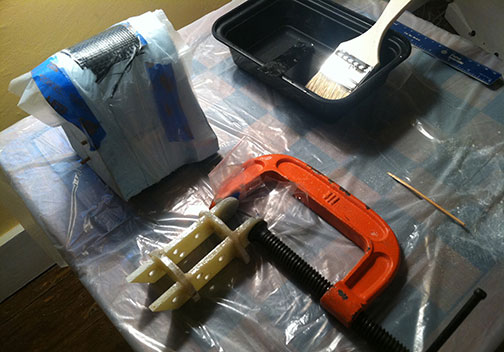
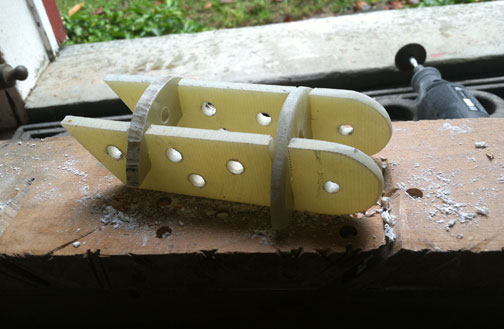
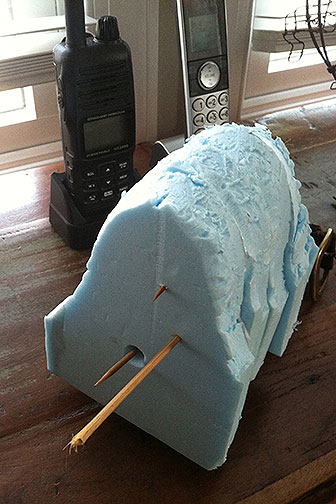
^ Notice the blue lump in the upper left hand corner...that's a foam saddle to match the outer dimensions of the boom. The CF layup is the begining of a "strop-stopper." These will prevent the attachments for the vang and and mainsheet blocks from walking along the top of the boom. To make this, I roughed out a piece of foam, sanded it smooth with 320 and then went at it with some wetted out CF remnants. I'll show how I will fabricate the "stops" a little later on here.
I still have to sand down the G10 sheave chassis and clean it up and install the pin and sheaves, but I think it will work.
10.26.14...Still Crankin Away
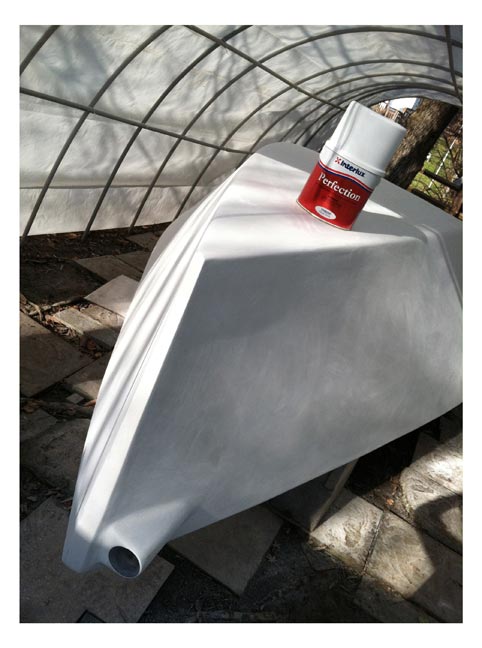
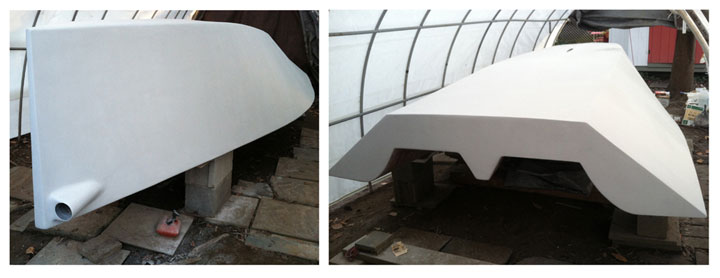
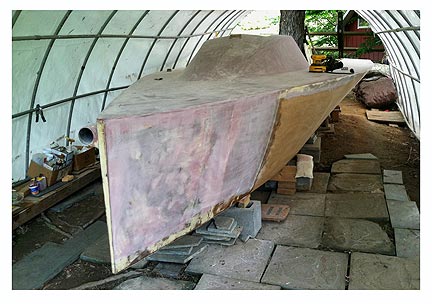
Despite evidence to the contrary, there is still work going on with hull number 87. Two coats of Interlux Perfection are now on the rudder, the hardware is pretty much done, the tiller fits over the rudder head and a neat little spacer has been cut on the table saw from some spanish cedar my J24 crewmate "Gnu" Acheson gave me.
This is some pretty wood and I plan on using it wherever appropriate on #87.
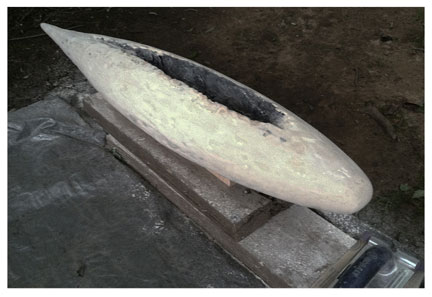
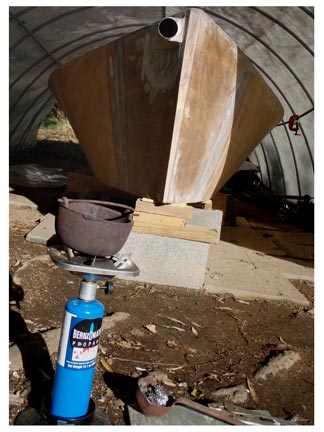
9.8.14.....Bulbalicious
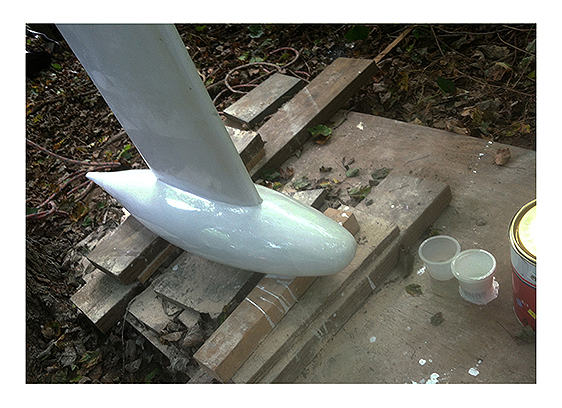
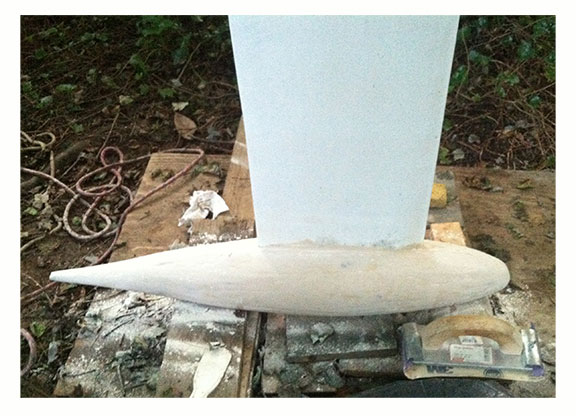
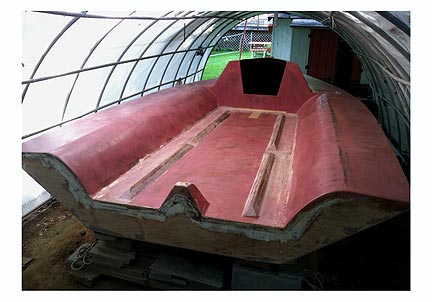
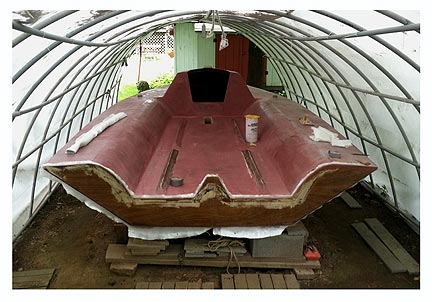
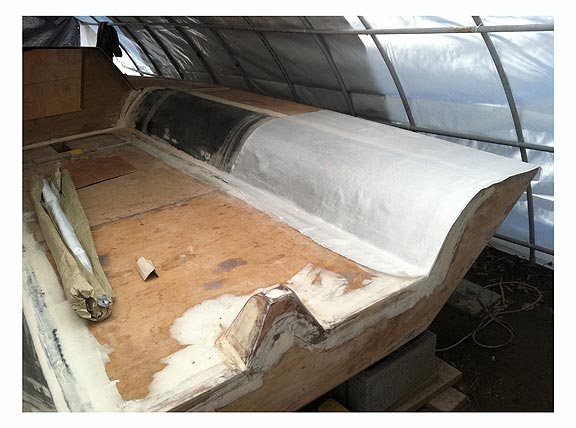
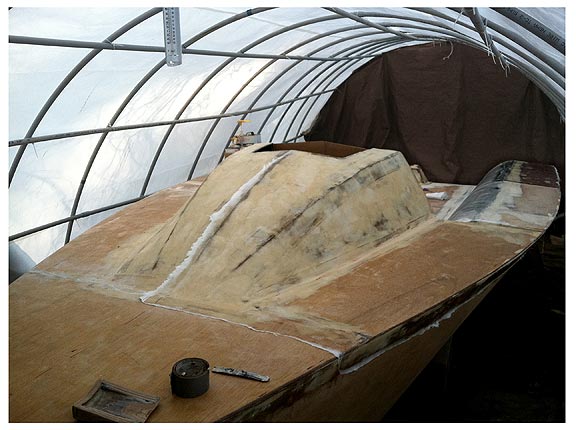
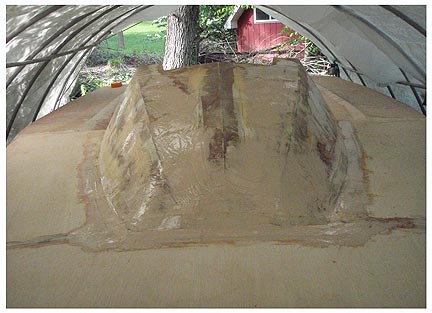
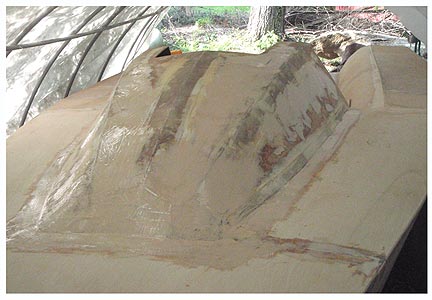
For anyone who hasn't gotten to the BULB POUR yet, my advice is be careful. Not just with the hot, liquid lead, but with the overall quality of the mold and the level of care you put into the pour. Why? Because I wasn't particularly careful and went by the thought that most problems with lead can be fixed with a hammer. That resulted in my spending a helluva lot of time trying to fair this thing into something respectable. I think I'm getting there, but that's with the addition of a LOT of bog. Here are some shots (below) of the bulb with a coat of Perfection on it.
8.20.14.....Closer, but no cigar....

I had to bolt the bulb to the keel. I mean, it had been glued on, but somehow that didn't seem like it would be enough. So, I took some lengths of threaded rod, drilled some holes completely through the bulb/foil/bulb sandwich, inserted the rods (cut to the proper length), and then put some washers and nuts on the ends of the rod and honkered down on them. The rods go through the middle of the thickest white oak strips in the foil laminate, so I think it should be good (the foil extends completely through, vertically, down to the bottom of the bulb).
Due to my haphazzard casting of the lead, there's a bunch of fairing to do, and I had to build up one side of the bulb that seems a little shallow, when the thing is viewed straight on, looking aft. It's pretty darn close now, and I cannot wait to put a few coats of Perfection® on the whole thing.
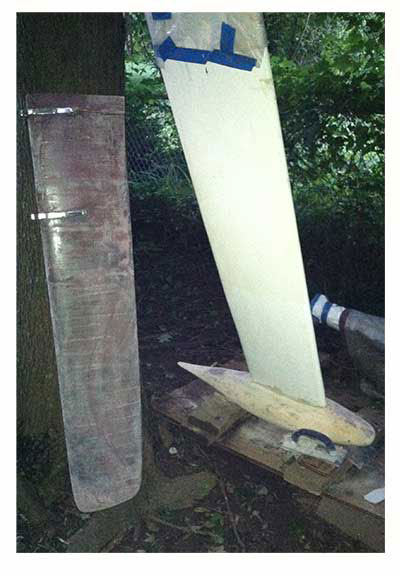

I'm simultaneously finishing the complete rudder assembly, and that, too, is requiring a bit of pox/microballoons fairing, so the dust mask is not something I'm done with.
Trevor from Harney Yacht Rigging is finishing up the synthetic rigging and we got the rig up in the backyard a few weeks ago. That was fun....a bit of a learning curve, but fun!
I sort of miss having the rig stepped in the backyard....I felt like we were living on waterfront property there, for awhile.
6.27.14....Dah Bulb
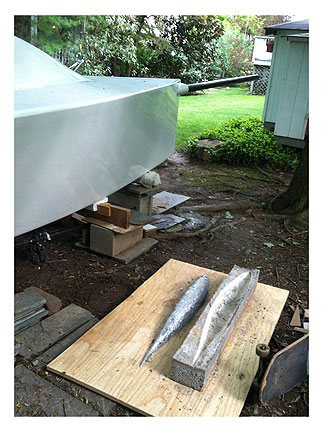
With the new lead added, the keel complex gained another pound or two. I think it comes in at around 175 pounds now, so it's close to class rules max.
I'm pretty stoked about this whole keel thing. It isn't perfect but for a first-time attempt, I can live with it.
6.24.14.....The Dreyfit Affair
While all the drama was going on with the lead and the bulb and the foil, I have been surrepticiously finishing the rudder. Some back-ordered parts finally came from APS and I finally figured out which SS bolts and nuts and stuff I'd need to seat the pintles and afix the gudgeons on to the rudder foil. It wasn't that complex, but somehow Home Depot sucks every functional synapse of organizational prowess out of my dim brain and I always get home wih the wrong hardware.
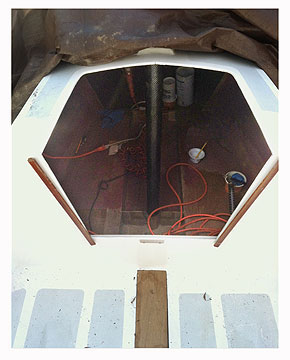
Speaking of organizational prowess, or the lack thereof, I had to sink yet another inspection port because I couldn't reach the hardware to put the backing plate (G10), washers, and nuts on the bolts that hold the gudgeons on to the transom. This boat has a LOT of inspection ports.
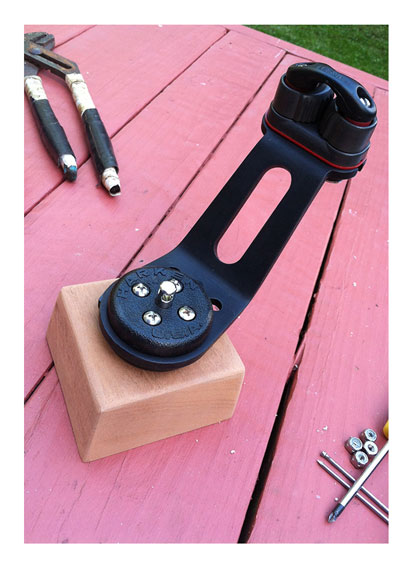
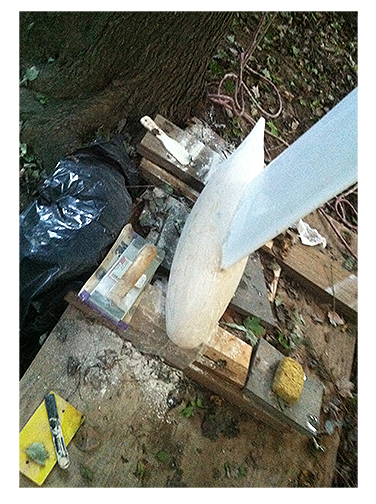
But that's OK, because it will allow me to more easily install the O/B bracket, too. Then I had to dig a hole about 18 inches into the ground in order to dryfit the rudder and figure out where all six bolts will go through. All-in-all, I think this pivoting tiller arrangement will work well.
If it don't break.....
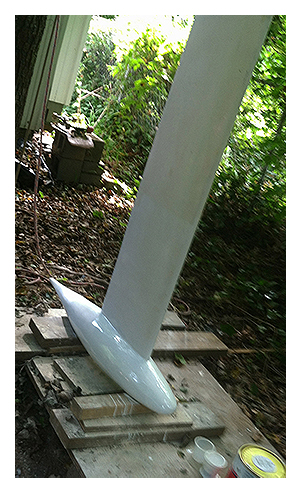
6.22.14....Aswan Dam nice keel
I got the foil and bulb paired together as one. I used some number 8 lead shot mixed up in bog with some 403 microfibers and poured that slurry into the slot between the keel foil and the bulb. Worked like a charm and I gained about 10 pounds, with the whole thing now approaching 172 pounds, more or less. The slurry did not run down all the way to the bottom, in all places, so a couple days later, I poured some more shot-slurry into the bottom and then dammed it up with the same foil tape. (that stuff is a boon to boatbuilding. I love the way it peels off with no residue). Probably gained another 1.5 pounds by doing this small job.
What remains is: fairing it out really well. Painting it with two-part epoxy paint. Then, inspired by Jon Raymond's extremely cool bulb, on "Critical Twist," do the same thing, although most likely, not nearly as well.
6.16.14...Polishing the old bulb
I piled on a lot of pox/fairing mix this past weekend, and the bulb is coming along. Next is the official "filling in of the gap" with lead shot and pox mixed into a thick slurry.
This will get poured into the gaps/recesses between the foil and the inside of the bulb. I hope to add another ten pounds of weight with this procedure, too.
6.13.14......Nearly keeled me
Sorry, even by my standards that ^ was weak.

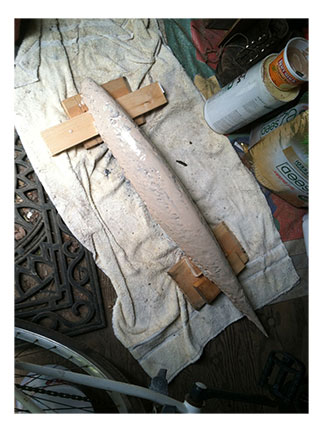
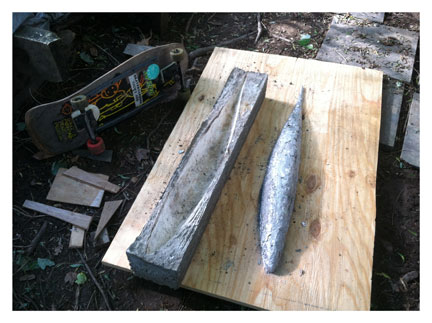
Yet, it's true. The keel bulb has been a struggle. It weighs about a 140 pounds now and I am using an old skateboard to move it around. The skateboard is about to give it up.
With the foil resting in the bulb, it's closer to 170 lbs. So, getting closer to final class rules weight and I still have to pour in the epoxy/lead shot slurry to fill in the space between the lead and the foil.
But it has been very physical!
Back when I was an undergraduate (Art Major) I took Sculpture 101 spring semester. In the first week, I was moving a nice big chunk of marble from one table to another and I wasn't paying attention and I caught the very tip of my middle finger between the block I was carrying and a block resting on the table. Second only to the retina, your finger tips have the most receptor nerves per square centimeter on the human body. The pain was the blinding-holy-crap-I-may-barf kind.
I swore I'd never take Sculpture 2 right then and there. And now, here I am 40 years later taking Sculpture 2, "Topics in Toxic Heavy Metal."
Quite fun.
The big big super-big issue I had was: it became clear from the gekko that the spacer arrangement I had concocted, the one that would leave room for the foil, was not going to cut it when during the casting of the two halves. So I took it out. The resulting pour produced two flat sections coming together around the keel foil with no slot. So I had to remove a lot of lead, approx. 20 pounds, total, from the center of each bulb.
That worked! Sort of. I still had a bit of a gap and frankly, the board wasn't sitting quite straight in the bulb. So first, I drilled two 1/4" holes straight through both halves fore and aft. Then I used a couple of big long carriage bolts to honk the two sides close together, but deliberately left about a one-inch wide gap in the forward part of the bulb between the two sides, and about a half inch aft of the keel foil, tapering down to none at the very end.
I took some aluminum tape, 2" wide, the kind they sell to join duct-work, and used that to form a bottom on the bulb to keep the melted lead from running straight through. That worked like a charm (thanks Rocky down there in Tijuana for the suggestion!). So, I was all set to melt the lead I'd lost in the removal process, restore that lost weight, and seal the two halves together, to some extent.
And dammit! It worked! The thing needs a LOT more fairing and TLC with sandpaper and rasps, but it is definitely going to work.
I wasn't too sure of that a few days ago...
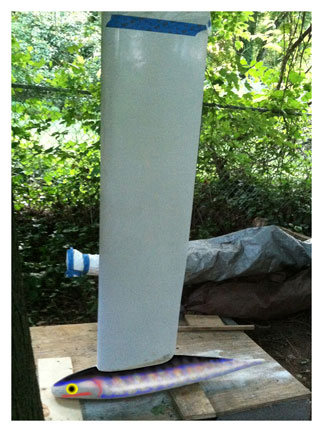
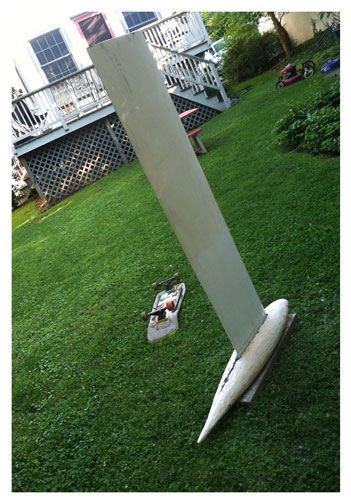
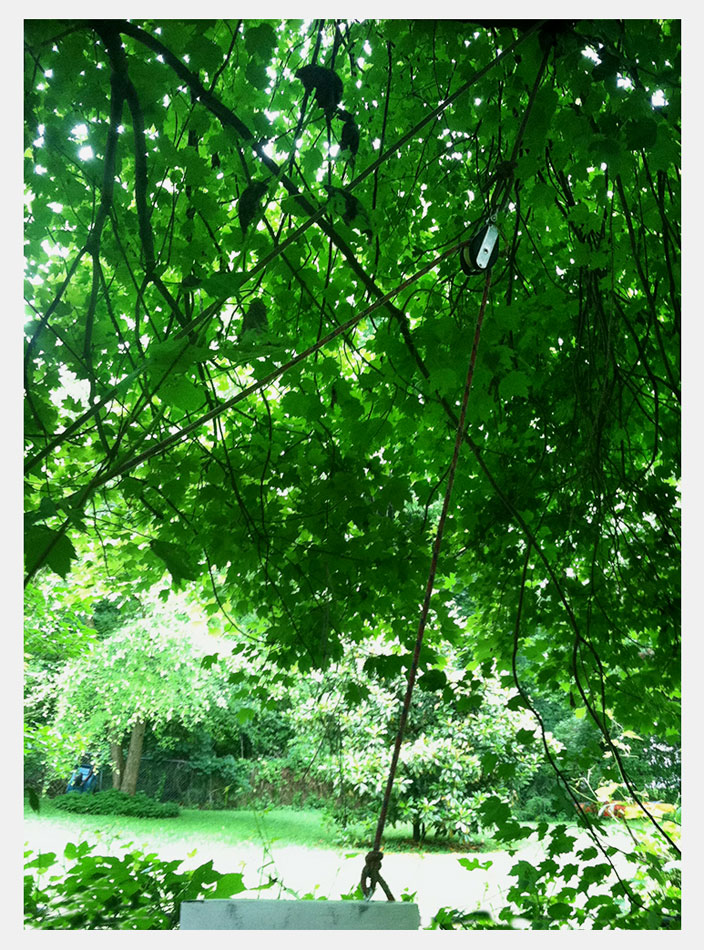
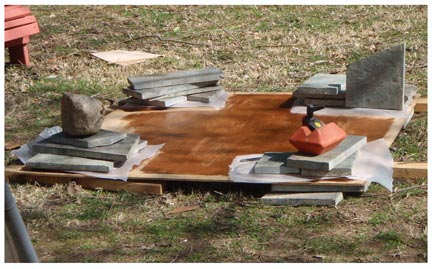
Below: here's a shot of the big snatch block I have rigged in a maple tree branch to help with the sheer weight of the keel foil (approx 28 lbs)
5.23.14....Ready to Roll
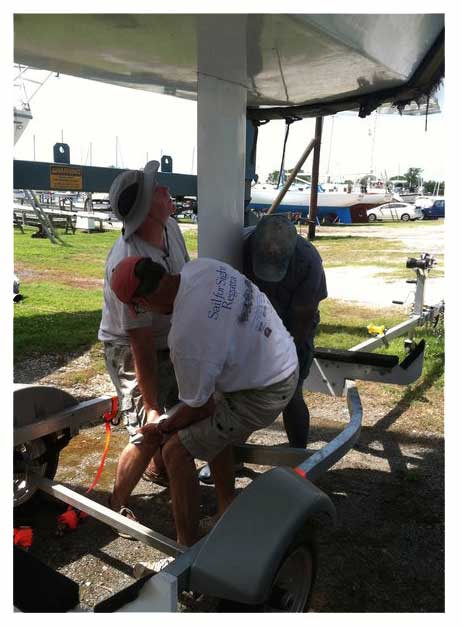
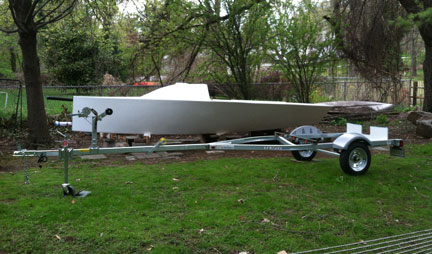
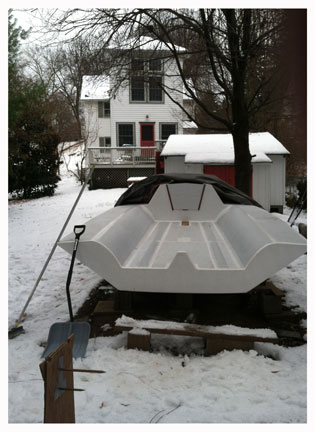
Using some superior modern technology, Garry and I got the boat on the trailer. We used levers and blocks and paving stones. It wasn't always pretty, but it worked.
5.12.14 .... Lead it Bleed
I finally bit the bullet and melted a lot of lead and fed it into the cement molds. Results are still pending. The stuff came out of the molds OK, but my spacer plugs did not work with the way the lead was pouring (I didn't really give them a chance and bailed prematurely on them), so I had to dig out a lot of cooled lead, later on, in order for the keel to fit in between the two halves. I'm still working on that, in fact.
For anyone getting ready to do this job, I strongly recommend you read (and re-read) the thread on the class forum.
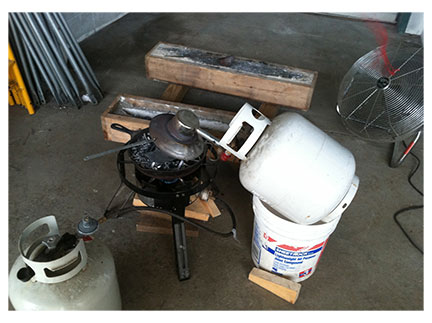 Here's the set-up in my friend Steamboat's work place. Forget the heater in this shot...just go with a hand held propane torch and melt from above while the turkey fryer is going full-blast on the wrought iron pan. Highly recomment using wrought iron.
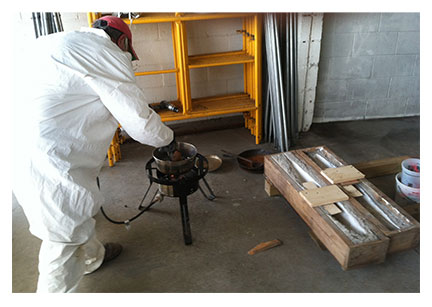 Here's a shot of feeding some lead into the original vessel I used, a steel pot. Go with wrought iron, I'm telling you. The steel pot does not retain heat and distribute it as well as iron. Note the spacers in the molds, screwed down, into the 2x6 frame. They were removed, which is one of the stupidest things I've done in a while.
 The first bulb came out sort of nasty. It's just bumpy, so I evened out the bumps and started to fair it. BTW, a hammer works well in shaping lead.
 The second half came out of the mold pretty smoothly. Next is to attach the two halves to the keel foil. THAT should be interesting. Huge thanks to my man Steamer, who provided the space and the moral courage to get this done. Leather gloves, leather shoes and a Tyvek suit along with a fan and proper respirators are strongly recommended.
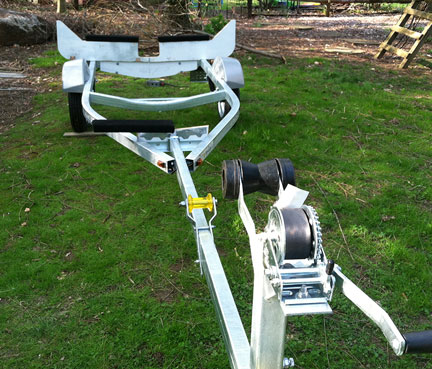
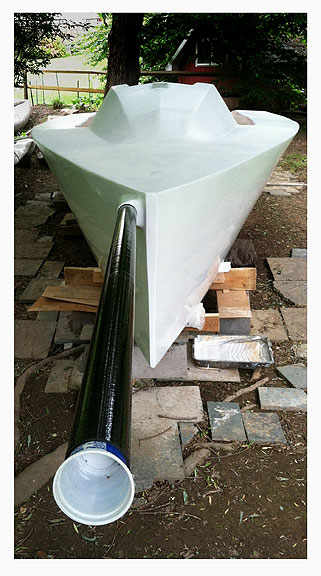
4.25.14....Move it
Picked up a trailer and now I have to modify the bunks (essentially: build new ones) to fit the i550 hull shape. This should be done by the end of the first weekend in May.
I have to finish up the rudder attachment points and tiller, too. I made a mold and flipped the rudder upside down and then poured some pox/410 into the mold to make a squared off section where the rudder can attach and pivot.

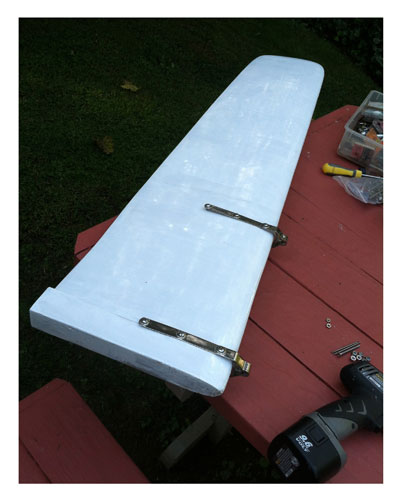
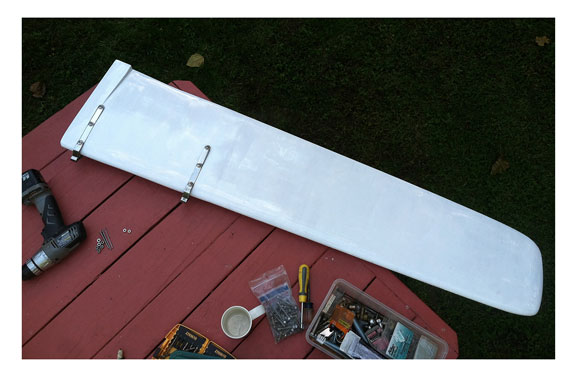
4.4.14... The laying on of hardware: and so it begins
 hiking straps and inspection ports and stuff.
3.2.2014....Steer Clear
I've had to work on inside projects, but was able to spend a little bit of time outside with the sander working on the tiller fabrication. I think this will work.
Until it breaks.
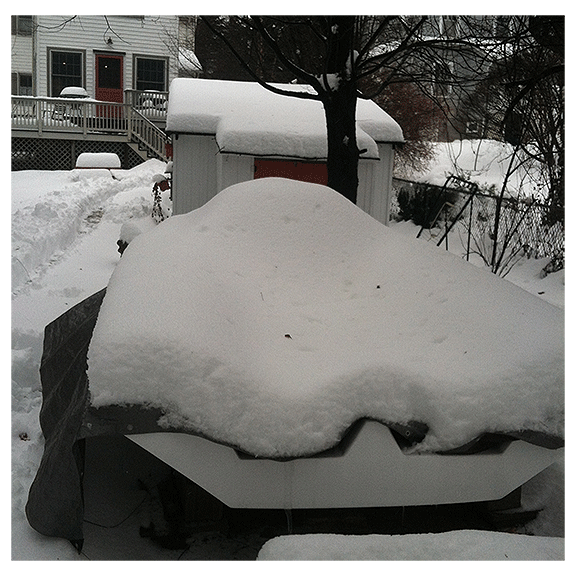
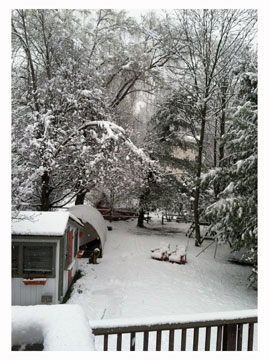
2.22.14....What a winter
Cripes, what a winter this has been! Even with the snow, some stuff has gotten done, but it has been a struggle. Luckliy, the weekends have been in-phase with some of the nicer days of the week. First duty is to get the white cover off the boat. That done, got another layer of CF on the compression post. It is not a perfect layup, but it's OK and will serve the purpose.

Also, got a chance to work on a tiller. I found some leftover white oak from the keel. I ripped a piece of 7' x 6" x 5/4 that was pretty much knot-free into some strips that will comprise my tiller. This will hinge as shown. Surprisingly, the mock-up so far, is not that heavy!
1.04.14.....Pole Carbonated
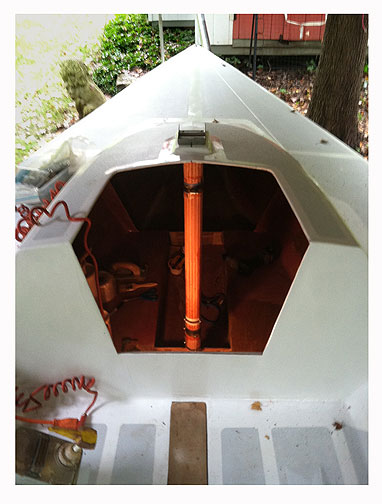
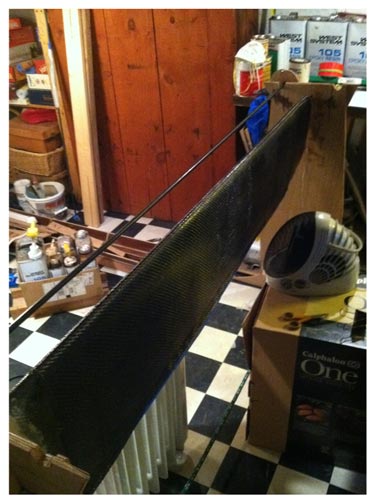
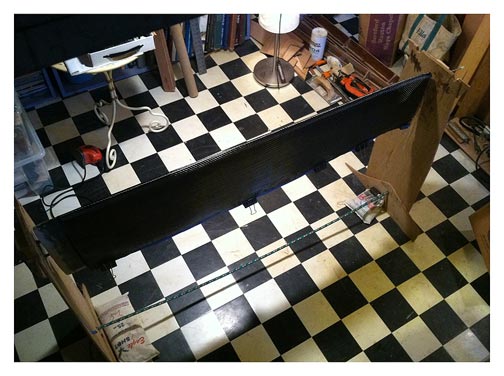
At some point the weather gave me a break and I was able to get a CF twill sleeve around the mast compression post. This wasn't easy, as it is really tight down below with a space heater and a utility lamp hung on a small gap in the overhead framing gap. So the lay-up isn't perfect, but it's OK.
The thinking is, the sleeve will keep the post together, as it is comprised of a lot of individual splines of douglas fir glued together. I wasn't overly enthusiastic about how well I'd executed the glue-up of the tube, last summer, and I'll feel a lot more confident that the post will retain its integrity with yet another CF twill layer on it....so for now, I have to wait for one more warm day to check this off my punch list.
12.16.13....Livin' in a cold hotel
I'd like to get some measurements done to give them to the Class org., but hell, this weather is just not cooperating!
It has been a consistent 15 - 20 degrees below normal since like Thanksgiving or something. I was able to drag a heater below and get my compression post solidly seated with a bunch of G10 as compression plates both above and below the compression tube. I have also sanded the tube in place to get it ready for a couple of CF layers around it. I think on a day in the mid-upper 40's I can get the inside of the boat well up into the 70s, but this freezing weather and intermittent snow storms is screwing up my plans BIG TIME.
10.13.13...Latest stuff
I finished the KiwiGrip and started in on the compression post. I wasn't thrilled with the level of quality I'd put into glueing the beautiful Douglas Fir compression post together, the one that Tim Ketten made for me and shipped to me. I cannot thank Tim enough, what a generous guy. The quality of the fir he used is impressive, it's as fine grain and clear-run as I have ever seen. So I was particularly pissed off at myself for doing such a hack job of the glue-up. It is really hard to get 15-16 splined cuts of 48" fir, coated with glue on 2 sides, to line up properly and conform to something resembling a cylinder. My wife and I wrestled with it on a hot day, back in the summer, while being feasted on by tiger mosquitos. Fun stuff.
So with the crappy lay-up, I was not surprised when trying to force the post into place, one or two of the strips popped out of place with a cracking noise. The noise was just the epoxy giving it up, but the strips had to be glued back in simultaneously, with the post being seated in the exact right spot, vis a vis the mast step. This is why the hose-clamp was invented! Hose clamps made the job easy, thank you! With it in place, I also wrapped two small bands of CF tape approximately 1.5 inches wide to seal the deal. The whole pole will get a couple layers of CF, too. The pole is seated on two strips of G10 and the top will get the G10 inserts too, between the top of the pole and underside of the cabin roof.
Anyway, I got it in place and used a utility lamp to provide enough heat to get the 105/205 mix to kick. What's is truly amazing, almost miraculous for me, is that the fasteners that hold the mast step down go through to the underside and clear the sides of the pole enough to get a fender washer and a nut on all four screws! An absolute miracle!
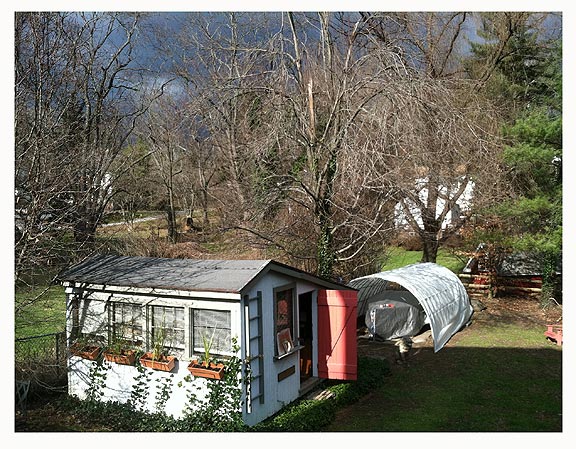
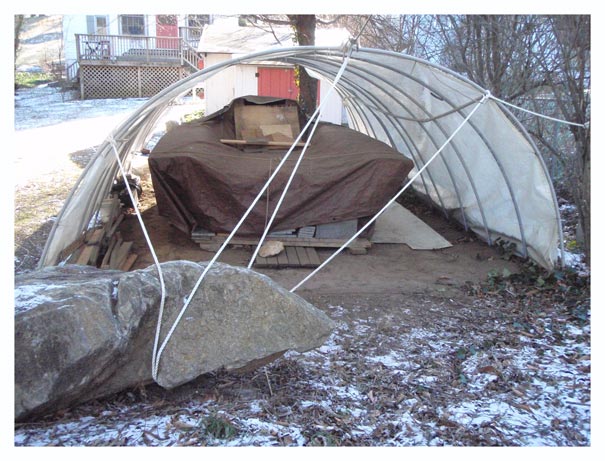
I'm running out of stuff to do on this project and thinking about the next one...already have
an appropriate Hoop House in mind....
9.05.13...been a while
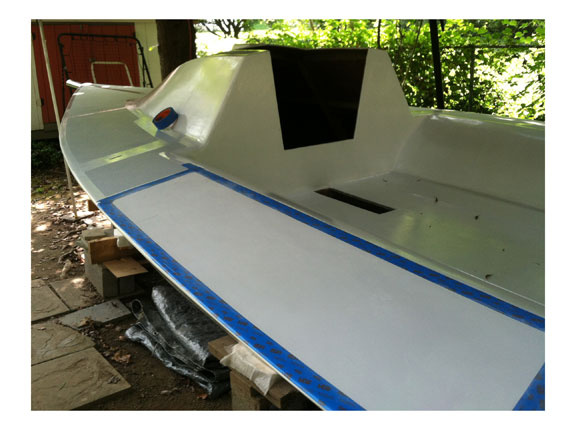
Haven't posted anything new for quite some time, but some stuff has gotten done. Fully primed the house and decks with Interlux PrimeKote. I think I put three coats on. Then I got the Perfection laid down. It isn't such a great paint job. The stuff orange peeled on me for some reason. But I decided to stand pat and say "screw it." I then came up with what I thought was a suitable mock-up for the non-skid application (KiwiGrip). I took a photo of the boat as painted and then in Photoshop, highlighted areas where the non-skid would go and then just used the brightness control to make these areas gray instead of white. See below:
Once I was satisfied with a scheme, I decided to just go for broke and paint it. I went at it with the blue tape. In some spots I used pencil lines, but for 80% of this I just applied the tape and fussed with it to get it straight. That seemed to work. I cut nice round corners with a utility knife, taking care to replace the blade with a new, sharp one every once in a while:
I used 320 grit to sand off the gloss of the Perfection and then glopped the KiwiGrip straight out of the can with a plastic spoon. I used a plastic V-notched tile adhseive spreader to spread the gloppy KiwiGrip out in some sort of semi-uniform fashion, but didn't really pay much attention to how well I'd spread it....after a few minutes of rolling it on, with 3" rollers, I figurerd it really doesn't take a lot of finesse with the V-notched spreader, just get the stuff down and roll it out, no worries.
This is how it came out. I am pretty happy with the end results, And unless you are a total fanatic, don't bother trying to fair out deck areas that will get KiwiGrip treatments--the stuff covers and beautifies any imperfections in the fairing and paint department:
Now I need to get some hardware on the boat!
7.04.13....Not fit for prime time
Since I took down the hoop-house, it's been open season for anything overhead; branches, leaves, bugs, the stuff that bugs poop out, birds and stuff that birds poop out, and other identifiable Schmutz to drop down and solly the perfect paints laid down, thus far, on hull #87.
Left, see a shot of the crap that accululates in about two or three hours time. You just can't paint on anything that is going to see that much crud raining down on it with each little puff of breeze....the big willow tree is the harshest offender.
So, I pulled out some old poles and photo equipment support tubing and put one of the tarps up as an awning. Man, what a difference!
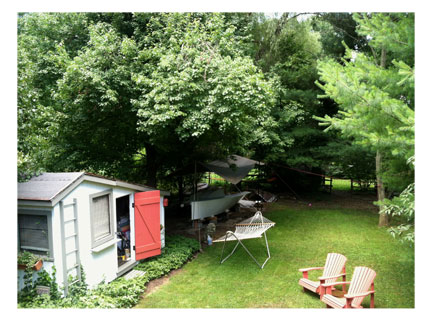
You can see the issue with a lot of trees surrounding the boat build site.
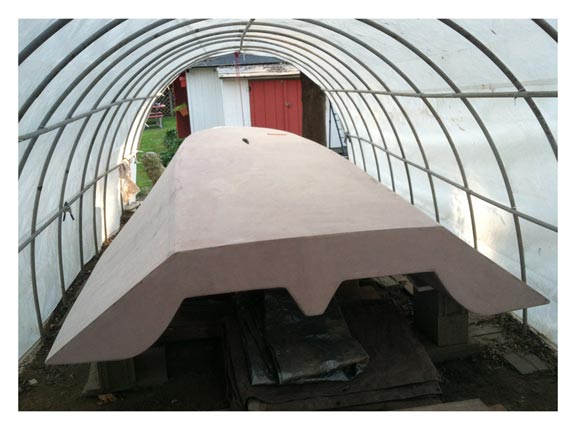
So, with the awning in place, progress was made and the boat is now completley primed and ready for Perfection® and Kiwi Grip®
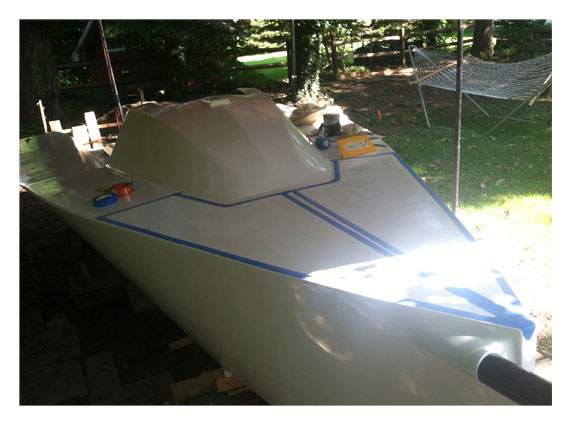
5.27.13.....Whiteness spreads
Slapped some more white PrimeKote on the deck and house over the weekend. Starting to look boaty!
And put the mast together, not without some effort. Parts did NOT want to mate, even though they did easily two years ago. But, eventually they did.
5.13.13...HOT RATS!
Major shout-out of THANKS!!! to my homies from the poker table and the Park School, not to mention certain out-o-towners and original hometowner, all of whom dropped by on MOTHER'S DAY! to flip this thing back on her bottom.
Of course there was a threatening STORM the night before, always has to be, right? and a bigass Willow branch did land about 8 feet from the BOAT, but what the heck?
The next morning I took the hoop house down, people showed up (I think we had 12 or 13, most of whom were able bodied) and the task was completed in less than an hour.
It feels good to be right side up again and to see parts of the project I had not seen in almost a year.
We put the boat on the hoop house tarp for long enough to build the new set up including some pre-made bunks. Worked out!
5.5.13.....Ready for FLIP-apolooza Part 2
It was warm enough this past weekend to get a bunch of coats of Perfection on. While almost done the last coat, the high-density foam roller disintegrated and left spots of crumbly foam particles imbedded in the paint. Lovely. So I went with what I believe is the 4th coat. I liked the finish better with just the third, frankly, but such is life. A hoarde of manly men and women are coming over this weekend to flip the boat back over on to its bottom.
Some pix, below:
4.14.13...Lubed Up
I did a wipe-down with Interlux 2333 solvent. The stuff takes awhile to evap, so I shot some photos. Then I asked the group whether I should continue on with the plan to paint, or should I go back to fairing compound and sandpaper. The consensus seems to be: PAINT IT!
so I will paint....
4.06.13....Mother Nature hates my boat
I thought I'd be flipped over, painting and installing hardware by this date. This picture was taken what, eight days ago? This is just wrong.
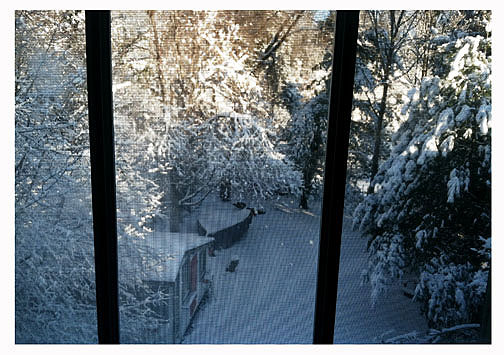
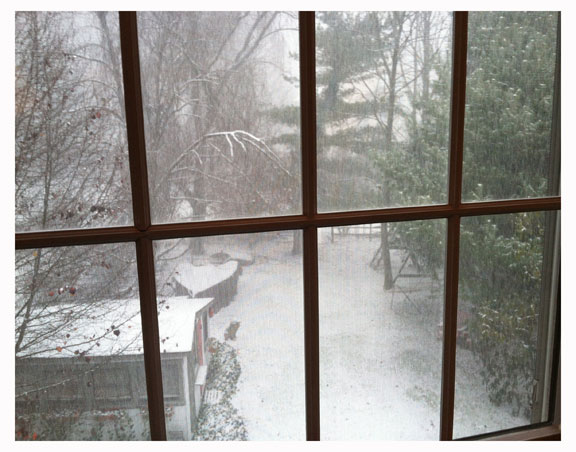
We got about 5 inches of snow. I don't remember ever getting snow this late in central Maryland. Snow FLURRIES, yeah, but not 5 inches.
So progress comes to a screeching halt.
And I'm going to go jump in a pool with all my foulies on.

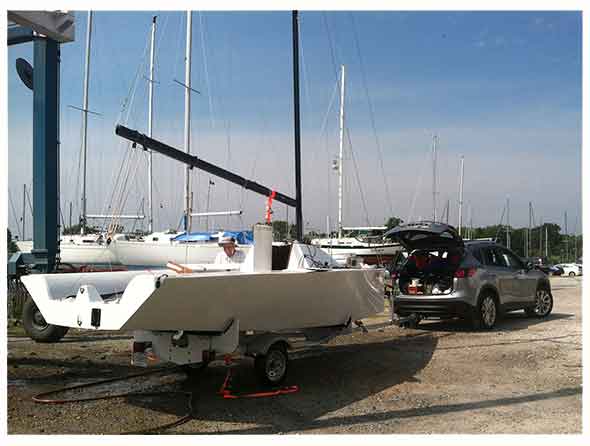
I did get a new tow-vehicle, though. CX-5, 2.5 L AWD. Should be enough...maybe. Anyway, it has a lot more UMPH than my SAAB 9.3 2.0T FWD had.
3.10.13...Finally a little spring
Got a decent enough day (2 in a row, actually) to lay on some barrier coat where I had screwed up the fairing. The second day would have been useful to finish and get the hull really and truly ready for the Perfection paint job, but I had to go out of town. So it is only just kind of ready.
But close!
2.25.13....Latest project: same old project
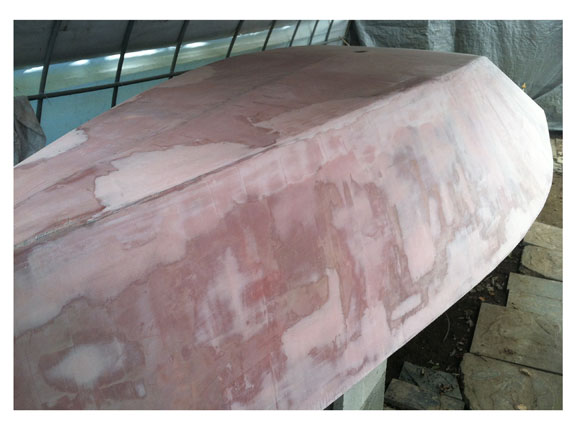
As mentioned below (2.10.13), I did a stupid thing by painting on filler to fill in some tiny dings. You can see how much material there is (was) laid down in the shot above. For the last 2 weeks I have been sanding that crap off like crazy. So, now I need to repaint the whole boat.
Stuuuuuuuu-pid.
On the other hand, the boat is just that much smoother. (Just wish the curves were more fair...)
2.15.13...Some Kind of Ventilator
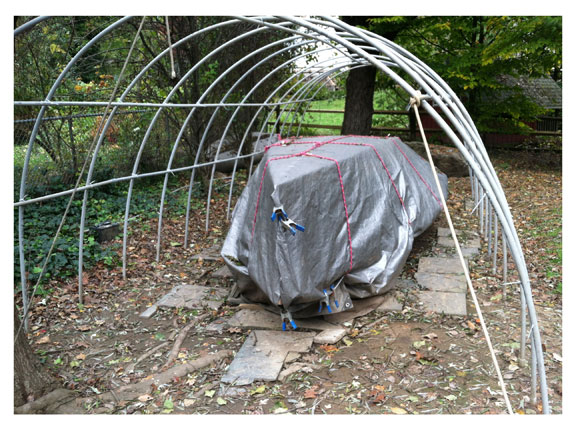
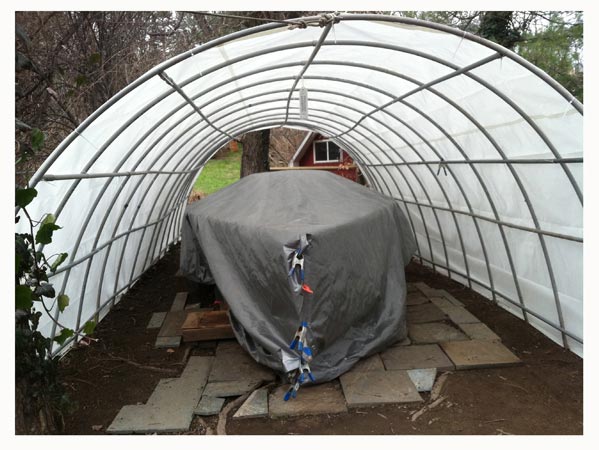
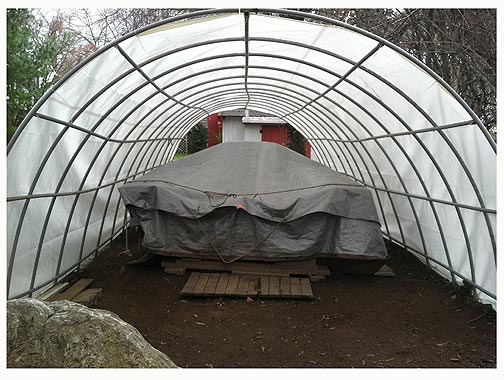
With 35-40 mph gusts in the forecast, I've figured out that the best way to deal with the hoop house is to let it breathe. Dodged another bullet.
2.10.13...Uppity Date
The good news is: a ton of progress has been made with Harney Yacht Rigging on both running and standing rigging decisions and materials acquisition!
1.12.13....Close to Perfection
The plan was to sand and paint during one of those warm weekends we often get in mid-winter these days....we got them when I was a kid, too, so don't go off on some sort of climate change rant. It was almost up to 50 on Saturday so I did a lot of sanding on the 4 coats of Interlux 2000e.
I started with 220 and went to 320, thereafter.
Wow. This thing is smooth. I have raced on plenty of boats that had no where near this kind of finish. And this is just the primer!
But I'm still not done. Upon VERY close inspection, I still see a few dings and divots that should be filled. As Chad of Knot Racing said, fix "what you aren't willinng to live with later." The paint will not fill in these imperfections.
Didn't really matter, as the predicted "near 70" temps, the weather peeps were promising, before the weekend, never materialized and it was a dank, 100% humidity, foggy day with temps that topped out at 47 degrees in the hoop house.
So no Perfection for you.
When I do get a warm day, I have to run some thickened 2000e one more time over the teeny dings and divots. If it's sunny this coming weekend, I can get the hoop haus up into the 60's for a short time with the solar oven technique and have at it.
We will see.
Hey, my sails are done!
12.19.12.....Old Bones
As anyone who reads the front page here (http://nbayracing.com) knows, I've been racing 210's on Sunday afternoons in December.
Getting pulled away to race, this late in the season, wasn't my plan but it has been hard to resist the appeal for a number of reasons, one of which is how much I like the boats.
I know I shouldn't go racing. I should shut myself up in the boat shed and listen to the Ravens game while painting, and sanding (and repainting), but gliding around on flat water in one of these things that matches, in a spiritual sense, the intent behind the i550 is just way too compelling.
What do I mean by matching "in a spiritual sense?" I mean the spirit of a design that was intended to be a low-cost, easy-to-build, beautifully performing three-crew, legs-in sailboat that was also first constructed in, watch out:
plywood.
Sound familiar to my fellow i550 builders?
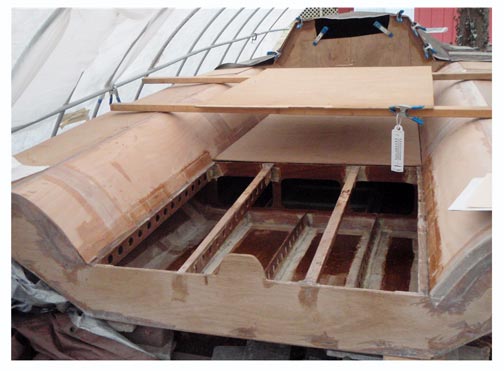
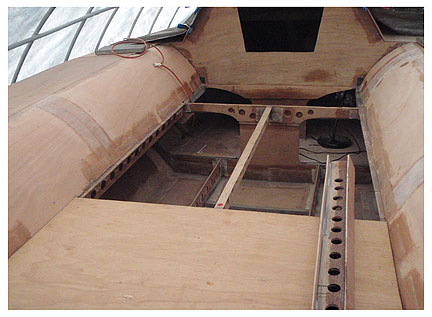
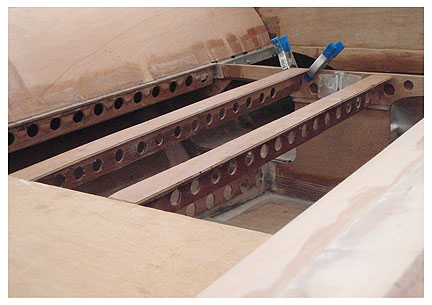
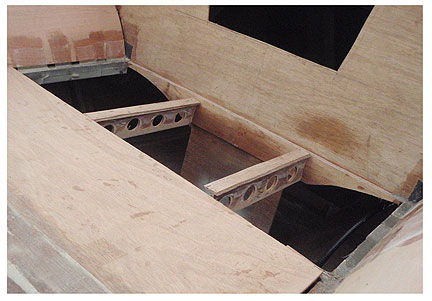
Last week I was lucky enough to have one of the members at GIYS show me the way to the Gibson Island marina, where there are three 210s sitting on the hard. It was getting late and the light was fading, but I did get a chance to snap a few pictures and, another stroke of luck, one of the boats had the floors on both sides of the bilge boards out, so it was easy to see what the bones of these things were comprised of, back a good long while ago, when they were being laid-up in wood. I think of what the support scheme is on my i550 and nod my head, yes, these are much different creatures, the 210 being twice as heavy and 60% longer. They also were desgned to accept an iron keel, the flange of which runs pretty much the length of the cockpit, resulting in a very stiff mid-section and relatively light overhangs. The stiffness is something that I'm afraid will be very much lacking in the i550, but that is just speculation, at this point.
What is obvious is the very simple construction technique involved with this design. A quick look says: beefy frames with a bit of deadrise drawn in, the frames easily knocked out of some available hardwood with two mirror-image straight cuts along the bottoms. Simple knees, from a lighter material, notched to accomodate the bilge chine log, added to the frames by attaching with liberal use fasteners. Top members added to the frames, fore and aft, to complete ring frames where the decking will go and bascially, you've got a hull. It obviously gets a little more complicated with stuff like the mast step and rudder and barney post, but for a 30 foot boat, this is about as easy as it gets.
So that's my excuse for not being in the boat shed on Sundays! What's yours? ;-)
(besides, which: I love the light this time of year!)
12.16.12....Fourth Mode
This is 4 coats of primer with dings filled and faired...is it perfect?
Nahhhhhhh.
Do I care?
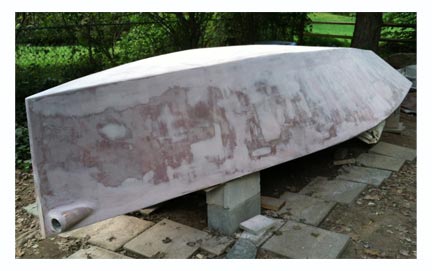
11.25.12...Winter Coats
Okay, it really isn't officially winter for another 3 weeks or so, but the daylight hours are short and the sun is at a very low angle, less than 30 degrees of inclination. Yet, it has been rather warm. Warm enough to roll on paint (or in this case, primer). So, primer was rolled. It has two effects: 1) it makes everything look a lot more fair and finished 2) it doesn't lie about where things are NOT fair or perfectly finished. So, I'll proceed with some 410 in certain spots and then hit it with the last (third) coat of primer. Kind of sucks because I was hoping I was done with fairing but so it goes....
First coat of Interlux 2000e goes on.
2nd coat of Interlux 2000e goes on:
Looks silver in this light and I am thinking maybe go with silver Awlgrip (AwlCraft2000)...maybe.
11.12.12....Towel Tosser
That's it. I'm done. Tossing in the towel. This is as good as it'll get as far as fairing is concerned. Paint is next and the first warm day that come along, when I have enough sun to heat the hoops up to 65 degrees, the paint will go on. Then (gulp) some sanding and then another coat. And then some sanding and then another coat. And then....
In actuality, it's pretty damn smooth. I was away for the better part of last weekend, but salvaged a couple of hours of sanding in the late afternooon. By 4:30 I said the hell with it. Time for PAINT!
Another day or two like this past Sunday and I'll be ready to flip it on to a trailer.
11.7.12....Last Month/Lost month
Here are a bunch of photos, 11 total, of stuff that happened in between, work, sleep, eat, race, and hurricane, and sleep work and eat. And did I mention work? Somewhere in there I got out to the build shed once in awhile.
this is the final filler attempt at correcting some low spots. after this I gave up.
and then a final thick run of pox/410/407/fast hardener ^
and then a bunch of sanding with the longboards (as evidenced by the dead curly things in the photos)
Then along came Sandy....we had to take down some of the hoop structure (like: the tarp?)
< this is as far as we got before we had to strike the tarp.
below, before and after Sandy, mostly involving leaves. I think we had one segment of breeze above 70 mph, most of the worst were in the 50's, I reckon. v
< after the covers came off, hmmm...some delam in some places. water infusion? insanely low barometric pressure? bad technique? (most likely)
9.30.12....Not an Ad for West System
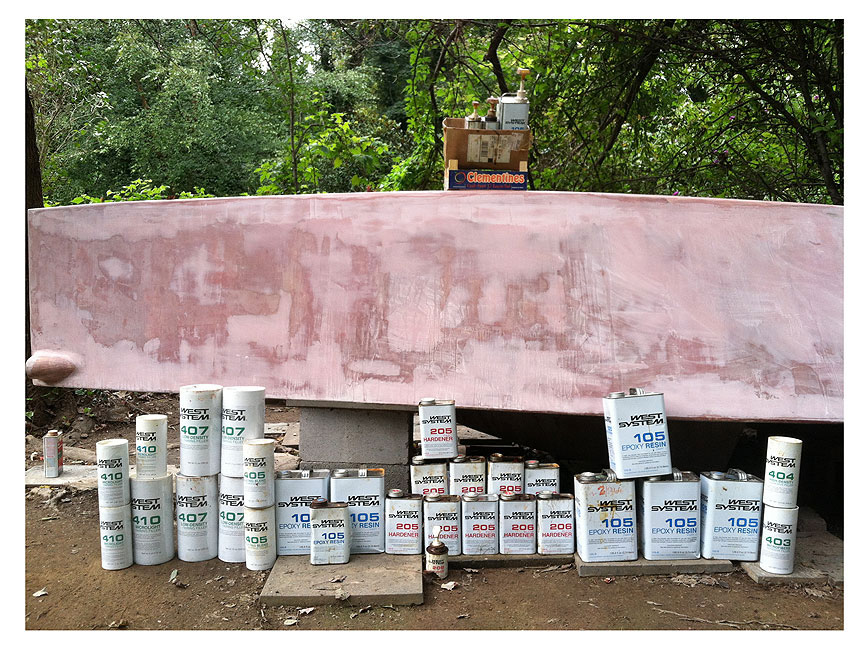
"Product" used so far, and I have another gallon of 105 on the way from Jamestown. I hope that wraps it up.
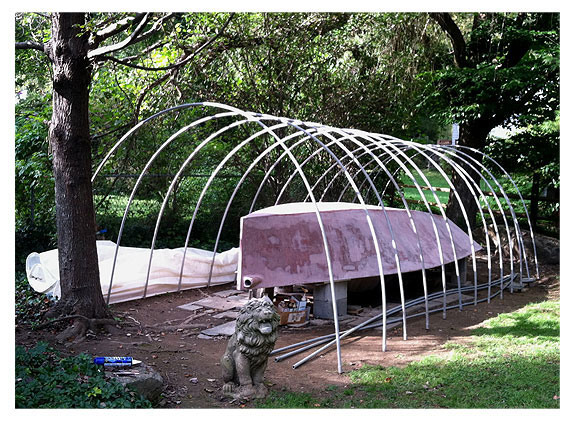
I had a lot of leaves dropping into my fairing goop, so it was time to construct Hoop House V.3....no way I am going to paint with 6.3 bazillion maple and willow leaves getting ready to give it up, overhead. Not to mention, the soft, even, wrap-around lighting from the white tarp cover is a godsend for applying 105/205/407 mix.
09.24.12...Paint it Black
I have had like zero time in the last few weeks, yet feel like I've snatched an hour or two away to sand and fair, somehow, every once in awhile and this is where it stands right now: the devil in me is saying just paint it, while whatever semblance of sanity I have left is saying, whooooooaaaa, pardo....do it right, apply a couple more skim coats of mud and really fair it out super smooth. Which is absolutely what I'll do. But: the temptation does exist.
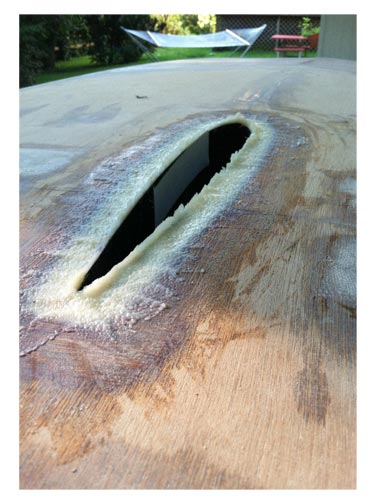
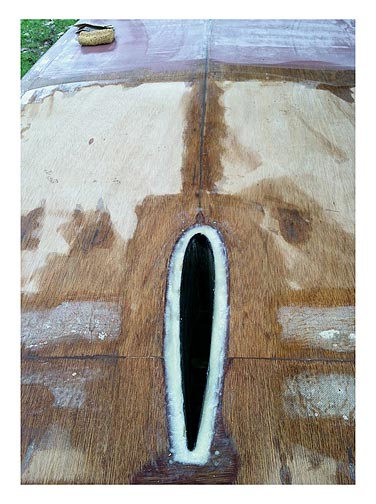
09.21.12...Slot Receiver
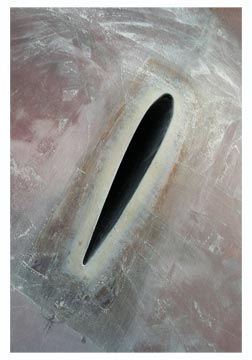
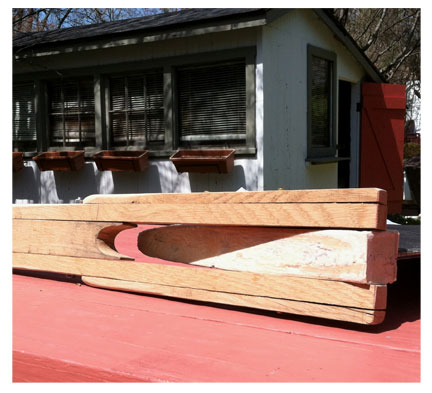
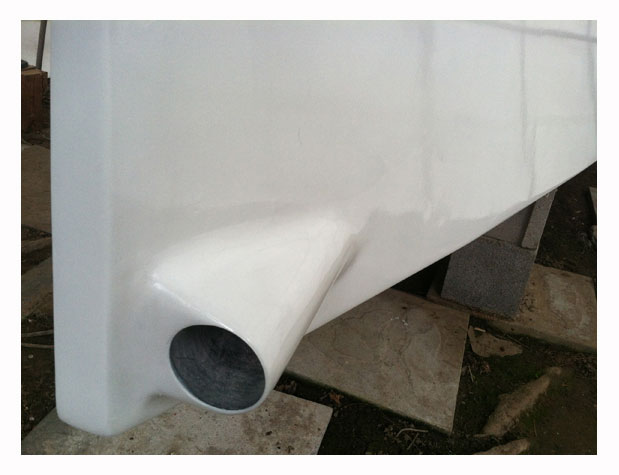
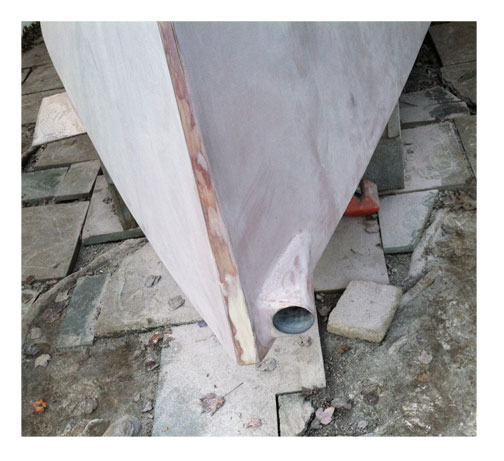
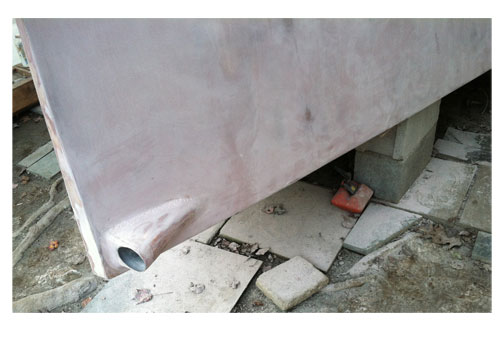
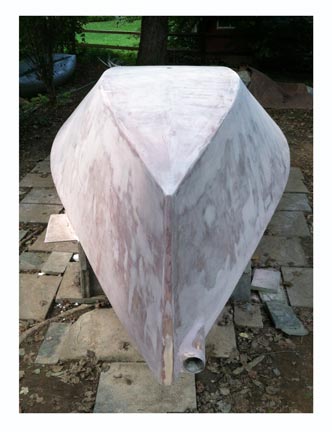
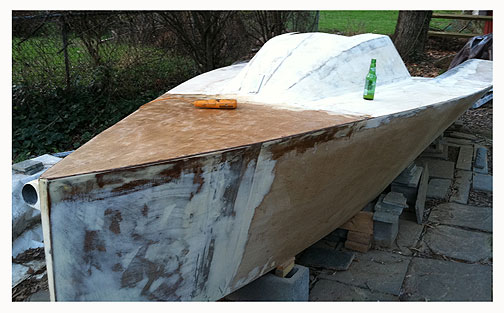
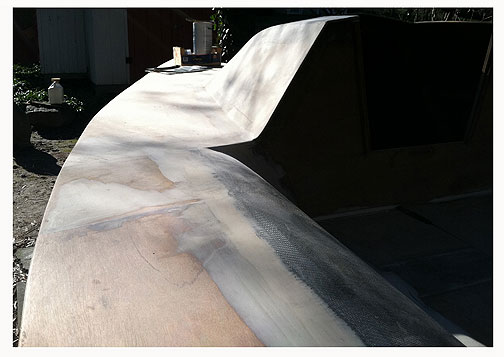
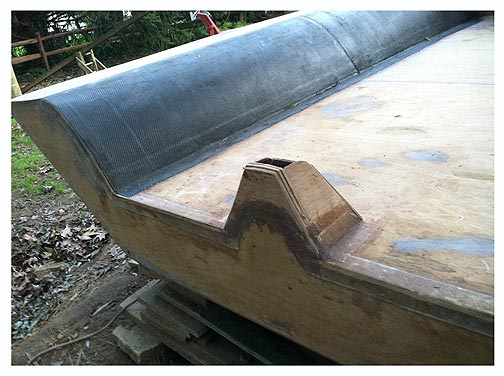
This is the way I finished off the bottom where the keel slot exits the hull. Your mileage may vary.
I over-filled the void with pox/403 mixture and let that cure (see Keel Slotted 9/5/12). Then I sanded that down flush with the plywood.
Then I cut a piece of remnant CF and dry fitted it....why CF? why the heck not?
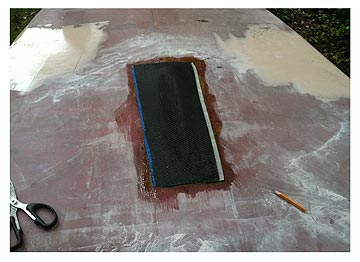
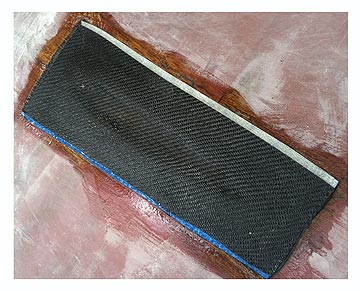
I let it sag in just a hair so that I could identify the cavity a little easier after it kicked.
After it kicked cut the excess material out of the void and sanded the edges down a bit and laid on some fairing mixture, it came out OK I guess.
Hope it doesn't leak ;-)
09.17.12....Filler Up
Laying in some pox mix with 410 to bring these low spots up to snuff.
09.12.12....Low & Slow
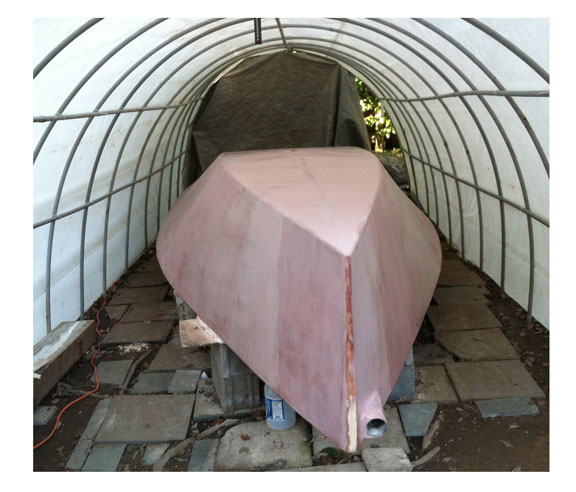
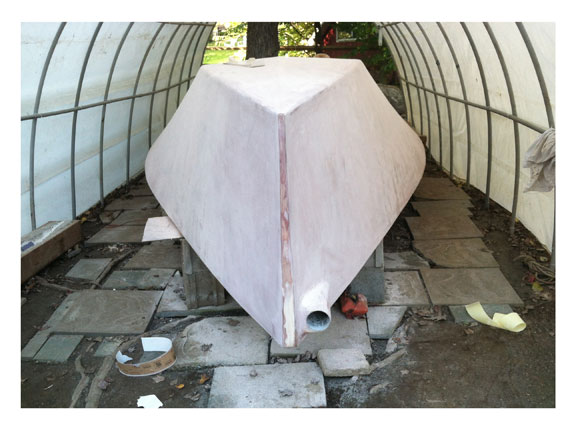
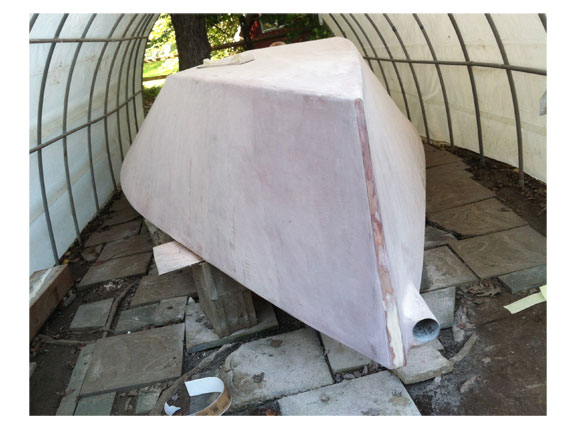
I was hoping I could get away with one more coat of Pink Fair, and then the 2-part epoxy paint, but there are some low spots on the bottom that I have to fair, first.
So that'll slow things down a little, but, all-in-all, I'm getting closer to flipping it on to a trailer and installing some sailing bits and bobs.
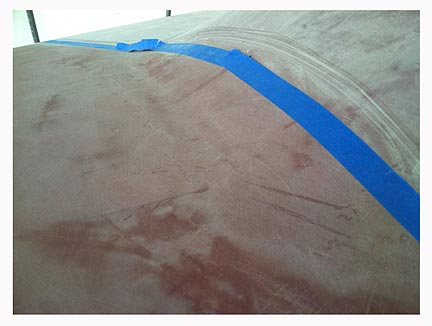
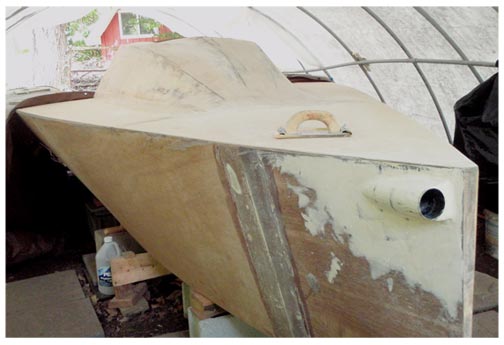
09.05.12....Keel Slotted
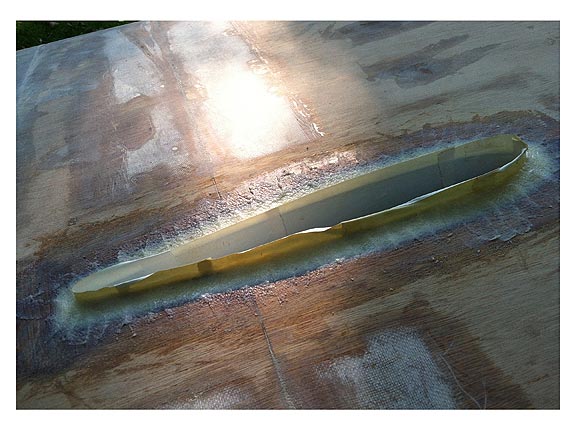
As promised, some shots of the way the keel sleeve is getting faired in. Some 403/105/205 mix pooled up against a tape dam.
Tape removed and the mix longboarded down with 60 grit
So now the whole bottom is covered with farberglatch...in fact the whole damn boat is! Hot-chah!!
08.26.12...Light at the end of the tunnel maybe, kinda
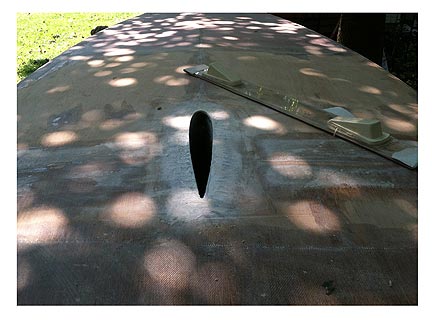
It was time to fair in the keel sleeve, on the underside of the boat, so first I dragged the keel foil out of its hiding place and seated it.
I stuck the keel in the slot for a few reasons:
1) to see if it still fit
2) to see if, once seated, it was straight
3) to fill the sleeve in case the 403/pox mix expanded enough to clamp down on the sleeve so that the keel would no longer fit.
This is the way I did the sleeve seating/fairing with the bottom, as recommended (sorta) by Chad and his knotracing project (his will be A LOT more professional):
- excavated ply >1" around sleeve with dremel tool
- cleaned the surfaces well--scuffed 'em up with 100 grit
- mixed West 403 (microfibers) with 105/205 mix and poured 3 separate mixes...I did not want the whole thing poured at once due to the issue of off-gassing leaving voids in the lay-up.
- for the third and final pour, I taped a dam in the inside of the sleeve to run the mixture above the sleeve. (don't have pictures right now)
- more photos once it stops raining and I can take the tarps off
Unscientific method, but the keel foil seems pretty straight and I'm very glad about that. Meanwhile, it's all about microballoons and fairing until the 2-part primer goes on.
08.19.12....Both Sides Now
I don't which to prefer, the Joni Mitchell version or the Judy Collins, but suffice it to say, clouds got in my way. I 'd have finished putting a soid layer of pink bog on the entire bottom and topsides, but the NWS was calling for a 70% chance of showers by 3 pm yesterday, so I had to knock off at 11 and allow the 206 mix time to kick completely, before pulling the tarps on. I need more 205 and that's on order. The 206 just takes too long in low 80's temps and I am getting impatient.
Nonethelss, it is beginning to look a lot like a fiberglass boat and I can almost smell the 2-part epoxy primer!
07.22.12...What's been happening
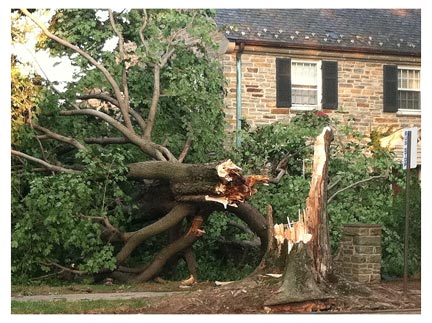
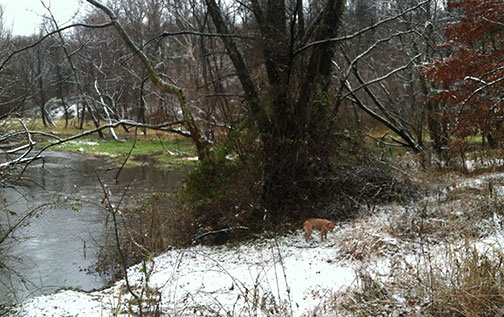
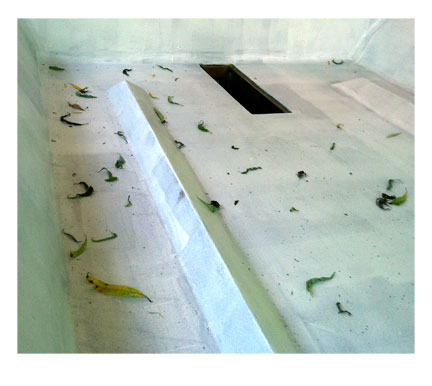
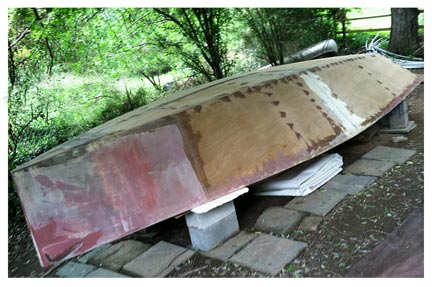
Spent 17 out of the last 32 days in New England and then, two of the days when I was actually NOT in New England, we had no electricity. So let's just say productivity has been low for the past month. Dodged yet another bullet with The Great Derecho Storm though....while some whooper trees and branches did come down, we got off easy, except for this little guy who had it in for the i550 (above, right). All kidding aside, I was lucky...again.

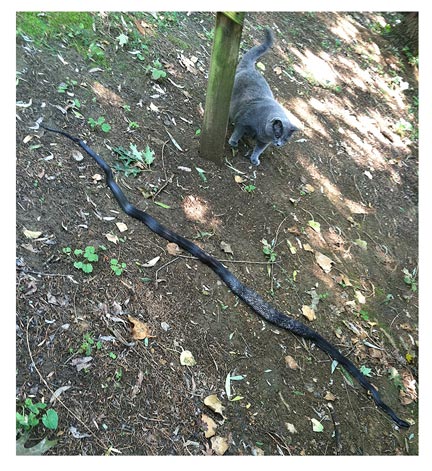
Spent the couple days that were slightly open to working on the boat with filling holes from the cable ties and sanding the hell out of the chines and bottom. There are some significant hollows and the other slightly problematic areas on the underside, but I'll cope. Also, all the aberrant weather has driven the serpents from their lairs, so one has to proceed carefully in the backyard.
I was also able to lay some tape on the chines and a bit more e-glass on the topsides, so at least something got done.
Not much.....but something.
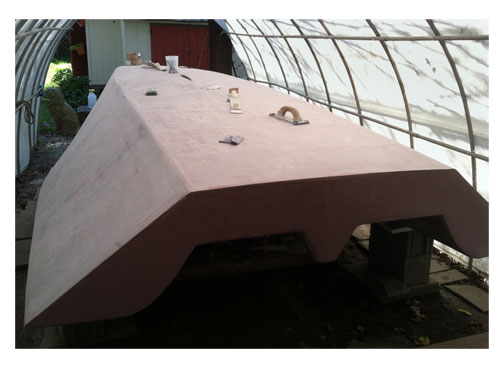
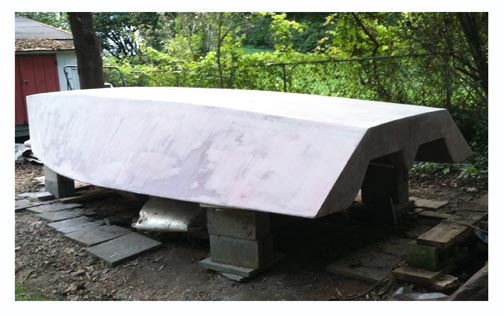
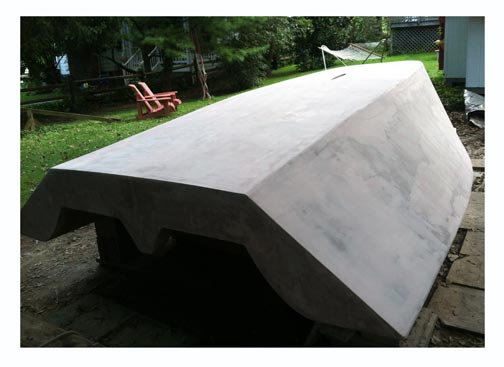
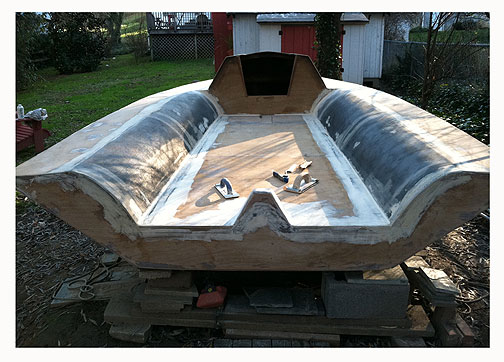
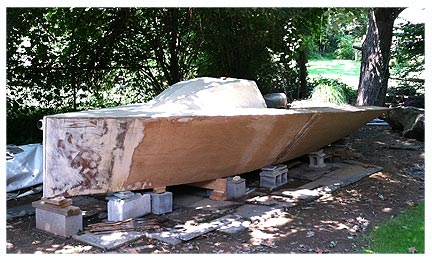
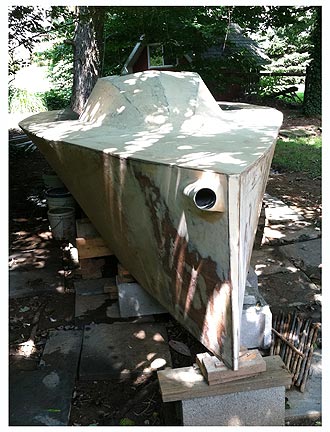
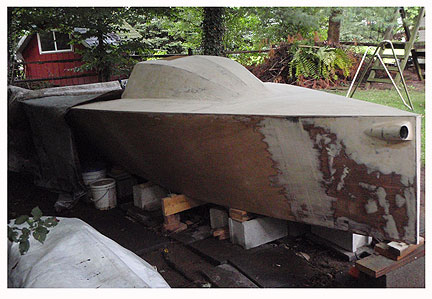
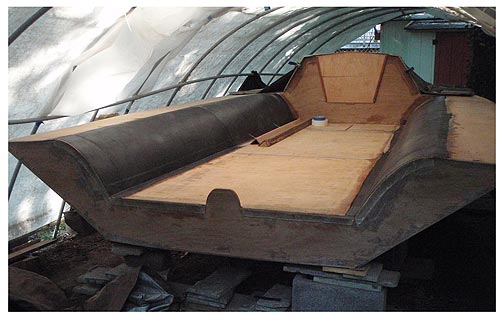
06.18.12....So Flip it, Flip it Good
I figured it was time. There's still some fairing to be done, but that can always be accomplished when the boat if turned back over. So, I asked a lot of people to show up on Father's Day morning. Awful nice of them to come over. I think between men, women and children we had fifteen people at least. So when it was time to lift her up, it was a cinch.
We used ropes under the boat with knots tied into the end for grips and an old old hammock for a sling in the back, which worked out perfectly. Took about 45 seconds to get her off the blocks and on to some tarps I had laid out on the grass.
Then we had an extened period of thinking about stuff. A lot of thinking. Maybe even some contemplation. I couldn't tell.
But there was definitely some thinking going on.
Then the engineering crew got busy and built some foam-topped piers for the upside down hull. These guys know their stuff and had a stiff and sturdy platform ready to go without even having to use a laser transit-level thingamabob. Amazing stuff.
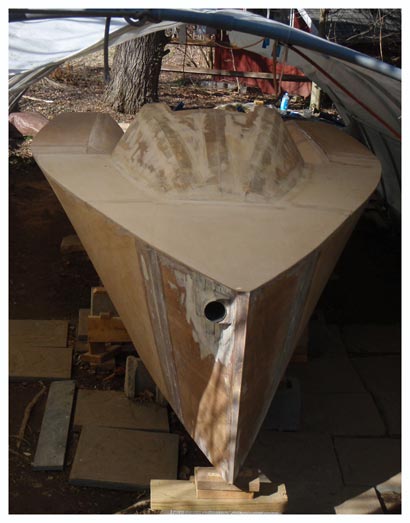
Just about ready to flip it. This is definitely the most challenging part, as the hull was slippery and there's a point of no return when you get her past the vertical, not to mention some remaining meat hooks from the top layer of glass that had flopped over on to the topsides and weren't sanded completely smooth. Ouch.
So, the deed is done. I was a little diappointed in how gnarly some of the seams looks...I'd never really looked at them too well while the boat was upright. But I took some 50 grit on the oscil sander to the entire bottom and it's not too bad, I guess.
Time to break out the 55 gallon drum of microballoons.
06.12.12....Meander Thrall
I'd love to be able to say that building this boat is so simple even Homo sapiens sapiens from the Neolithic Period could do it, but that would be a fabrication.
They hadn't come up with carbon fiber and epoxy resin yet.
I will grant our Pre-Pottery ancestors one thing: they'd be great at doing the grunt work which is sanding. Sanding one of these beasts will turn you into a Neanderthal. Thanks be to god we modern humans invented the shower.
In five days we flip it....it will be sort of ready, e.g., ready enough. I cannot think of a reason not to flip it.
06.10.12...Forgive Us Our Test Patches
I decided to apply some PrimeKote to see if I had sanded the foredeck down smooth enough. I still don't know. It had some blemishes and still does after the PrimeKote, but I thinned the PrimeKote a lot (as recommended) and am wondering now what it will look like with a thicker, higher-build primer and top coat.
Will have to wait and see about that.

05.29.12.....Deep Purple

We have a name, at least for now....sort of a play on plywood and getting up in 10 kts of breeze. Some early graphics at left.
Meanwhile there have been more microballoons and pox and some 6 oz e-glass.
In 90 degree heat it is quite possible, easy really, to hang cloth against gravity and get a great lay-up. But in 19 days the boat gets flipped to tape and fair the bottom. Closer and closer to a splash date!
05.17.12....Chainy Plates
Chainplates. We've got 'em, other people want 'em. Ours are firmly embedded. Unless we want to take them out. Because we can. And will.
It dawned on me that I could now step a rig. I have the mast step plate, just need to honk that down, and the stem/forestay attachment piece, just need to drill some bolts and insert and tighten the fasterners....and BINGO, up could go a rig. I even have the rig.
Hell, I'm ready to go sailing.
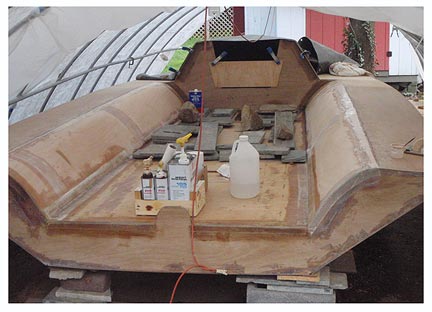
05.01.12....Footing
Just some pix that were taken thru April of 2012. I did not have much time to update the build log, but stuff did get done: cockpit foot rests (bensons) installed and glassed, every thing with at least one coat of the easy sanding pink stuff, mast step faired in, rudder tower faired in, etc.. Pix don't show the boat as being much different, but it is.
03.31.12....Closer toThe Flip

Haven't had much time to update the blog lately, but stuff has been getting done! The entire boat above the gunnel has been glassed and at least partially faired, with the exception of the back of the house..I took a jigsaw to the overhanging lip on the aft end of the cabin and cut it off. I like the look, but it means a little adjustment to the glassing issue (I cut into the remaining ply a little bit too far in one spot and have to flush that back out with pox/404 mixture).
The mast step has been glued down, too...going to run some biax along all for sides as soon as it gets warm again. I'm on overload with work and coincidental to that, the temps have plummeted a bit. So I can lay off the boat and get work that pays done and not feel too guilty about not working on the i550...it's only 50 degrees out now, not my favorite temperature for pox work and there's no sun to heat the hoop house.
Maybe tomorrow...oh wait, going SAILING TOMORROW!
02.29.12....In the Pink
It might've been 46 in the shade, but the Hoopshop got up into the high 60's and even warmer the weekend before. I was able to get the everything above the gunnels fiberglassed, with the exception of the cockpit sole because I ran out of cloth and 205.
But, nonetheless, I'm really stoked about the progress, especially seeing as how this is February.
It was great to finally get the cloth on all the decking and cockpit benches. In all honesty, everything's probably not as fair as I'd have ultimately wanted, but I think it will look OK, once the microballoons get faired and the primer and paint go on. Along those lines, the boat supply companies wanted over $300 for two longboards and 3 rolls of PSA sandpaper, so here are the homebuilt ones that saved a couple of hundred bucks. If you can build a boat, you should be able to build a couple longboards.
Got a layer of pox and 407 on the boat, too. This will be sanded down and then filled over and over and over and over and over etc.....hence the longboards. And over and over and over.
And over.
ALso: have started plans with regard to rigging and I've been hitting the APS sale rack pretty hard for cheap pricing on their remnants of high-tech line. Unfortunately, it's going to have to be wire for the standing stuff in the short run. No biggie.
02.20.12....Still with the Luck
Unbelievable luck with the weather this winter....another weekend day where, with some strategic placement of dark tarps, I was able to get the hoop haus up to a balmy 72-75 degrees. So more e-glass on top and with one more day like this, I can the boat all covered in glass. Forecast for Thursday is high 50's - low 60's so I may have to take a day off work!
Getting serious with the cloth layer. I wanted to radius the transition from the cockpit sole to the bench sides, but can't afford the time. I want to get this thing done, so some of the aesthetics are going to have to go a little neglected.
After it gets raced and dinged up pretty well, I guess it's gonna be academic at that point, anyway.
The shot at left is just dry-fitting a piece of cloth, disregard the bubbles and wrinkles.
Meanwhile, more carbon fiber is being layered on the rudder. Not sure how this rudder is all going to work out, in the end, frankly...but there will be a LOT of layers, guarantee you that.
02.05.12.....Better to be Lucky than Good
Have lucked out with some warm January days. I've been swamped with work and obligations but I've stolen a few moments in the last 10 days to take advantage of some freakishly warm weather--mid 60's in Jan., wot?
I blocked up the ends of the hoop house and let the sun do its work by putting the tarps dark-side-up on the roof and south-facing end. It turns the thing into a sauna as long as the clouds stay away. As the 105/205 mix was kicking off too fast this past week, I actually had to ventilate the structure to keep temps in the 70's.
Happy to report: the decks are more than halfway glassed and I'm thinking it'll soon be time to prime them for paint. Also: got my mast step fabricated and other small odds and ends done.
Pix and it happended.
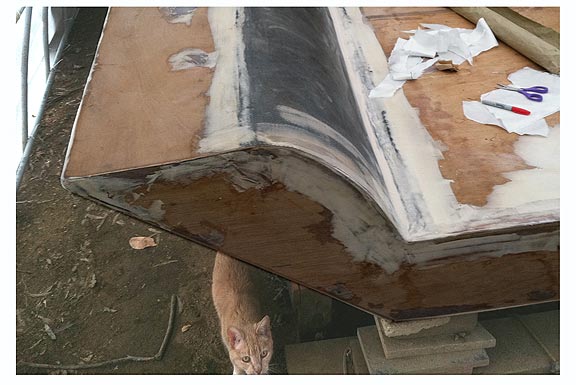
This cat has the job of keeping mice and stuff away. To date: zero mouse turds or mouse footprints anywhere in or on the project. Go cat.
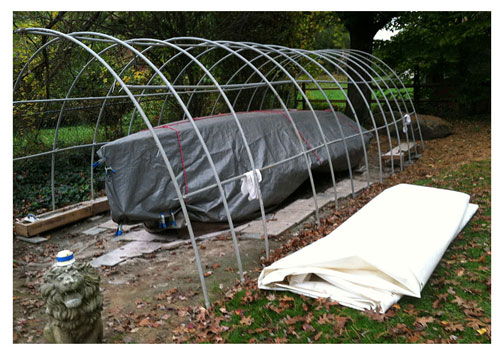
01.02.12.....Hoops: Version Two
This thing isn't going anywhere unless I get it back under a structure and provide some heat, so here is Hoop House V.2 and if I can get another 6-7 months out of this plan I should have a splashed i550 by July.
A bit more reinforcement and room to fit a heater or stove into the aft section.
And finished just in time as a few puffs to 25 and rain were coming in. Puffs last night to 39 knots at Key Bridge so when I looked outside this morning I was happy....everything was still there in the right place.
Moving inside is an option for the smaller projects I need to finish up, including a hatch cover.
2012 is going to be a busy year.
12.05.11.....Warm wishes
We've had an unexpected stretch of warm days that, by some miracle, have also lined up well with the weekends! So despite a bunch of house projects and running up and down I-95 a few times, things have been plugging along on the build. I actually got the first bit of fiberglass on the deck this past weekend. When the high is 58 degrees, you can do some work...unfortunately, the high only lasts for an hour or two and then the temps plummet pretty quickly. So I devoted 40 minutes to standing over the boat with a hairdryer until the Ravens game started at 4 pm. By halftime the foredeck glass had kicked enough to put the cover on...rain is coming tonight. But I am psyched about having one small part of the boat glassed over and also very psyched about being 98% done with fairing the decks and house to be ready for the laying on of the cloth.
Rolling Rock, the preferred brew of hairdryers around the world.
Bit of an issue with this area, where the benches abut the house. This is a complex curve and it probably won't end up being as bull-nosed and curvaceous as I'd like....but time is moving along and I only have so much patience.
Another thing I've learned is that a wide radius curve, where the house meets the deck for example, is also pretty time-consuming to finesse. I wanted a very soft transition from deck to house, but getting the curve fair and equal from the front of the house to the aft end is a bear, and the clock is ticking.
I'm done with the rudder tower, too....it's fair enough to glass over. A 3.5 inch inspection port goes on the forward face.
Cockpit is ready to go, but I may lay in a little more mud to increase the radius of the transition from cockpit sole to bench, I dunno...

I keep wishing it would stay warm for a few more weeks/months.
10.30.11.....Boatbuilding's a Beach
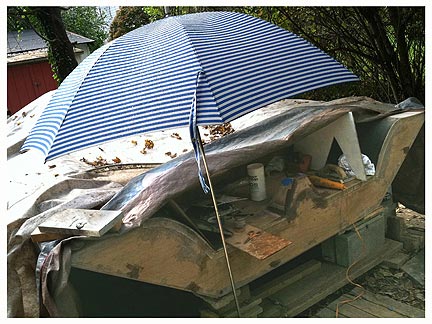
You live in a place where you have 115% of the average annual rainfall before 10 months are even up, you have to make some compromises on the build site. Hence the umbrella and wacky tarp-thing.
I got some more work done on the rudder tower, despite living in One Hundred Years of Solitude's dream setting.
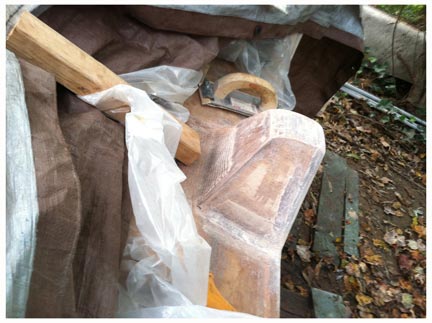
I have to roll...captions later.
10.16.11....Snake It

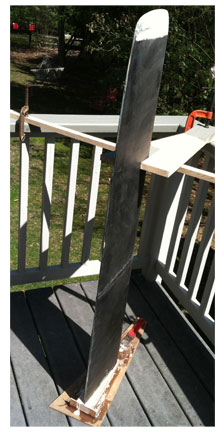
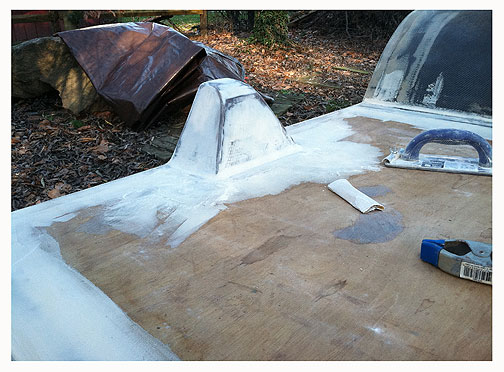
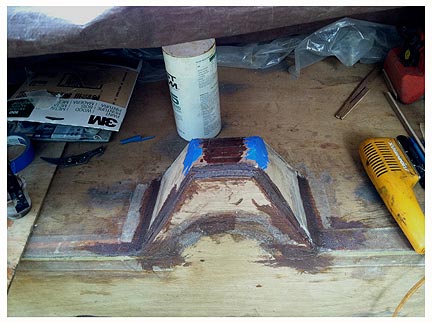
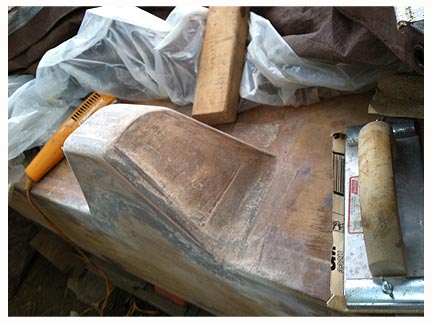
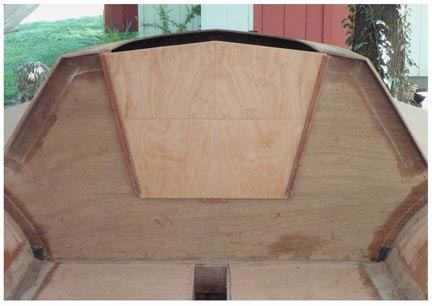
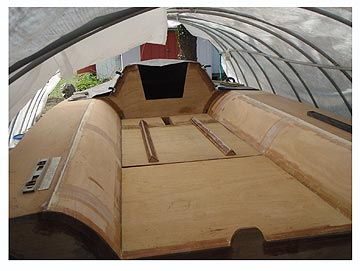
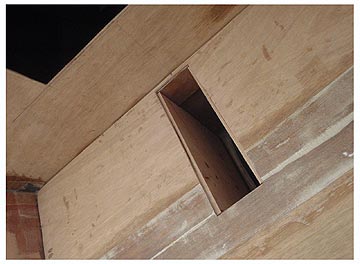
I decided to take a break from fairing and go sailing. That probably wasn't a good decision, but such is life. I also decided to build the Viper-Fix rudder tower. The idea is to extend the distance between pintels, to reduce the effect of the lever-arm from a loaded up rudder. The post is going to be sanded down to be all-curvy and stuff. A small inspection port (3.5 inches from APS) will go on the forward face to allow access to the mounting hardware for the pintels. The top (the radius'ed part) will be Okoume doorskin ply topped with carbon fiber.
It might be ugly, but if the rudder don't break, then I can live with ugly!
10.1.11....Just to Be Fair
I think since I took down the hoop house (see 8/22) it has rained pretty much every day with the exception of a couple weekdays when I had work (instead of boatbuilding). We set a new record with something over 23 inches of rain in the 2 months of Aug & Sept.
That's more than half our yearly annual average rainfall (approx 43 inches) in what was basically a six week period.
Ask me if I am sick of rain.
The boat hated it too....there were a few wet spots that I had to grind out on the deck, but fortunately I got to it and got rid of it and will fill the hollows with pox/colloidal filler. But what a PITA.
But even with all the moisture, work went on, albeit not a whole lot and no where near what I had figured I'd get done in the last two months of summer. Crap!!!!
All in all, I'm just about ready to start running some sheets of fiberglass cloth over the decks. It'll be great to have that on just for the weather-proofing.
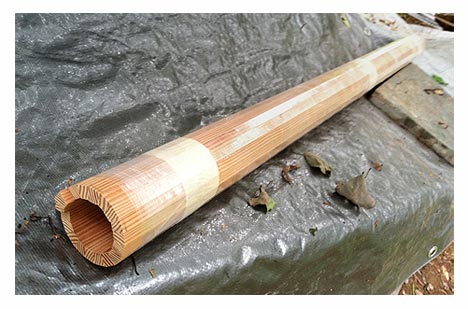
Check out this mast compression post Tim Ketten sent me! A thing of beauty, it'll be the best looking thing on the boat, certainly the best looking thing below decks, as there are some ugly seams down there, the first tape runs I ever did on the boat. I need to run some pox/410 over those seams just to reduce the fugly-factor, as I don't want Tim's outstanding craftmanship sullied by being in proximity to my hack/amateur/beginner work.
On the other hand, it is a race boat.
8.28.11....As Luck Would Have it
Of course, as soon as I removed the hoop house a hurricane hit.
But that's probably a stroke of luck because I sincerely doubt the thing would have held up through the entire breeze event, which went on for about 24 hours. I think the tarp would've been torn to shreds with all that windage up.
Instead, I took the tarp and tied it down very thoroughly with ropes under the boat and on top of the boat and cross-wise on the boat.
I got a teeny bit of water on the bottom of the boat, at the base of the stem, but that was dry to the touch by 1 pm Sunday (breeze/rain started approx 1 pm on Saturday). By 1:30 I was fairing again.
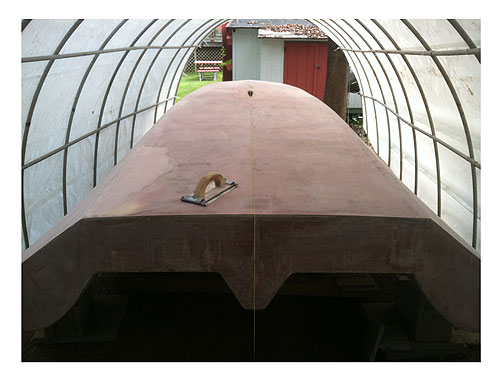
8.22.11......Roofless People
I took down the hoop house. It was getting nasty and it leaked a lot. Only now, my work windows are a lot smaller due to the fact that when it rains, I have to wait a long time afterward to take the tarps off--due to the wet leaves dropping a bunch of moisture on the boat. This past weekend was a real case in point when we got a brand new thunderstorm every 2-3 hours.
So nothing got done.
But there has been some fairing going on, that's for sure. I feel like I ought to spread some fiberglass sheathing soon!
If it don't rain....
7.22.11.....Don't Sweat It
Don't confuse my not updating the build log with my not doing anything on the build. Stuff has been getting done, I'm just not making a big deal about it. Plus, I've been racing a lot and also the weather has been too hot to do much building outdoors (100+ degree F. temps and humidity thick enough to wade through).
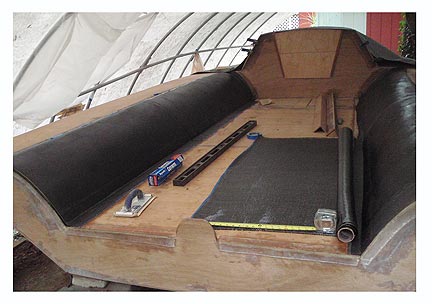
I'm still busy on the CF layup for the cockpit. Most of the 2nd layer is on. It's looking good and seems pretty darn strong. Still debating whether it would need a third layer or whether a skin of 10 oz e-glass would be sufficient.
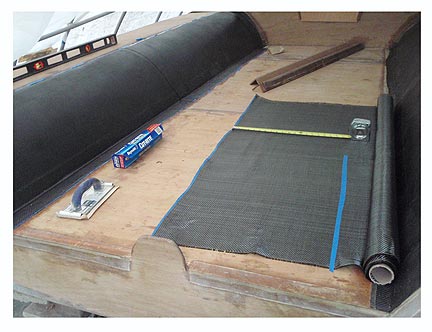
This is how I deal with the tendency of CF cloth to unravel once it's cut and therefore unselveged along the newly cut edge. I cut 1 inch blue tape in half and run it along measured points, in this case 20 inches wide.
I then cut thru the blue tape with sharp scissors and in this way there is no significant unravelling. The blue taped areas (approx. 1/4 inch wide) are then just sanded off once the pox cures.
CF and a whole lot of fairing going on....that about sums it up for July. Working in 95 degree temps and 90 percent humidity takes a lot out of you.
5.31.11....Long Month
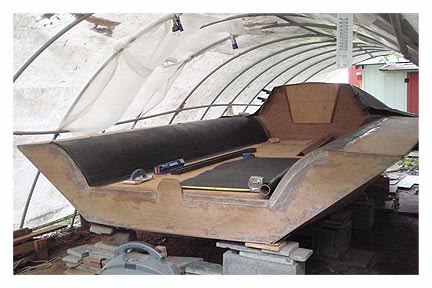
Rain and work have both put a damper on my getting a lot of stuff done, but there has been some slight progress. I am definitely into the dust phase...work has begun on fairing external surfaces. And I also got the first lay-up of CF on the cockpit benches. The lay-up isn't exactly Hall Spars quality, but it's OK.
Also, I have been messing around with some other stuff...."Mist's" builder sent me some douglas fir, complete with pretty pre-cut scarfs, to install as a toe rail. So, I dry fit that, and I figure I'll put it on after the bow gets faired and sheathed in fiberous glass.
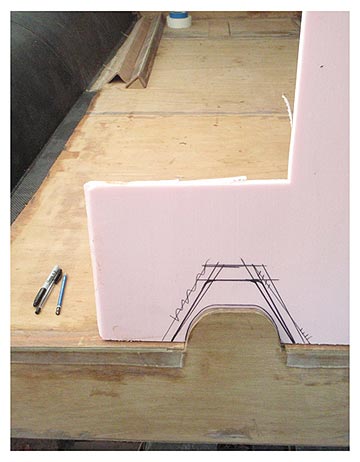
Also: there has been some discussion, in the class, about the frequency of rudder failures. These seem to fail for a number of reasons, but one way of beefing things up might go along the lines of the retro-fit that has been designed for the Viper. So, I played around with some pink foam just to do a mock-up of what might be a solution to end the kind of destruction these loaded-up boat bits have witnessed thus far. Not sure if it's a great plan, though.
____________________
5.1.11.....Plotting a Hatch
With the warmer weather, I was begining to notice wildlife exiting the open hatchway every morning when I'd walk back to the boat, so I figured it was time to impliment a solution to the issue of having an 18 foot plywood birdhouse. I had some leftover packing ply, 5 mm birch, so I cut some of that up and used some old hatch rails I had salvaged off a keelboat I owned in the 90's. This works OK for the time-being and I don't see any point in doing much else, there's too much to do otherwise.

There will be a need to come up with a solution to pin these in, in the event of a capsize, although we all know that will never happen ;-)
Also: got a chance to lay a little 410/pox on the house in an attempt to get it looking remotely fair. There will be a lot of 410 left in the backyard when this is over.
4.18.11....Fun With Airplanes

Been spending a lot of time going to airports, and tracking flights at home on the laptop, which is the price you pay for having F1 progeny travelling about the country during a very turbulent spring, meteorologically speaking.
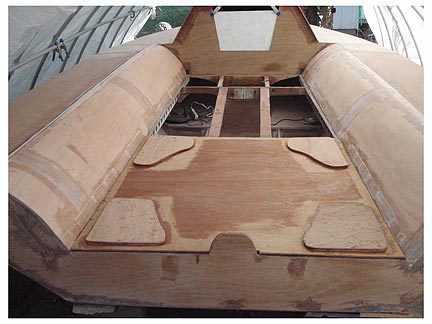
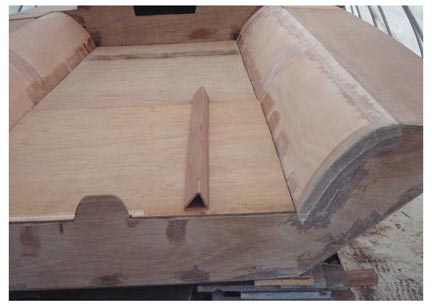
In between trips to the airport & cold snaps & fierce breezes and rain blowing sideways, I got a few more things done. I finished up the aft section of the cockpit sole and got it glued in. Then, I finished up all the guts in the forward section of the cockpit, as far as below decks is concerned, clear-coated it and hit it with a coat of epoxy appliance paint, too.
Then I finished adding the reinforcements to the forward section of the cockpit sole (see pic, left) and did some sanding and prep work and finally, yesterday, glued in the last section of cockpit sole.
I dry-fit everything to see how it went together...not too shabby.
Could have been done a little more accurately, but speed is pretty important as this thing needs to be finished at some point this summer!
Looks like temps in the 60s 70s and 80s are here to stay (right), so hoping to get a lot accomplished in the next month or two.
This was a record high and man, was it ever welcome. I actually had to go to 206 hardener as the day wore on.
As of last evening, the rocks were removed and the cockpit sole is now officially glued down! I'm giving serious consideration to getting rid of the hoop house. It's pretty ragged anyway, but does provide some privacy and some very soft, difused lighting, which is one of the best parts about having it.
3.26.11....Outside Chance
9 straight days, semi-off of work (still have an 8 am class), I figured I could really get cranking on the boat. But only 4 of the 9 days had temps in the 60's. Tomorrow, Sunday March 27, we are supposed to wake up to a dusting of snow. So, I'm not looking the gift of the first 4 days of warm temps. in the mouth. Got a few things done:
My main goal was to get at least part of the cockpit sole glued in. But, before I laid down any bog, I had to reinforce the sole for few hardware attachment loads, the boom bridal and the eyestraps for the hiking straps (footstraps). So I cut some backing plate patterns and laminated them down under a surprisingly warm March sun.
These 3/4 inch layups may be overkill, I don't know. But I'm thinking at this point, more is better than less.
A bunch of pavers an old neighbor gave me have come in really handy for this project. Thanks Terry!
While the sole reinforcements were kicking, I sprayed the clear-coated bilge areas and holey beams with another coating of epoxy paint...this was Home Cheepo's epoxy appliance paint. I used 2 cans, it runs about 5 bux a can. I figured it was worth the ten bux.
Here is the aft section of the cockpit sole with the reinforced areas laminated in. I took it off, layed on some thick 105/205/404, flipped the panel and fitted it into the area and then laid on a lot of weight: pavers, lead, a old car battery and a few rocks. The glue kicked in 52 degrees of dying March sunlight and by the next morning I had the aft section of my cockpit laid in and secure.
3.19.11.....Rocks Off
Took off the pavers and gave the decks a good sanding...lookin' good. Next is closing up the cockpit sole.

3.06.11....Closing Time
Another massive break: temps in the low 60's on March 3rd. I got to do a bunch of clear-coating before the cockpit sole goes down and I finally got 100% of all decking glued in.
I'm going to wipe the amine blush off the clear-coating and hit it with a quick coat of shiny white aplliance epoxy spray paint from Lowes. I hope that brightens up the guts when I open an inspection port one day in the future.
I have to install some more laminated reiinforcements or backing plate material on the underside of the cockpit sole panels. One big plate to back-up the mainsheet swivel cam and 4 smaller plates to back-up the eyestraps for the hiking straps.
I ordered 24 feet of 4" webbing from these folks. Pretty cheap, the shipping from Portland was almost as much as the webbing. That's strapworks.com, they also have some good deals on tie-down stuff for your trailer.
Pile of pavers are where the very last, smallish, deck pieces are being glued down. This seals up the deck, entirely, finally!
This may signal the final days of the hoop haus, which is reaching the point of being damaged to the degree where its usefulness is debatable (except for the Greenhouse effect it has on cool, but sunny days--that's a big help).
Still a lot to do but every step forward is good.
Unless it has to be undone.....I sure hope I haven't forgotten something.
3.01.11......Ancient History
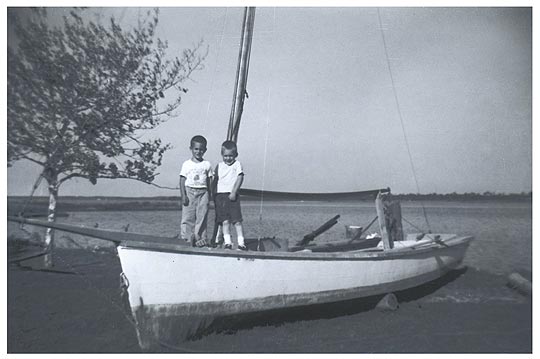
Dug up this shot from 1957. I was almost 5 years old, the kid on the left.
I've no idea who the other little guy is, but he looks like the kind of happy-go-lucky bloke who'd be handy on a sportboat.
Check out the prod and the sag on the boom, and also the sheeting angle from those narrow shrouds. I don't think we ever sailed it, but maybe we did, I don't remember .
Thanks to Tom Price, USNA, for helping me with info about the boat. Tom writes, "It is probably a skiff that, as you probably know, was generically called a 'bateau.' The skipjacks were just enlarged bateaux. The bowsprit looks like someone's modification. The rig looks good. It's got the typical Chesapeake cross planking up to the chine. Bugeyes would have what they called a "chunk" at the forward end of the keel, shaped to avoid having to plank that area.
The skipjacks really were just enlarged skiffs and if you put a longhead on this it would be one! Applegarth, right at the right turn entering Oxford, made a heck of a lot of these types of boats and put raked rigs and bowsprits on them. He actually would put a little cuddy cabin on and they really looked like littlle skipjacks. The boat is a great example of the generic deadrise skiff and with her raked mast and long boom, could certainly be called a crab skiff or bateaux. Boatbuilders abounded on practically every creek, so she was probably built on Taylors Island. Great looking little boat. Here's a link to some bateaux info."
http://www.mdsg.umd.edu/CQ/v02n1/side1/index.php
This was taken on Slaughter Creek, Taylor's Island, MD in the spring of 1957.
It was great to be a kid back then, and I thank my father about 100 times a year for exposing me to this stuff some 5 decades ago.
R.I.P., Dad.I'd like to think it's one more reason why I'm building the i550.
2.14.11.....Mud Season
Got a Valentine's Day gift of temps in the low 60's, so I put it to good use. Four or five inches of melting snow and ice turned the build shed into an island in a sea of mud, though. Any work done inside the boat had to be done in sox only. I could not find my fuzzy bunny slippers.
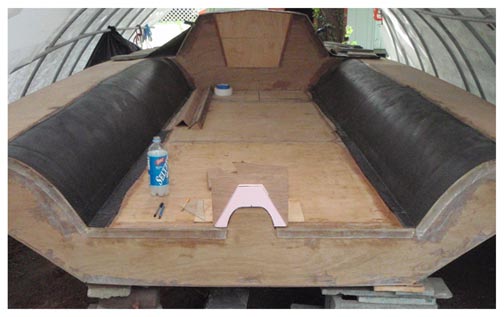
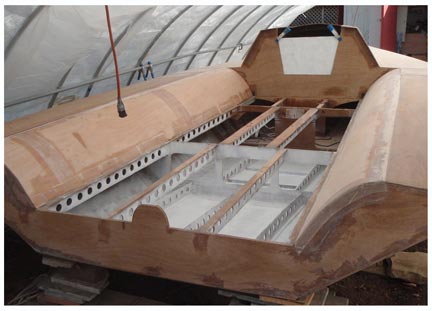
The goal was to get the four cockpit support beams glassed in, from where I had torn out the old one. The old one got cut into two short lengths and these were to be installed where there were none, in the 14 inch section where the keel box rests.
By 11:30 it was 62 degrees in the hoop house! Not too shabby for Feb 14th. It was time for a few squirts of 105/205
Another chore was to get inside the forward ends on the curvacious benches and slather some 6 oz. cloth on the underside in the last two places where I hadn't done anything last Fall. So I got that done and it was a pain in the rear-end, but it's done!
Now I can gue the last 14"x16" piece of decking on and the entire boat will be decked over.
I can also clear coat and paint the entire below decks infrastructure, as I am ready to glue the cockpit sole down too, once everything is sufficiently waterproofed.
So while there is not a huge amount of noticeable new stuff to point out, the good thing is this pretty much wraps up everything that needs to be done before the boat becomes a closed affair. At the rate falling limbs are poking holes in the tarp, it's coming at a great time to be DONE!
I also got a chance to play around with some hatch strategies (hatch some strategies). I found some old pieces of teak hatch guides that I'd pulled off one of the old keelboats I owned a while ago, so I cut these down and they'll be useful on the i550.
Teak on an i550. Old school.
_________________
1.30.11.....Limbo Lo
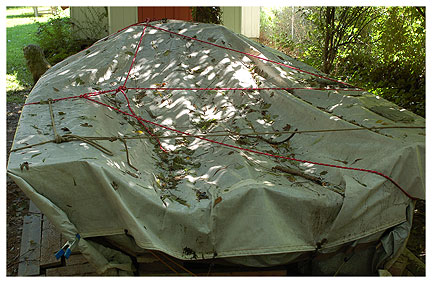
Doesn't look like that much snow, but it has the specific gravity of Unobtainium. Finally knocked this crap off the tarp.
It, and all the falling branches, also damaged the tarp in a few places. I have jury-rigged a couple of patches and that will have to suffice until I get another tarp. All you people building in monster garages have a lot to be thankful for, I'll tell you one thing.

Why is this man smiling?
He isn't. That's a grimmace. The Saws-All needed a new blade and it would hang up and shake the user violently, vibrating like some kind of insane lounger on meth.
At least I didn't fall off....no "Ruxton man severely injured in roof-cleaning mishap, film at eleven!"
Hot fun in the Summertime.
Making the world safe for hoop-tent boatsheds. Somebody has to do it.
(photos: Ella Ford)
1.29.11.....No Foxholes in an Atheist
I'm not very religious (that's putting it mildly) but I am starting to wonder whether this project has a guardian angel.
We had a wicked storm earlier this week. How bad was it? This storm produced 47% more power outages than BOTH enormous snow storms, combined, that we had, back to back, last winter...one of which was a 28 incher. It was the clumpiest, heaviest, most adhesive snow I've ever felt and I'm sure the eskimos have two or three different names for it, all of which are an Aleutian variant of the word "cement."
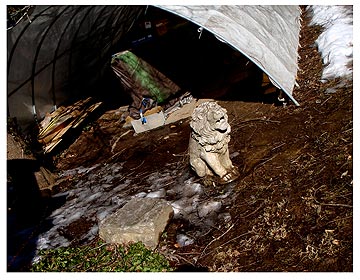
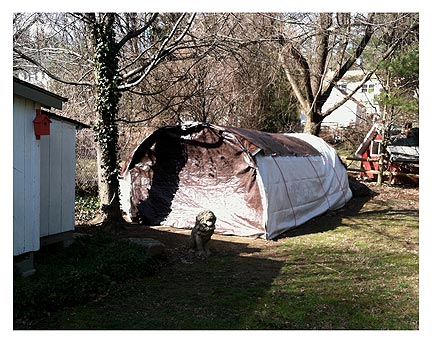
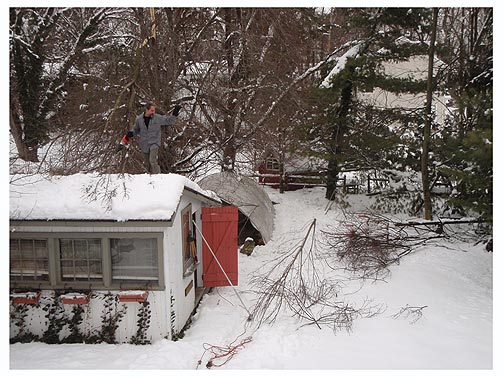
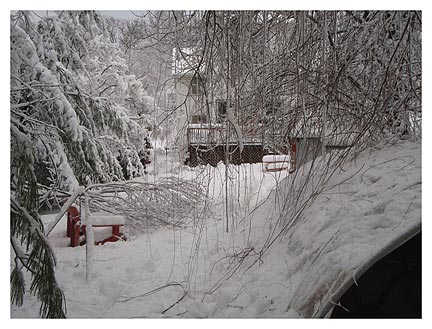
If you look over the chicken coop (building at left), there is the spikey tip of the top of our maple tree left pointing upward, and a big branch resting on the coop's roof....really, really glad it fell in the direction it did. To the right (center of the shot) is another big branch that fell in the doorway (opening) to the hoop house. It totally blocked access to the boat until I dragged it away. It doesn't look that big in the photo, but it is.....it must weigh a couple of hundred pounds, easily.
So, yeah....dodged another bullet. But we have another weather event coming in Tuesday night and I am keeping my fingers crossed.
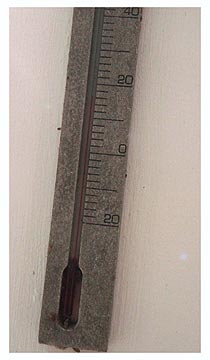
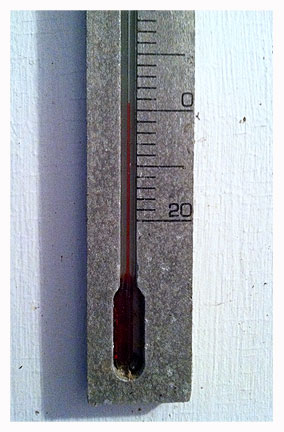
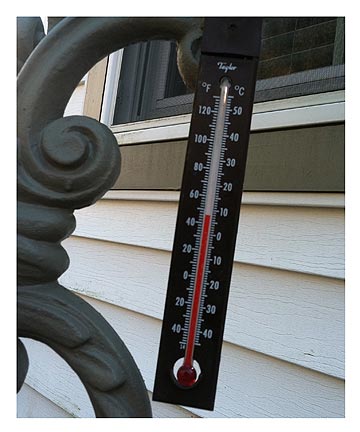
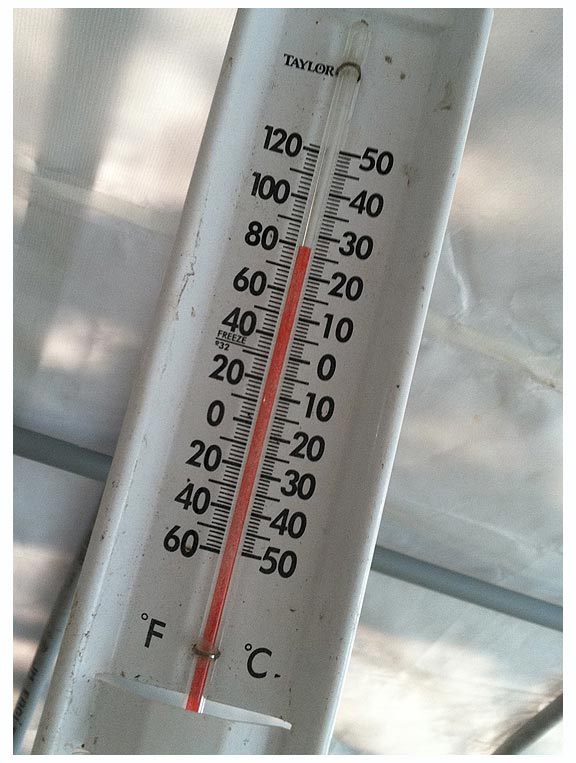
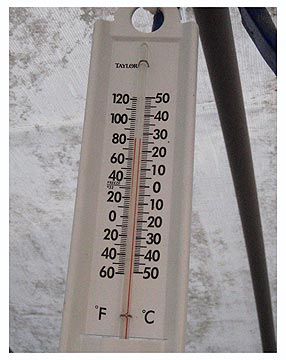
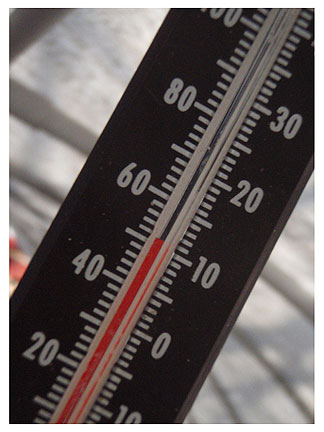
Photo below (of the thermometer) not withstanding, this is a much better shot of what this winter has been like in central Maryland. And I always thought Maryland was BELOW the Mason-Dixon line....clearly I need to get this project finished and away from the trees before next winter. I think this is nature's way of saying "hurry the hell up!"
The tarp took a hit in the aft end, tore about a 3 foot gash in the roof. Wonder how duct tape sticks in 28 degree temps?
____________________
1.09.11....Cut it Out
A day in the low 50's in late December is a good thing!
Here is the culprit. This single support beam (center of photo) makes it hard for me to mount the swivel base cam for the mainsheet...since I have decided to 86 the idea of mounting a traveler.
So, I cut it out. What was surprising was how much of a bitch it was to cut out.
I was not too thrilled with the way I had tabbed in some of these supporters, but any fears I once harbored about their robustness has been laid to rest by the sheer amount of effort it took to remove this thing. Finally the dremel took and jigsaw did the trick.
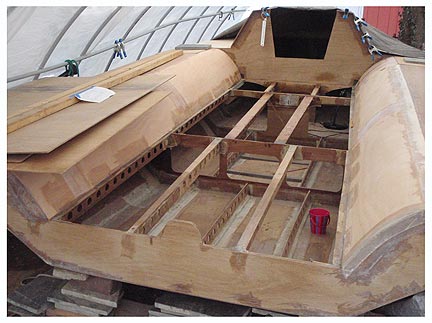
Losing the centerline support will allow me to replace it with twin beams and I will also install short beams in the 14 inch gap in the keelbox section. Should certainly be more than adequate.
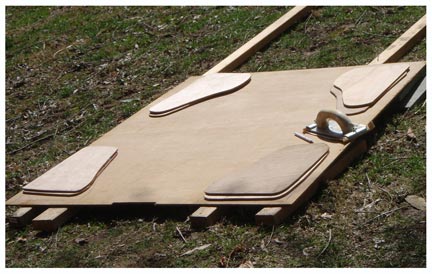
I figured building these bensons would be a snap, but it is a little trickier than I thought (what else is new). I followed one of the other blogs (sorry, can't remember who's) and used nine cable ties to fit the things together. Then I stabilzed the shape with a quick wrap of 3" 6oz tape. Once this kicked, I turned the thing over, removed the cable ties and cut little reinforcing triangles, 4 for each benson. Then I glued all these in and ran filleting bog along all the length of the benson. Next I'll cap it and wrap the cap in 6 oz tape and that should do it. A bit time consuming for a total of four of these.
-----------------------------------------------------------------------
12.27.10.... Perfromance Management Program
Seeing as how we move into a new year in a few days, I thought I'd try something completely unoriginal and take stock of how things went last year (with the boat building project). I think I can safely cut to the chase and save people the time and boredom of having to wade through a load of B.S. about the past 12 months:
In a nutshell, "expectations were not met."
Okay, you can factor in a ramped-up workload between the 2 jobs (three, if you include the wife's), some untimely weather events, a bout with The Big C and the resultant myriad appointments with the M.D.s, finally culmanating in surgery and post-surgical recovery, and then, late in the season, a fierce desire to go racing instead of building, then the icebox getting turned on as soon as December arrived, with nary a chance to screw around with resin and hardener outside the house.
It's all a bunch of excuses. The bottom line is: "expectations were not met."
So, for the next few months, my goal is to get as much done on the boat as humanly possible, given certain constraints, such as family, work and weather will permit.
In other words, I'm SOL for an early spring splash, but the water is icy in early spring, so why not shoot for May?
Speaking of icy, we dodged a bullet by just getting a dusting of snow yesterday (while the rest of the east coast got hammered) but today the winds are in the 25-35 range with puffs up to around 50, so last night I went out and put a few more ropes on the hoop house. That was fun.
I'm making 2 new holey beams in the basement. These will replace the single holey beam I have now, that is mounted on the centerline. I won't be able to install the swivel base cam cleat on the centerline the way things stand now, so later this week, when the temps go above 40, I'll cut out the existing one and if it gets to 50 F, I'll tab in the two new ones mounted off-centerline. Of course, a little more heat will be required so I'll have to bring out the "heat lamps" and just pray the 205 is quick enough to kick before the temps plummet again, as early as this coming Sunday.
I remember the good old days of Global Warming. Shooting hoops in a T-shirt in my parents driveway on Christmas Day, circa 1966. And bass fishing all day and sleeping out in a jungle hammock that evening, in early February, circa 1964 in Accomack County, VA. Times were warmer back then and I sorely miss them.
This new, little Ice Age is frostin' my cookies.
12.4.10....Tasty
Took a little time to try melting some lead last weekend. This was some lead that my friend Steamboat gave me last year from his stained glass contractor bidniz.
It is some sort of alloy and it melted really nicely. I also tried melting some of the lead shotgun shot that I had epoxy'ed into the bulb (the first bulb) and that stuff melted okay too, but the fumes from the epoxy that was getting burned off were horrific.
Man, did it stink and I have no idea what the toxicity level of those fumes is, but if the smell is any guage, I'd say the stuff is lethal. So, I'll have to deal with that somehow.
But it was nice to see how easy it is to melt the stuff and how well it pours. Also how easy it is to screw up and incur some nasty burns, so an investment in some seriously robust gloves along the lines of lacrosse or hockey gloves will be on the shopping list.
I also started messing around with the bensons, trying to figure out how high to make them. I settled on 2" high with a 2.5 inch inside and mounted on a 3 inch wide base.
Ideally, I'd like to experiment with different length people sitting legs-in to figure out the placement, but in lieu of that, I'll just take the placement of my short limbs and add maybe an inch or so. There will be footstraps anchored to the cockpit sole, too.
All this benson-making and stuff is going to have to happen indoors, as daytime highs have been hovering in the high 30's - low 40's for the last couple of weeks.
And in a classic case of bass-ackwardness, I bought a table saw from some friends who are moving. Granted, I should have done this 2 years ago, but better late than never. I've already put it to good use in cutting the material for the bensons. Voila, straight cuts! What a surprise! No more fugly, wavy edges from the jig-saw.
Huge thanks to Clint and Terry! Not only did they give me a great price, they delivered the darn thing.
And below are some photos from the weekend of Nov 20 that I posted on FakeBook® but never put on this build log for some reason having to do with braindeadedness.
11.20.10...Some photos that never got posted from Nov 20
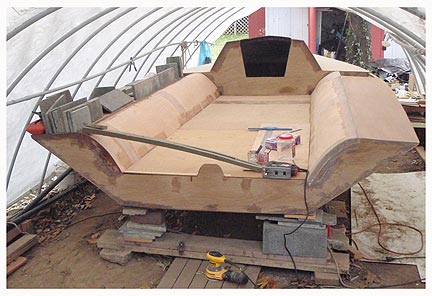
With the help of one of the Swan boys from Minnesota, I got the port side decking down. There was so much weight on that side I was worried the boat would flip. The thing that looks like a tiller is just putting a little weight on the curvy plyood to get it to conform well with the decking added.

Starboard deck with some pox/microballoon faring added to smooth the transition.
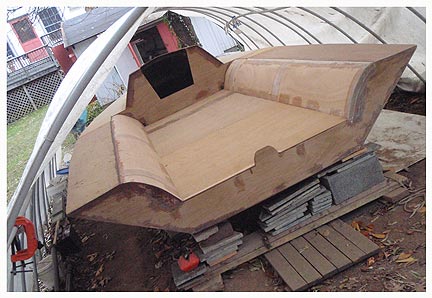
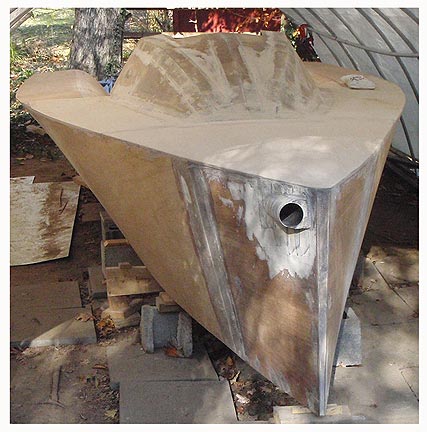
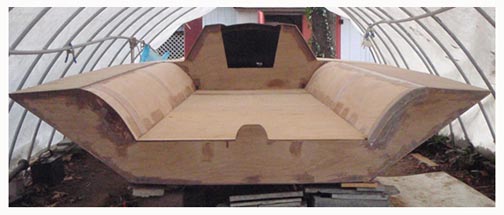
so, yah...it's getting there!
11.14.10......Hectic World
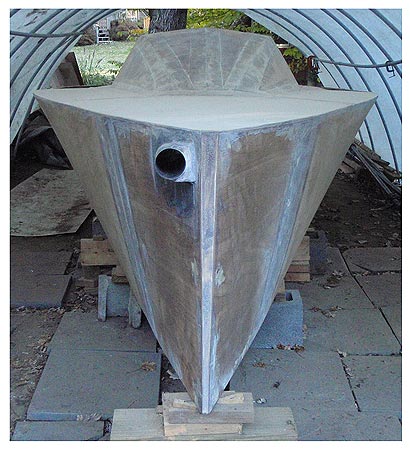
Life has been crazoid and I have had no time to make entries in this BuildaBlog, but I have been able to squirrel away a few boat-building days and have gotten a surprising amount of work done in the last 4 - 5 weeks.
Biggest gain: NO MORE CABLE TIES!
Yep, everything is getting glued down and I'm almost done with all the decking. The cockpit sole may take a little longer, because I am still not dead set on the hardware placement scheme.
This coming weekend has promising weather in the glue-kick zone (great November so far, I have been very, very lucky in that regard). So, my goal is to have the thing completely decked over by Nov. 21.
I had definitely underestimated how much more stuff I had to take care of, aft of frame 108, before decking over the boat. This included, but was not limited to: a huge amount of clear-coating, taping in all of the curvy-bench supports (this was hugely time-consuming), sanding down the sloppy left-over crap I'd compiled when tabbing in the deck supports, more clear-coating and more and more sanding and fairing to get the decks to lay flat and ripple-free.
I also had to decide on a deck plan for hardware placement and where I'd want to reinforce the deck with an additional laminate of meranti 1088.
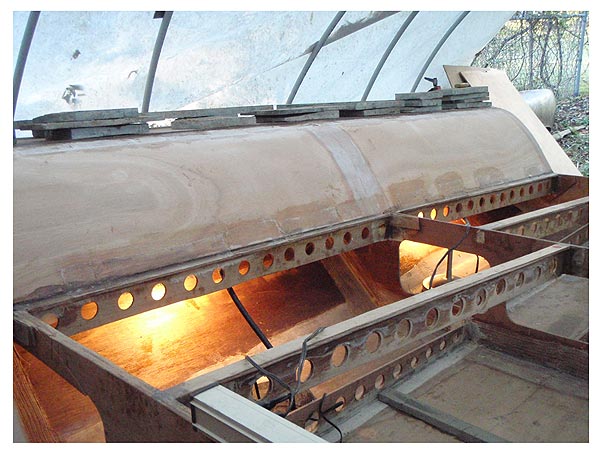
Okay, it is November, afterall, in the Northern Hemi, so after 3 pm or so, the temps start to plummet in our particular little holler' here in NW Ruxton ("North Rukkastan," in the great state of "Absurdistan"). A couple of 75-watt bulbs does a good job of helping glue to kick, at least for now.
Under the curvy benchs are a few miles worth of taping that had to be done, plus clear-coating some of the harder to reach beams was a royal pain in the posterior.
Also in the photo, at the bottom right side, is one of the strips of Coosa-composite that I have been sticking to the bottom in places where it will, hopefully, lessen the likelihood of oil-canning under load. Debating on whether to tab them in with some 6 oz tape or just go with the pox/406 mixture that has them glued to the bottom panels.
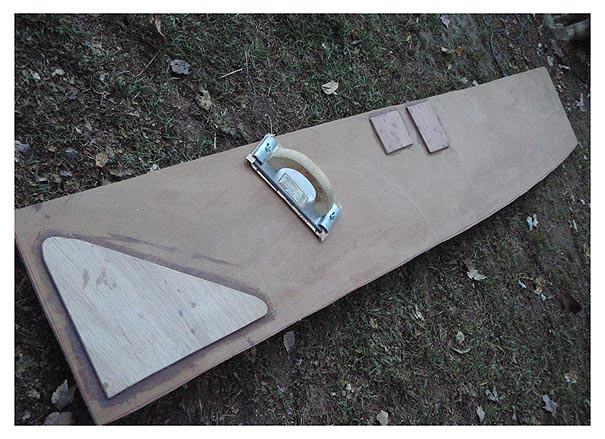
Speaking of pox/406 mix, I just glued these reinforcement laminates on the underside of the deck, with the full expectation that they will all be in the wrong places when I go to install some hardware. Is that being a pessimist or a realist? Hard to tell these days....
The good news is that when these got flipped and fitted to the proper places on the boat, they slid right in. So a bit of a victory there.
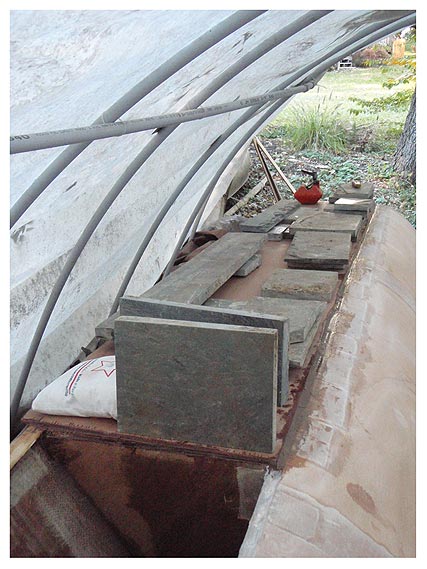
And this is the scene a few minutes later after wet-fitting the deck panel in place. Considering some of the goof-ups that had gone on earlier, I was surprised at how well this thing fit together. It is still going to take a lot of fairing though. But that's something I can plug away at in colder weather once I get a layer of faring pox on top...hopefully there will be one or two days with highs in the 60's to accomplish that. If not there's always the heating tent.
Of course, I'd rather be much farther along than this, but given a few of the continguencies that came along this year, I'm very psyched to be at the point where it is getting decked over and forming something that can rightfully be called a boat.
We still haven't figured out a name for this thing. That concrete lion has been a fixture in this whole endeavor, performing a variety of useful tasks. There is still a lot to get done on this project, so no real level of urgency with the name but it will necessitate a deadline eventually and besides, not having a name is starting to grate on some people's nerves though. Gotta get going on that.
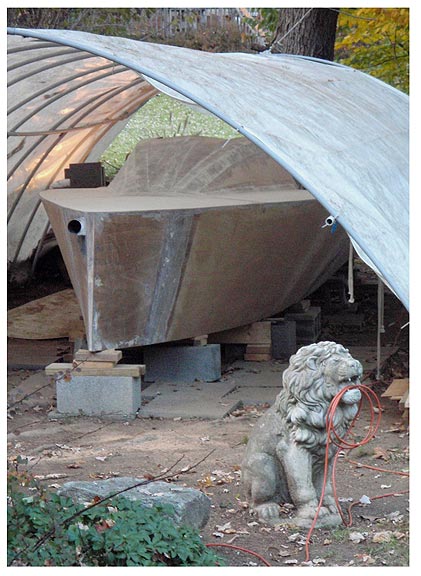
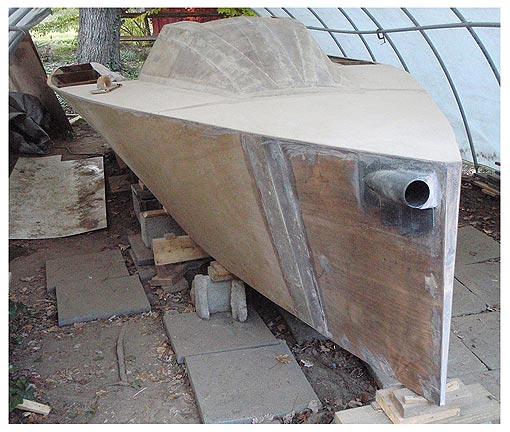
11.08.10....Deck Down
Below, is the boat, lit up from within, as the glue kicks, or tries to, in some cooler early evening temperatures. The foredeck got glued on this weekend and the house got some seams taped in. The whole structure forward of frame 108 is now in place, and there are only a few cable ties remaining in the coach roof. I hope to get them out soon and be a cable-tie free project. Of course, air temperature is a real constraint these days, but things have been a little milder after an initial blast of winter air went through a week or so ago.
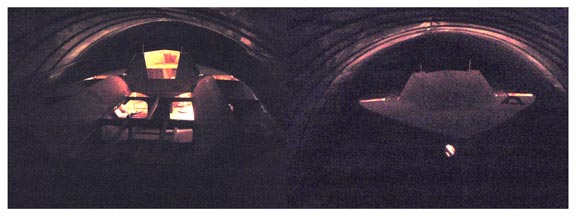
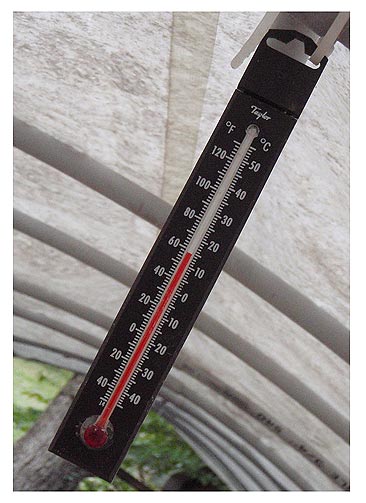
Big help here, at 11:00 a.m., as the 60 degree threshold looks like a dead cert. One more small distraction is glueing in some coosa strips as a hedge against oil-canning. This is aft of frame 168.
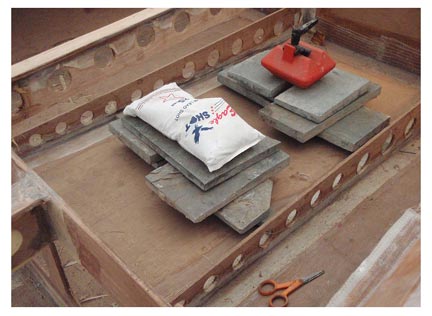
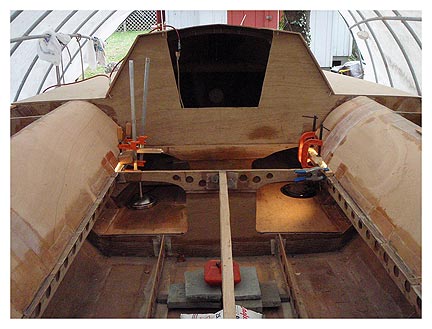
The biggest issue I have now is finishing up tabbing in all the support structure to the undersides (outboard sides) of the curvy benches. I had done enough to get these held firmly in place, but not enough to be anywhere near secure and done. Plus the material needs to be clear-coated in some of the small areas where there is not fiberglass cloth on the undersides.
I hate to say this but, in all actuality, I sorta wish I had stayed with the cockpit arrangement that was specified in the plan set....it would've been a heckuva lot easier to build. I hope the payoff in terms of aesthetics and comfort is worth all the extra effort.
10.10.10....Short Days, Shorter Time
Man, it's getting cold and early, too. Temps in the Build Hut, in the morning hours, slowly climb out of the 50's. I was lucky to get a Sunday that saw temps near 80. It's clear I either need to get a heating system going this fall or live with the potential of an early summer splash instead of a mid-spring splash (at least the water temps will be survivable in early summer!) Anyway, here is the progress so far:
Still working on the keelbox, I got a chance to cut the inside of the top to the outer dimensions of the keel sleeve. The Dremel tool was huge in doing this. I put off buying a dremel tool for way too long. Probably the same thing with a Fein multi-tool, but I don't have the bucks for that now. The dremel I could swing. Wish I had just plunked down the bucks back in 2009 when I got rolling with this project. The top is made from three 6mm sections of 1088 Meranti glued together and laminated with one helluva lot of weight placed on top of it for 48 hrs.
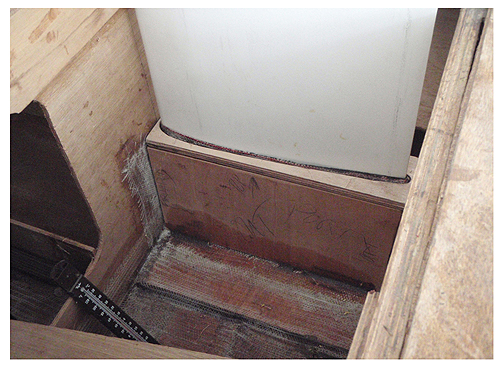
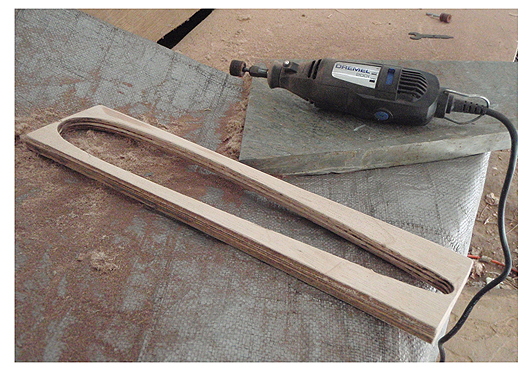
I'm mostly using some 4 inch wide 7.5 oz X 7.5 oz biax to get this thing anchored in. I highly recommend this product that I got through Jamestown (link above). It is unusually soft and plyable and it conforms easily to nasty, cramped configurations and it's bullet proof when wetted out properly (again, don't ask me how I know....I think it was Ron in Iceboxland who said "it isn't a mistake if you can tear it out and fix it"). I'm also doing as much as possible in this area with the keel actually seated in the sleeve. This is to avoid any surprises, like the sleeve inadvertantly compressing and then the keel foil not fitting when push comes to shove. So, for awhile, the foil lived in the boat. Then after the glue kicked, I did the final dry fitting of the berth panels and also ground down the sleeve to the be flush with the top of the box. It's gray from the graphite dust in the picture at right, below.
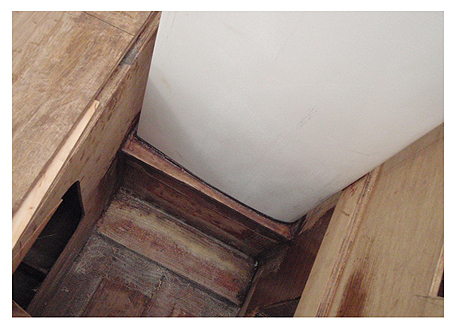
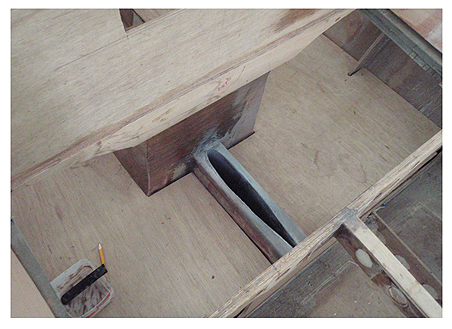
Now the berths are 75% glassed in and hopefully, this coming weekend, I'll have that job 100% completed, depending on how warm it gets and if I can tear myself away from the Ravens-Pats game. Eventually, the entire keelbox will have another layer (box) around it that extends to the underside of the deck. This will be a water-tight box, with a hatch at the top, that will be removable in order to be able to lift the keel for launching, trailering, etc.

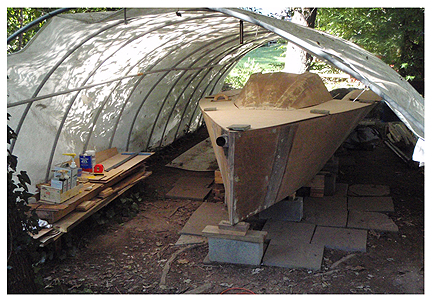
10.4.10.....Looks sorta like a boat
Got a lot of dry-fitting done in a very limited work period this weekend. Starting to look like something that might, one day, float.
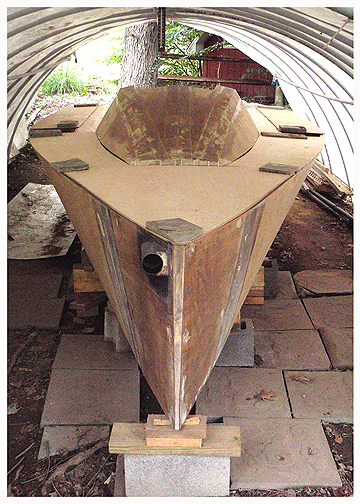

Once I get the keelbox and berths dealt with, I'll begin getting everything aft of the companionway permanently stuck.
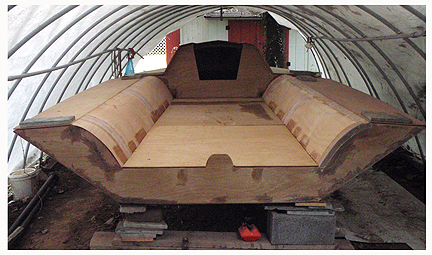
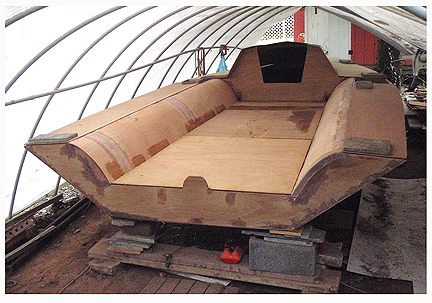
I still have a ways to go on the keel box though!
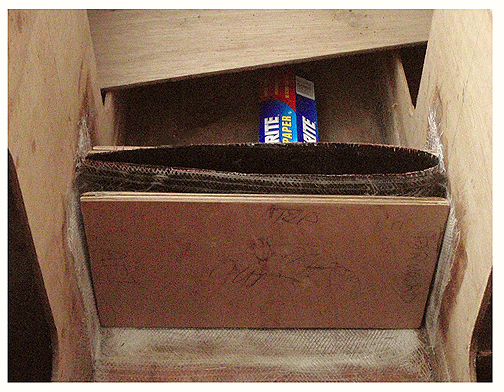
9.19.10.......More of the Same
Spent most of the weekend continuing on with the keel box sleeve and keel box. My goal is to have this thing lying in a landfill somewhere, 80 years from now, with the boat completely rotted away yet with an intact keelbox that looks as good then as it will in a few weeks.
I mean, this thing should be rock-solid. Too many "lost keel" stories as of late.
Also I have been gradually tabbing in the curvy seats and dry-fitting deck panels and tweaking other areas to get them optimized for "closing up" the boat, e.g., putting all the decking on. This also calls for a lot of clear-coating anything underneath.
In essence, as of late I am walking around with a punch-list: things to do before the decks go on and this means going over the stuff I did inexpertly 2 years ago and making sure everything is going to be A-OK when the water meets the chines....in other words, making damn sure the thing won't sink............hopefully.
(below) The foredeck is shimmed up off the sheer clamp because I've glued in a little more carbon fiber cloth to anchor the prod receiver tube a bit more heartily. Another fear I have is the prod skying in a 25 kn puff and ripping the foredeck off the boat....so being more paranoid than most I have the frame 18 pretty well slathered in CF cloth. And I'm going with another layer of CF cloth on the topsides, above and surrounding what's visible around the exterior portion of the tube.
If my build comes in at 1,200 lbs., we'll know why (I don't think it will, though).
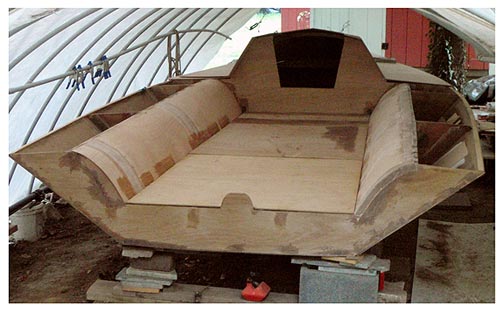
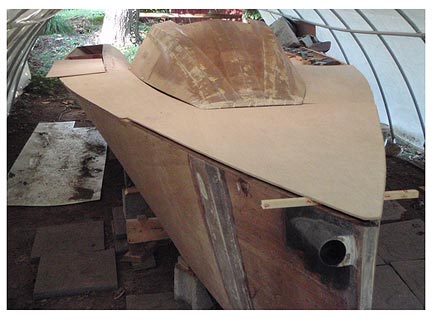
_________________________________
8.31.10 - 9.6.10....Back to School, Weak
Finally, after 4 weeks, I can lift more than 10 pounds. So, I recently got back into doing some of the things I couldn't do in August because of the weight lifting ban. Item number one on my priority list: build the darn keelbox. But first, I needed to figure out a way to get it fitted in place so that the keel hangs straight down, not canted or twisted off to one side. Easier said than done.
I took a ton of measurements and hung some weight from a line, plumb-bob style, to ensure the thing was "true," but the bottom line is: my wife and I did the final placement by eye-balling it. I have a good eye, but the wife is like a human laser-level. So here are some shots of it in place while the keel sleeve gets glued in around it. Works for me!
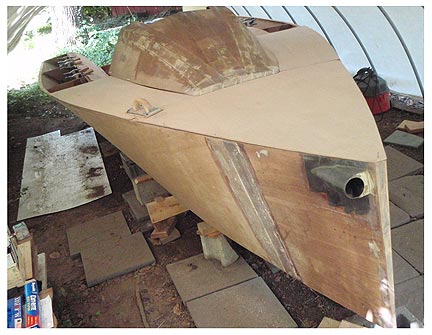
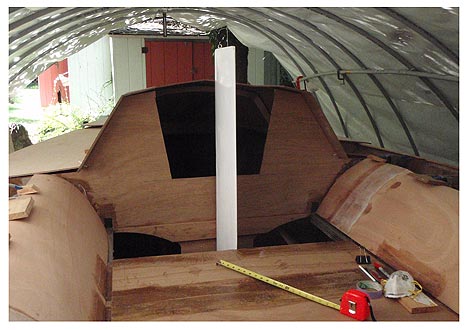
Also, above and below, left, are some of the dry-fitted decking panels. This is the exciting part of the build, as far as I'm concerned. I also chopped a bit more out of the companionway, which makes it a lot easier to duck below. Still a bit tight, though.
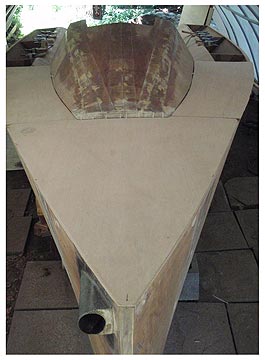
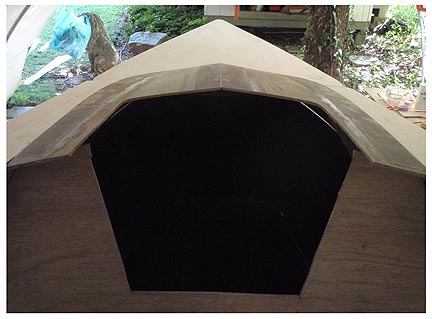
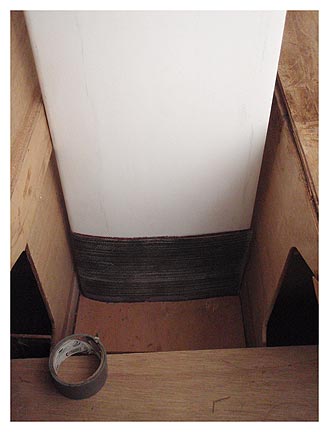
Here's the keel inserted into the sleeve and serving as the defining element to install the sleeve/keelbox straight, plumb and true. It's upside down of course. And yes, I did make sure the sleeve slides equally as well right side up or upside down.
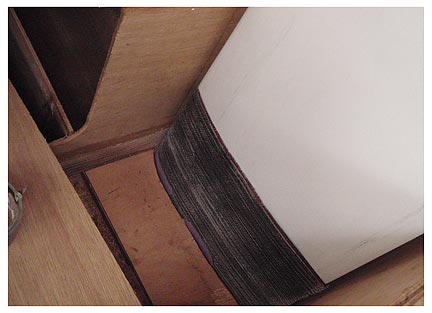
Shots below show the keel foil in terms of its relative perpendicularity to the deck, waterline, hull bottom, etc. I think it's pretty damn straight. The camera might involve a little bit of a paralex issue, so if the lines in the photos don't all support perfect alignment, it might be due to the fact that it is almost impossible to get perfect 90 degree registration in an X,Y,Z orientation with a point and shoot camera the size of a cigarette pack!
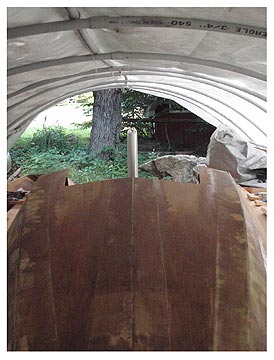

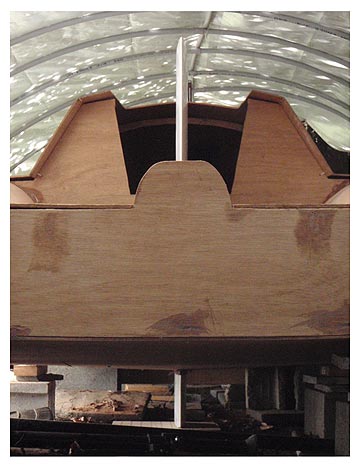
__________________
8.25.10....Inside Slider
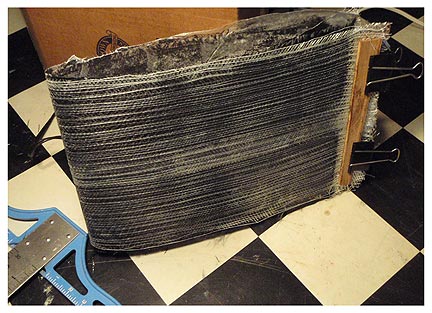
Finally finished the layup of my keelbox sleeve. The sked was:
- one layer of 10 oz e-glass with a hearty graphite component mixed in
- one layer of 6 oz CF twill over the 10 oz.
- one layer (slightly overlapped in center) of 9 oz biax over the CF
Here it is just after I popped it off the plug, still ragged. It came off pretty easily.
Below, here it is cleaned up a bit. The best news is that it slides easily (right) and yet fits snuggly!

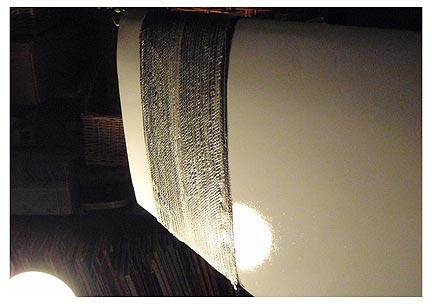
Next task is to build the keelbox.
________________________
8.22.10....Back in the Battle
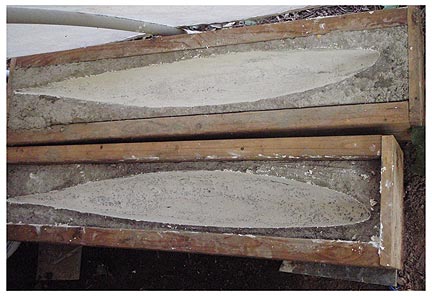
Able to do a few things now as long as I don't lift anything over 10 lbs. Yeah, right.
So, thanks to my helpful kids, we dragged the second mold under cover and I was able to further fair the forms by loading the inside up with mud (dry wall compound) and smoothing it out pretty nicely. This was on the advice of Chad, of the Mission Viejo build.
Was also able to finish the 3rd coat of Brightside on the keel foil and start building the sleeve for the keel box. The first layer is 10 oz. e-glass with a lot of West Graphite added into the pox mix. Maybe a little too much, in fact.
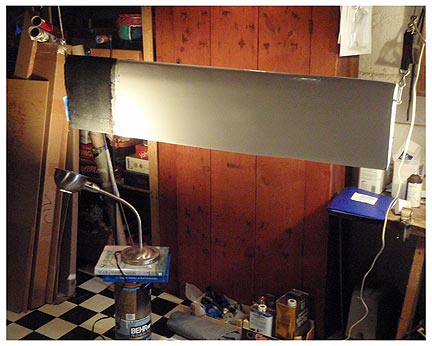
I made the sleeve layup approx 9.5 inches wide, but this will get cut down to 8.25 inches. I have learned the hard way to make things larger than spec'ed and then cut it down to the proper dimensions.
It may look like carbon fiber, but it isn't...at least not yet. A couple layers of 6 oz. CF twill will go on over this layer of 10 ox. e.
I just hope the damn thing will slide off o.k.!
----------------------------------
7.31.10....Layoff Notice
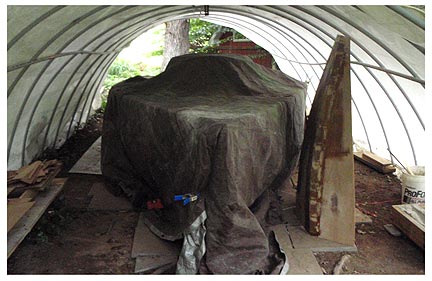
Put the tarps on for a few weeks while I recooperate from the effects of robotic laparoscopy. I should be back in the build shed by late August. This is going to further retard my progress in a month when I had high hopes of getting a lot done. Such is life.
As a swan song before wrapping things up, I was able to get the final coat of Interlux PrimeKote on the keel foil, sand it and prep it for a coat of Brightside. I put the Brightside on yesterday and it looks pretty good. My foil is by no means "perfect," but for an amateur builder I think it's not too shabby. Two more coats of Brightside and then I can take the foil inside and use it as a plug for the keel box.
I also completely taped the house, which needs to go on soon!
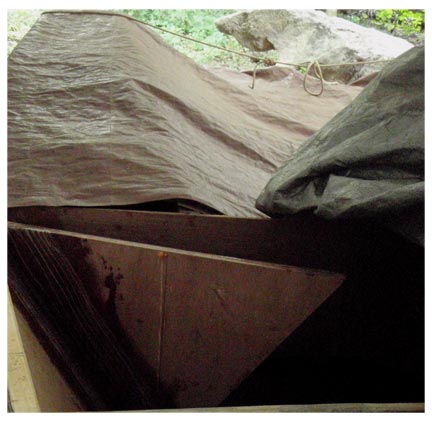
I also got the chainplate gussets taped in. This is a good feeling, having them in. It took some ingenuity. But the real help was having my daughter hold the gussets in position to get them clamped in place for the fillet and taping....there are some times when you just cannot function efficiently as a single-handed builder.
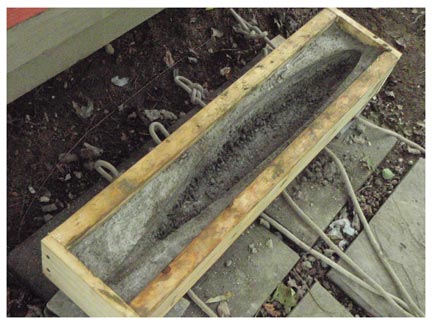
Lastly, I cast the other side of the bulb in concrete. This one didn't go quite as well as the first. I bought the concrete from Home Depot and they stock "Sakrete." Then for this one, I went to Lowes (having decided a few months ago to boycott Home Depot...long story). Lowes stocks "Quikrete."
Strictly anecdotal, but I found Sakrete to be a better product for this application. I have no idea why, most likely it was probably more based on my technique than any huge difference between products, but the Sakrete seemed to have conformed more closely to the shape of the plug.
The dark band on the bottom on the left side of the mold is a very rough, porous section where small rocks and lack of sandy filler left significant voids in the Quikrete. I did not get this effect with the Sakrete. Again, it might have been related to operator error, but I thought I was pretty consistent with the way I performed both castings in terms of methodology.
I'll try to fair out the rough areas with some Sakrete devoid of pebbles.
_______________________________
7.4.10....Misc. Fourth of July Projects
One good thing about the i550 build is, as soon as you get sick of working on one part of the project, you can switch to something else. I guess that's a good thing. For someone as A.D.D. as I am, it's a great thing.
I decided I had had enough of the tabbing for awhile and with temps in the build-shed hanging in there at about 94 degrees, it was time to start screwing around with some other component of the boat...so I recycled the forms that I had built a few weeks ago, for sand-casting the bulb, and converted them to concrete forms.
I followed Chad McNeely's advice about casting the bulb in 'crete (after all, it is his plug) and things went surprising well. I was low on Saran Wrap® so it was maybe a little tougher than it should have been to remove the plug, once the concrete had set-up. But, after some initial digging and chipping, the thing more or less popped out and I have a pretty fair female mold!
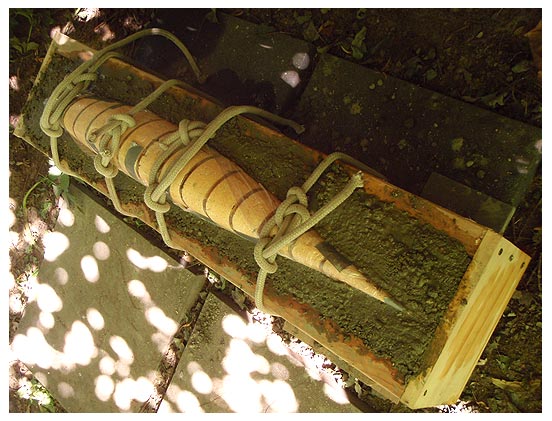
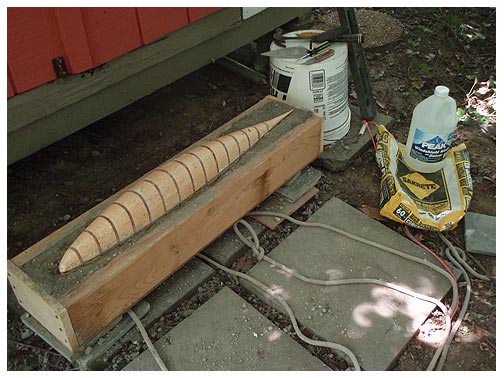
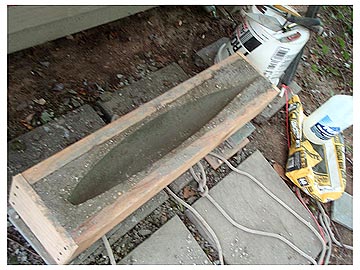
Happy to report that the plug survived pretty much intact but will need a tiny bit of repair before anyone else uses it. A skim coat of pox and Microlight 410 ought to do it.
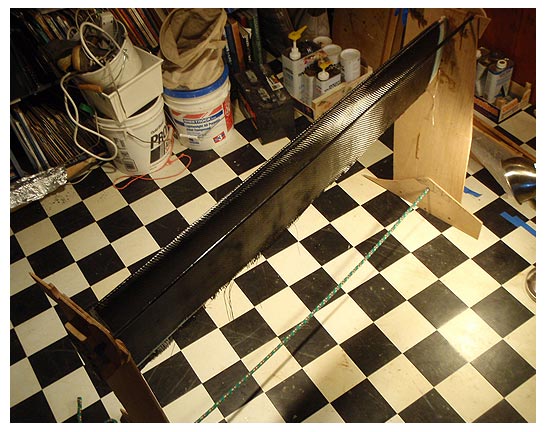
On another front, got the next layer of the sked on the rudder.
There was a bit of a CF with the carbon fiber cloth, but as this was the first time I have ever messed with a piece of carbon fiber this large (50" x 36"), all-in-all it went rather well.
What I learned: make sure you use a few inches more on both sides of a two-sided layup and mark the centerline very well with something that will show up on the CF cloth.
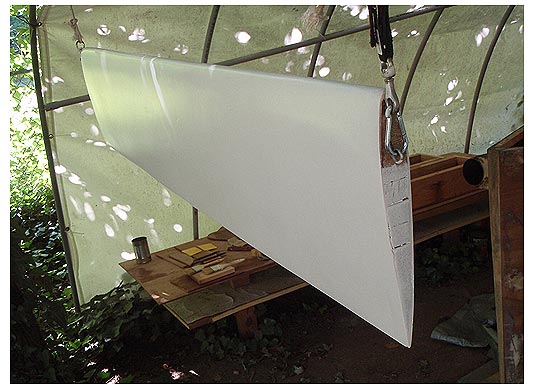
Another coat of Interlux PrimeKote on the keel foil.
Organic respirator, Tyvek® suit, & nitrile gloves make it a challenge when applying this stuff in 98 degree temps. My glasses kept sliding off my sweaty nose and face.
Good fun!
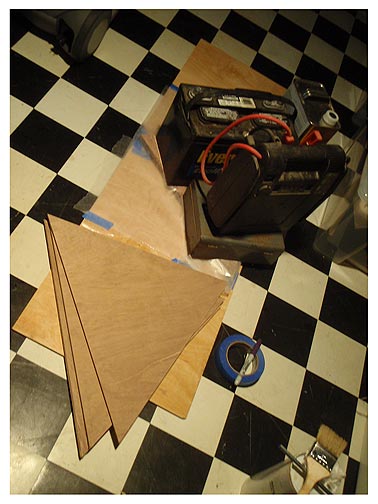
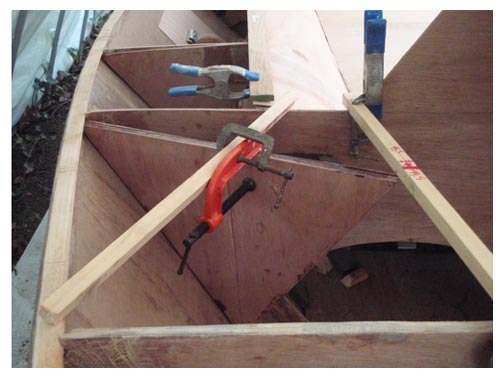
Last on the agenda was to laminate the chainplate gussets (three 6mm plywood triangles) and get them fitted in between frames 89 and 108.
Kevin McD's drawing (available on the Class website) is spot-on and the forward edge of the starboard gusset lines up perfectly at 99.5"
Busy weekend! Lots done.
6.20.20......GOOOOOOOOAAAAAAAALLLLLLLLL!!!!!
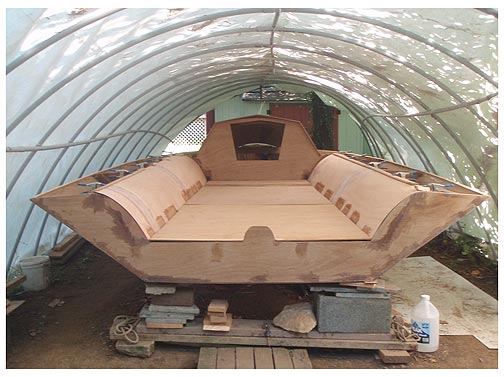
Well, three of them actually. 3 goals.
I left work on Friday with a list of three things I wanted to get done this weekend.
1) finish the last of 96 tabs.
2) get the prod receiver tube mounted completely
3) paint the keel foil.
Pretty much suceeded with the first 2. Late Sat. p.m. I finally laid the last tab for the cockpit structure. Man, that was a good feeling. I went in and made a drink. But I had to drive somewhere right away so I didn't get far into that drink. Such is life.
I also used a bunch of CF tape to finish mounting the prod receiver. It isn't beautiful but I don't think that tube is going anywhere soon. All I need to do now is sand off that raggedy aft edge, buy and install an inspection port for frame 18 and I can do some decking on the pointy end. I can put backing plates on the stem for any hardware that gets mounted later, headstay fitting, padeye for trailering, what-have-you, through the inspection port (I am hoping...there's a question for the class forum).
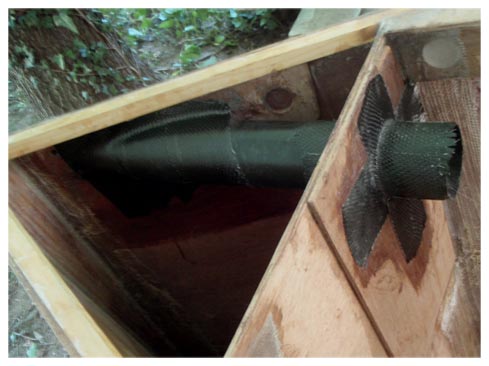
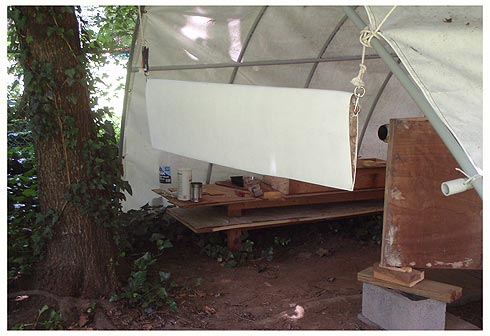
The last thing I had on my list (the "get-real list" not the "fantasy list") was to get the keel foil painted. I did not succeed in getting it all done, but I scored a little moral victory by plunging in to the 2-part, epoxy paint world without ending up in the ER from the paint fumes.
I don't like this stuff, to put it bluntly. I remember using some Interlux 2000e on some past keelboats I owned, back in the day, but I do not remember taking all the respiratory precautions that are necessary with these paints. But anyway, I suited up, organic respirator, 3 pairs of gloves, longsleeve shirt, long pants, (did I mention today's high was 92 F.?) and dove into the mixing task. 3 parts Paint, 1 part hardener, 1 part 2333n, and started rolling this crap on with a 6 inch high-density foam roller. It went on like a charm. The coat is light, but the coverage is consistent. It kicked and was dry to the touch in 1.5 hours (again, 88 degrees just outside the build-shed in the picture, above.).
So next is to sand it and do two more light coats. Then the Brightside. Finally when all this cures, I can wrap it and build the sleeve for the keelbox, which is the rate-limiting factor on a lot of the "inside" chores, like glueing in the bunks, etc.
Hotter'n hell in this get-up, but necessary.
One of the product reviews on the Jamestown site for this stuff (Interlux Primekote) mentions how bad the smell is.
First off, you really shouldn't be smelling this stuff. Your organic respirator should be trapping the malodorous volatiles. But I read somewhere this week that the masks only get about 90% of the bad compunds. Which means you better have some decent ventilation. I worked outside in a light and variable breeze.
Frankly, I wish there had been more breeze (where have we heard that?) and from a constant direction. As it was, I could never really get upwind of the fumes because of the constant shifts in the light breeze.
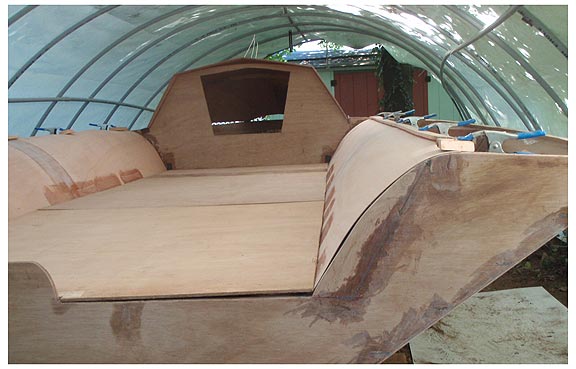
With keel foil drying and the resultant paint fumes just forward of the bow stem, the progress on mounting the cockpit sides was slow. But I got a few "anchors" in on both sides, these are strips of 3 inch tape that secure the bendable plywood against the bottom support....serves as a clamp. I can now go in and clear coat the panel and get it tabbed into some of the supports on the inside..should be pretty solid when done with some CF skin on the bendy panels.
6.16.10.....Wide body
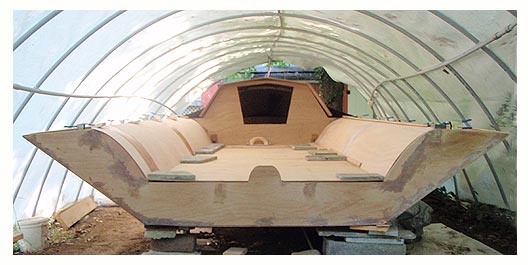
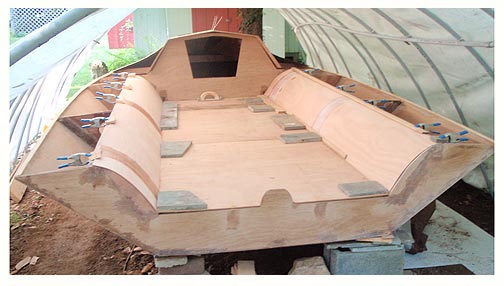
Cockpit sides are dry-fitted and ready to be tabbed in. Progress!
6.14.10......And You'll Start Cryin', 96 Tears
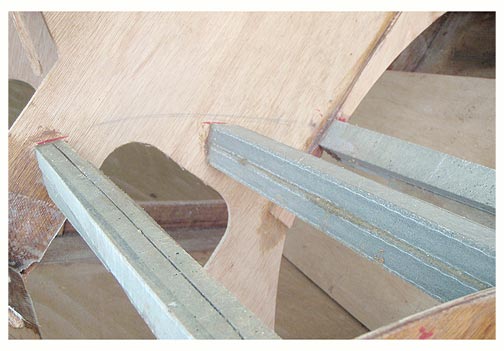
Oops I mean 96 tabs, not the oldie 96 Tears, by Question Mark and The Mysterians. Just a giant buttload of tabs to get done before the cockpit sides and everything else can go on.
24 support beams, with 2 tags on each end, that ends up being 96 of the pesky tabs, each varying slightly in tape width and length...makes production work a little difficult.
I have been plugging away at this chore for what seems like weeks and I think I may have just another 6 or 7 left. Hallelujah.
Seriously.
Totally burnt out from the tabbing, I moved forward to get the prod receiver tube properly supported and honkered down in the forepeak. I used a bunch of CF tape, can't remember the weight of this stuff but it's heavy. I probably overdosed the CF tape with epoxy because of my, at this point, profound inexperience with working with carbon fiber, but I squeegee'ed the heck out of it with one of West's yellow squeegees and I think I got a pretty good layup. Everytime I work with this stuff it makes me more amazed at the work the pros like Hall and C-Tech do with this material. I know they have the expertise and tooling but still, I feel like a total hack whenever I do a CF layup. Nonetheless, this one turned out OK, or good enough for me.
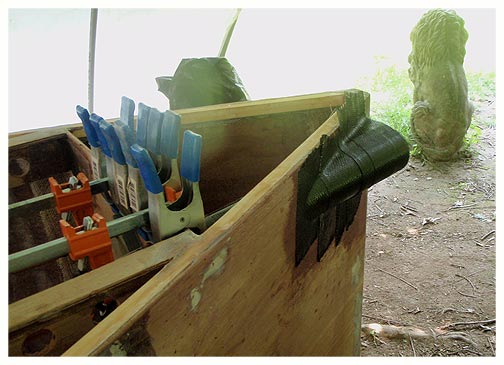
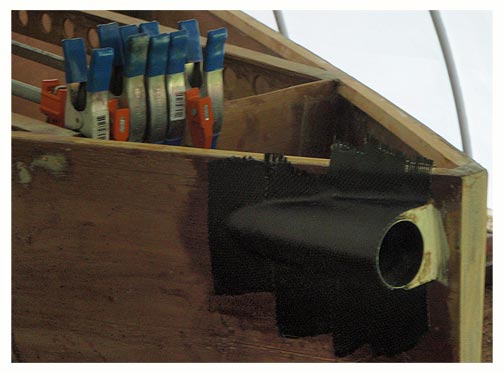
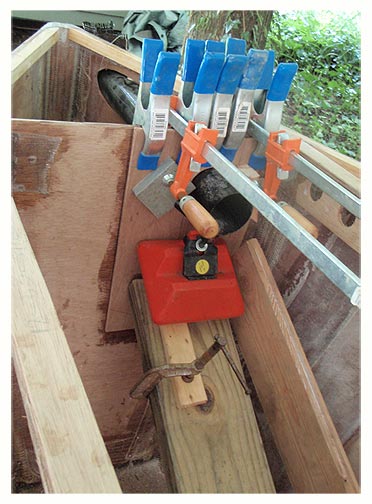
On the aft side of frame 18 I cut another piece of ply and layed that up to beef up that section that will be mainly receiving a compression load (downward). I will lay on some more tape and tab in the reinforcement with some 9 oz. biax. I want to keep this section light but also want more than adequate reinforcement, so it's a bit of crap shoot with how much material to add. I wish I'd seen more about how people reinforced their receiver tubes, but I was too lazy to search the blogs. If anyone has any advice feel free to chime in at the email address shown above.
I also picked up a couple bags of Sakrete this weekend and will start on the bulb molds asap.
No shortage of stuff to do, at this point in time. I gotta make some serious progress in the next 6 weeks, before I go under the robotic knife.
Uh...make that knives.
5.31.10......Silicon Dioxide Blues
The hell with sand. I'm going with cement.
5.30.10.....Speed it up, Dude
So, umpty ump doctor's visits and stuff out of the way (see 5.28.10), I got a chance to ride herd on the project for a couple days this weekend.
First priority was to get going with the revived bulb cast. Chad McNeely out in Mission V, CA sent me the plug that he had made and already used on his casting. It's a really great goddam plug as you can plainly see from the pix. I have to send it on to another builder and I'm running behind sked, so I knew it was time to get going on this.
This is where good friends come in handy. My man Garry, already mentioned in this Build Log once or twice, came through with an idea (and the materials) to do a sand casting. I don't know squat about casting stuff, but Garry is a wiz. In fact, there is little on this planet that Garry doesn't know how to do. I have been blessed by having him as a friend and I don't think I would have even started this boatbuilding project, were it not for knowing he would count as a resource, knowledge base and moral supporter (as opposed to an athletic supporter).
So, I built the form...here is the photo sequence:
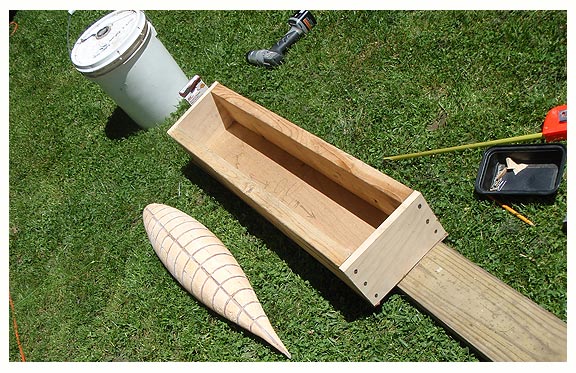
I built one form out of 2x6 and some 1x6 and used some scrap meranti 6mm for the floor.

Next, I sprinkled some loose sand to cover the floor to about an inch, then I pushed the plug down into it hard and seated it well in the sand.
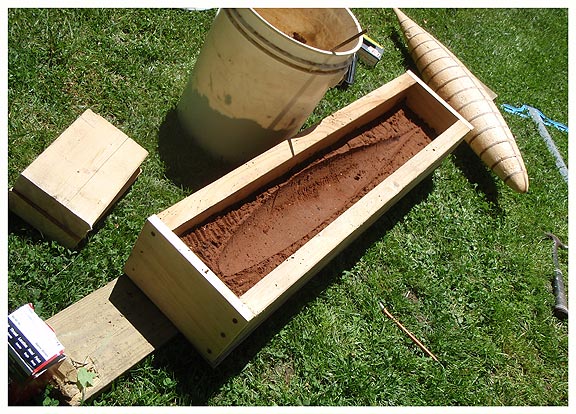
Finally, I covered the plug in sand well past the mid-line and pounded that crap down hard with a various instruments to get it to seat compacted against the plug.
Then I pulled the plug.
The resulting impression was not too shabby considering it was my first attempt. The problem was, it ate up most of my sand and I also have to cast the mirror-image of the plug.
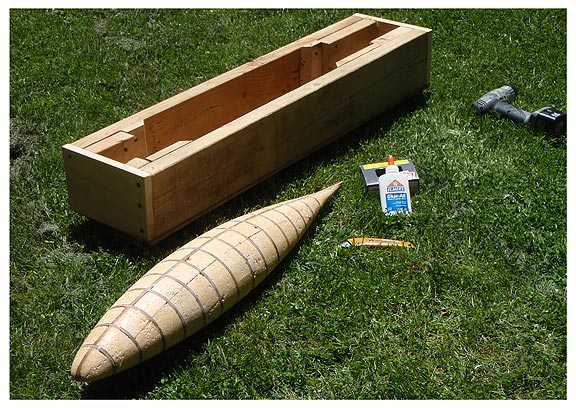
So, I decided to rebuild the form by adding a boatload of scrap lumber as spacers, thereby vastly reducing the amount of sand needed to fill the entire form.
I should be able to get two forms out of the amount of casting sand that I have on hand.
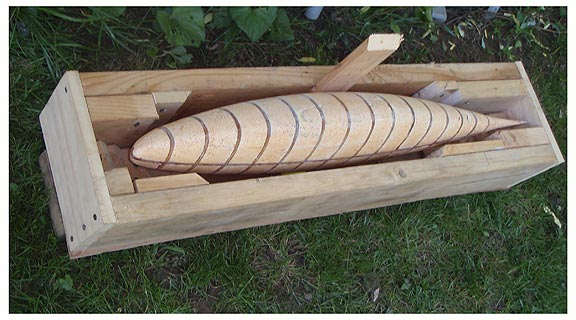
Now I just hope I left enough room to tamp down the sand adequately.
This whole project I seem to come up just a tad short of materials from time to time...see my comments on the curvy cockpit, below.
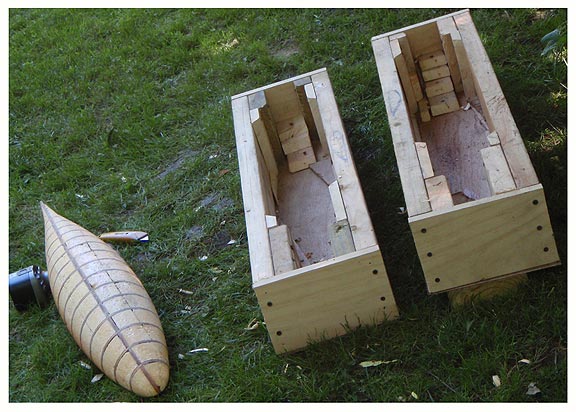
Two forms ready to rock.
I also kept at it on the cockpit time-sink both today and yesterday, e.g., tabbing in the support structures. I am enthused to say that I am almost to the point where I can start glassing in the ultra-thin plywood panels to build the seating. I did a dry fit late this afternoon and am happy with the way things are turning out. I must say that, as mentioned above, this would be easier if I had been smart enough to order the plywood from Bolter cut into 20 or 24"strips, but I ordered 16" ......which is going to be OK, but another 2 or 4 inches on the bent panels would have been nice. Such is life.
I also cut some pieces to fill in those nasty looking cut-outs in the transom that were there from my first, aborted, attempt at the seats. Not sure why, but those things were a high source of annoyance whenever I walked behind the boat. So they are gone, finally.
You can scroll down to 5.11.10 to see how ugly they looked.
____________________________
5.28.10.....Slow it Down, Hombre
I got the diagnosis that I have prostate cancer on Monday this week. That was 10 days after a biopsy I had on the 14th. The biopsy left me feeling a little dicey as I had some obligations just after the procedure and probably did way too much too soon, including a pretty hectic trip to NY and back.
So, since the 11th, I haven't done too much, just tabbed in a few more of the cockpit supports and stringers. Made a little more progress today, in fact.
Yesterday, I picked up a 5 gallon pail of casting sand that my good buddy Garry had left over from a project. This weekend I plan to build the form for the bulb-casting process. I want to get the molds done ASAP so that I can send the bulb on to the next builder in line. Build a box, pour in some sand, place the bulb plug half-way down in the sand, pour some more sand around the plug, tamp it down real hard and then repeat the process for the mirror-image other side.
How the hell tough can that be?
5.11.10.....More On
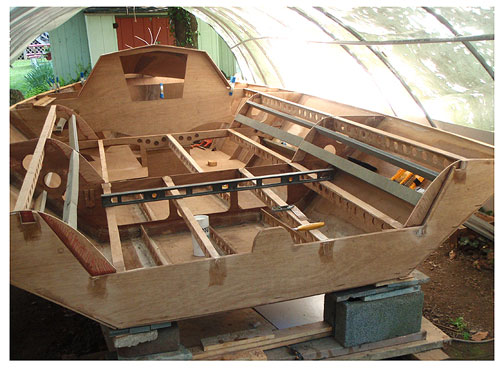
I made a bit more headway this past weekend. Doing the voluptuous cockpit meant tearing out some things and re-routing the supports and stringers. I got 16 of the 18 new supports cut and dry fitted (they might not look completely straight in these shots b/c they are not tabbed in yet). Then I got a bunch of the new supports glued in (straight) so that I can remove the brads that are holding them in place prior to being tabbed. I used a combination of the holey beams and 3/4 inch Coosa-composite. With the coosa, I cut it into 2.5 - 3 inch wide strips and mounted one set wide-side out, as a large surface to which the bendable ply will adhere, and then, above it, I rotated another set of strips 90 degrees to provide a support that is more resistant to bending inward. We'll see how it works out.
The port side, lower, wide-section-out sets are not yet dry-fitted in the pix above.
Assuming one day it will actually get into the mid or upper 60's, I'm going to have a tab-fest and get all of these tabbed in properly, then start bending the ply into the eventual shapes. But the weather has got to cooperate...it is mid-May for cryin' out loud.
This persistent Global Cooling is a pain in the rear.
------------------------------------
5.05.10.....Back in Biz
Well, sort of.
Finally got paroled from Solitary Work Confinement, and got the cover off the i550. It had been almost exactly a month since I had the tarps off. All I got done was: cut the cockpit sole panels down to fit the new curvu-licious frames and took some pix so that I could figure out how I would ultimately run stringers and supports and stuff.
If I ever get some days off work (scheduled for some this week, but that got scrapped real quick) I'll glue in all those orange and purple supports and then start to bend on the sides to the cockpit benches. Weather permitting.
So that's it. For now.
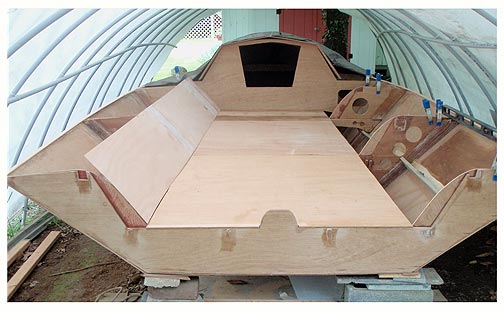
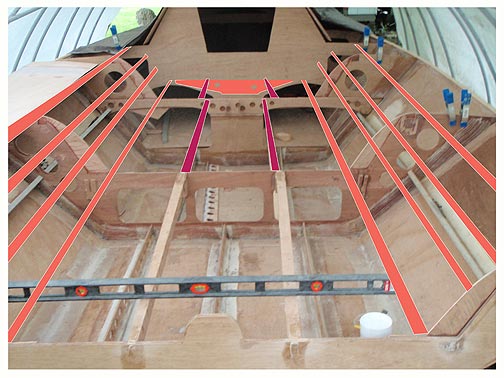
4.22.10.....Update: no update
I've been creamed by work, more work, and then some more work. No building for me. (okay, there were two consecutive weekends of sailing, but it's basically work that's keeping me away from the Build Shed...& some cold weather, too).
I plan to be back in the shed this Sunday....hoping it's 80 degrees.
4.04.10....If 6 Turned Out to be Nine, I Don't Mind.
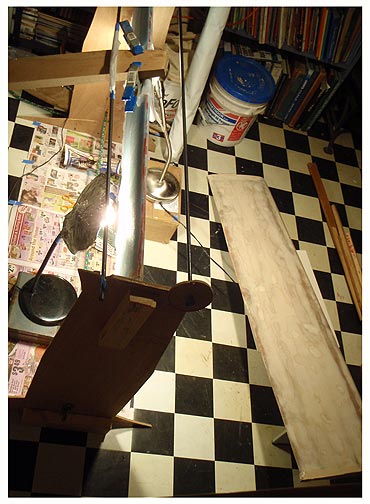
Got a few things done in the last couple days.
Put another layer on the blue foamy foil. This was a layer of 9 oz. E-glass. Went on pretty well, no issues.
If you are wondering why that piece of 5/4 oak is lying on it, it's b/c the first layer, six oz. E, created a tiny amount of bow in the foil, maybe 1/8th inch from tip to tip. So, resting that piece of lumber on the foil as the 9 oz was setting up completely eliminated the bow...it had just enough weight to straighten the thing out.
After the glue kicked, I took the foil off the stand (which worked even better with the foil having a solid tie-layer on it) and I weighed it. After the 2 layers of glass, the thing now weighs in at a solid 2 pounds 2 ounces....it's 52 inches long. Cool.
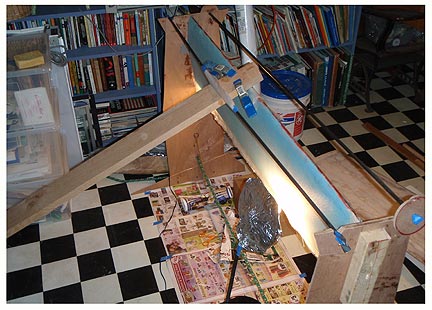
I also finally made it down to West Marine to pick up my foil paint. Decided on the one-two punch of Interlux Pre-Kote and Brightside. Also picked up an organic respirator. But before finishing up the foil, I wanted to do one last set of measuring. I want to avoid, at all cost, a situation whereby, once I wrap the top of the foil to make the keelbox sleeve, I cannot get the damn sleeve off.
So, I am measuring carefully to make sure there isn't an "indentation" along the top 9 - 10 inches, especially on the trailing edge, that will cause the keel sleeve to hang up. It probably will, anyway, but at least I can do as much as possible to try and prevent it.
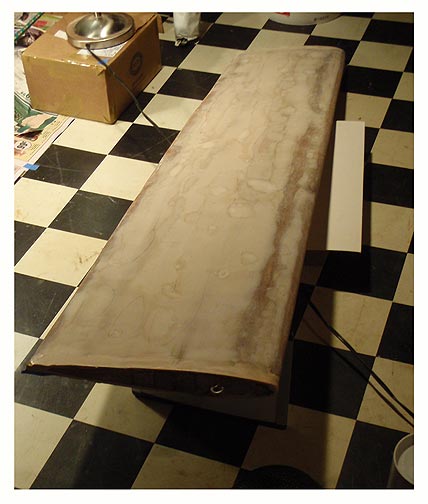
There was a lip at the top of the foil right at the end (bottom of photo just up from the eye screw). Not sure how it got there, but it needed to be filled. Again, one more thing that was going to be a big pain when laying up the keel sleeve....so I had to deal with it.
Measurements up near the root chord to make sure the sleeve doesn't hang up ^. Those numbers (in 16ths of an inch) need to be consistent along the length of the top ten inches and they aren't....need a bit more sanding, I am afraid.
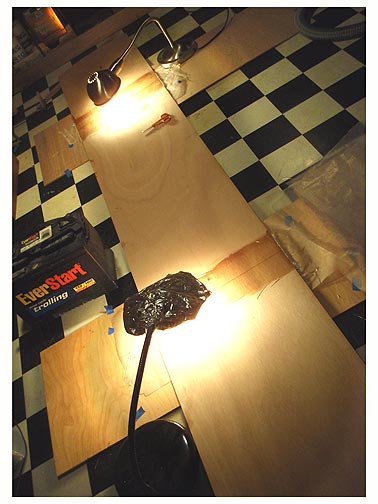
Most of this weekend was spent on getting the cockpit framed properly for the bendable plywood that came last week.
Again, I cannot say enough good things about Boulter Plywood (link above). The stuff they sent is gorgeous, it came quickly and it's pre-cut perfectly. It's 1/16th inch Okuome....pretty slick.
Here are the butt joints being laid up to make 10 ft x 16" panels. My one worry was that the butt joints, laid up in 6 oz cloth (not tape), would be make the panels too stiff to conform to the cockpit frames....they are a little bit stiffer, but they should still bend to conform to the shapes I have cut.
Incidently, most of today was spent getting those shapes good enough to glue in, e.g., sistered to the existing planset frames. I glued them in and am hoping just a bit of sanding will make everything fit perfectly...we'll see.
As usual, deviating from an existing planset can be a huge amount of trouble. I hope it's going to be worth it....bottom line is it has been an interesting challenge, and that's what I love about building this little ride!
3.28.10....Wrap It.
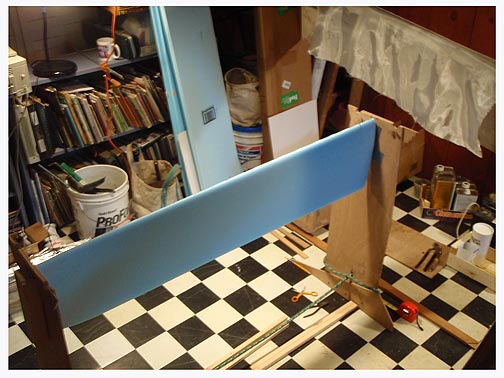
I put a tie layer of e-glass on the rudder this weekend. The rack works well, but I wish I had made it a little sturdier; it wobbles a little bit more than I'd like.
Nonetheless, it worked!
One good thing about the relative flimsiness of the rack is, if you sight down the leading edge of the foam and it is not prefectly straight, you can torque it back into perfection by turning the end supports very slightly.
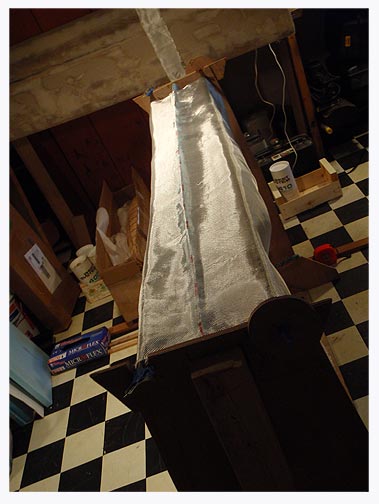
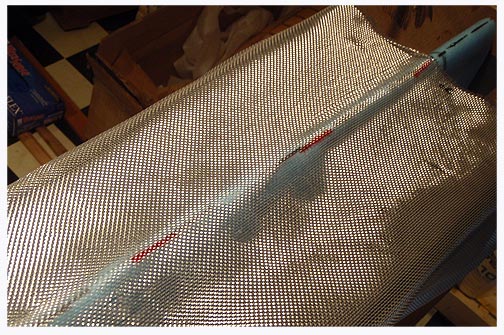
These are shots of how the two rods support the cloth and keep it off the wetted out foil in order to line up the visual marks on both the leading edge of the foil and the cloth. I did them in different colors to make that easier, too.
When things line up, drop the rods and wet out the cloth....this tie layer is 6 oz. e-glass.
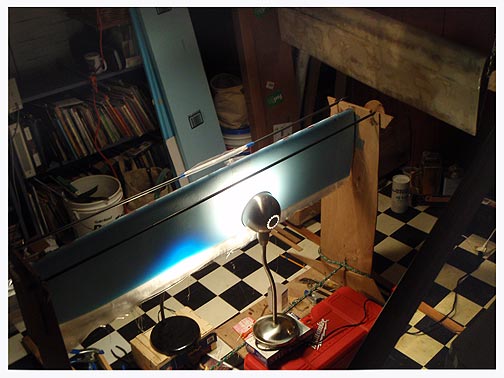
Lamp curing the cloth because it's still a miserable 58 degrees in the basement. But this first layer came out really well.
Next: 9 oz layer and then a couple of carbon fiber.
3.22.09.....Rack It
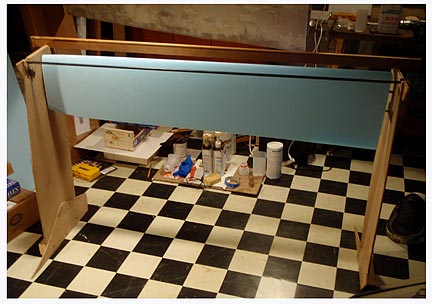
Built this rack to hold my rudda when it gets covered with glass and foam. There are dowels, pointy dowels, on each side that get pushed into the blue foam. Holds it pretty well. The rod (wish I had another one) and the piece of canvas framing, on the other side, hold the cloth off the wet foam until you can get it into position perfectly by marking the leading edge when you dry-fit it, and then lining it up with the cloth draped over the rod (and frame). Then you pull the rods out and let the cloth drop on to the wetted out foil. Sounds easy enough....this was adapted from the SwiftSolo tutorial that is available on the internet somewhere....just google "swift solo centerboard" or something.
Shots of the sides, below.
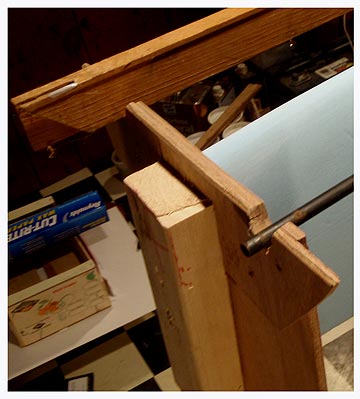
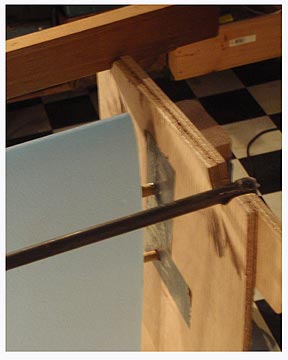
You can see the dowels before they got smacked all the way into the foam. The ply is backed up with a 2x3 that was drilled to accept the dowels...that way they are held in tightly with sufficient support such as not to droop at all, and also another small piece of scrap ply that was knotched to hold the rod and framing lumber.
3.21.10......Curvaceous Sisters

The curvey frames that will be sistered on to the ones from the plan set are all cut. Some minor tweaking will be neccessary, but they are pretty much ready to go. I'll need to run stringers at the top and about halfway down the slope and at the intersection of the slope and the horizontal deck frame (along the lines of the piece of lathing to the right of center in the photo).
Then I hope Boulter plywood comes through and I'll glass in the bendy ply, cover it in carbon fiber and a layer of 6 oz. e-glass.
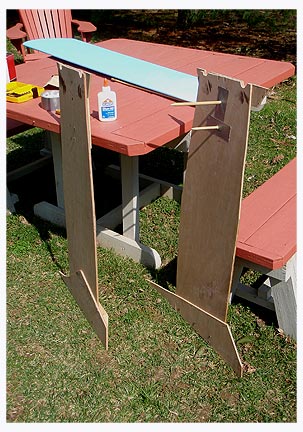
I also slapped together some frames to hang the blue foam foil that will be the core of my rudder....I want to get that thing done soon, too, so that I can get started on the rudder cassette.
Stuff is happenin.'
3.19.10....Opening Day
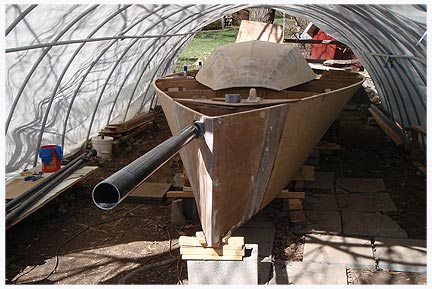 I
don't think I've had the cover off since mid-December, so it was great
to take off both big tarps and see the boat as I left it back in 2009.
I
don't think I've had the cover off since mid-December, so it was great
to take off both big tarps and see the boat as I left it back in 2009.
That is, until I realized how much work I still have to do. There were stringers and stuff that I thought I'd tabbed in last year, but nope, never happened.
First thing I did was drive a nail into the middle of the stem and measure to the far corner of each transom to see if the boat was still square after the pummeling it took in February (see 2.06.10). I was psyched to have the tape stop precisely at 218.50" on each side....it was even more precise than I remembered it being....hmmm.....figure that one out.
I had never really come to grips with how the cockpit was going to come together and after a winter of electronic conversations with a helpful pro builder, I hit upon a better strategy then just radiusing a laminate of Coosacomposite. I'm going to use a bending, bendable, doorskin (or whatever you want to call it) plywood. As a test, I bought a sheet of FRP which is typically used as shower stall or bathroom wall material. It worked OK as a test and frankly I would have used it in the build if it accepted epoxy adhesive, but I did a test overnight and the results were dismal...the stuff barely bonded with a light epoxy layup with 6 oz cloth.
So here are some pix of the way it'll go, once I find a place that will ship me the plywood for less than the cost of the material....finding this stuff in Maryland is not easy. I'm getting a quote from Boulter ply up in Massachusetts who seem to be amazingly helpful and have some pretty decent prices (another tip from the pro builder).
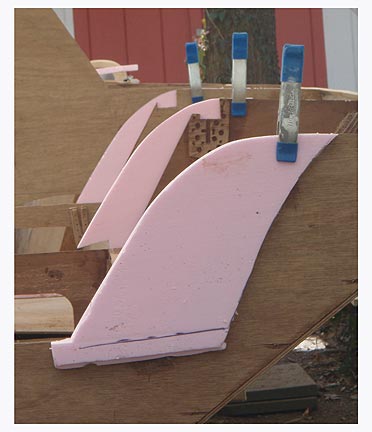
I just used a french curve to trace a shape I thought I'd like on some pink foam to do the mock-up....took a little sanding and some 2nd and 3rd attempts, but I got something that I figure will look good and feel good on the crew's bodies.
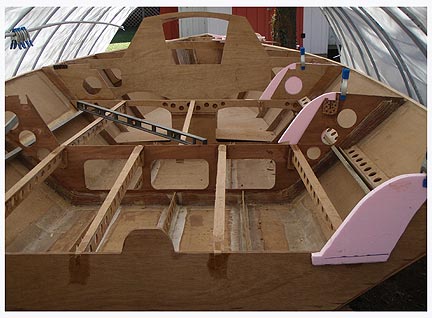
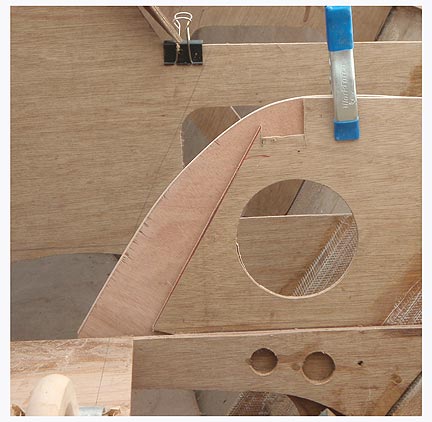
Next, I cut some 6mm ply to sister to the existing frame...I'll use some 9oz biax for that.
Some 16" strips of FRP laid on as a mock-up....I think I'm going to like this.
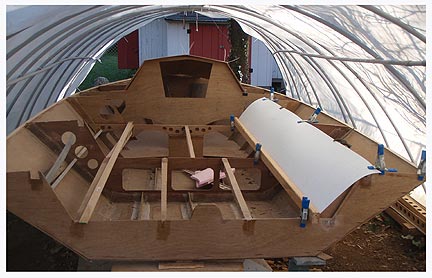
Aside from some of the design and mock-up stuff, the thing I am the most stoked about is getting to the point where I can paint my keel foil!
Finally after fighting this thing, tooth and nail, it's starting to look really good. It is not going to be absolutely perfect, but it'll be close enough. Fairing is like using Photoshop...half the skill lies in figuring out when you can say "enough is enough."

Just a few low spots and dings to fill, some light sanding and then............primer-time!
Then, finally, I can wrap it for a keel sleeve.
3.14.10.....Acid
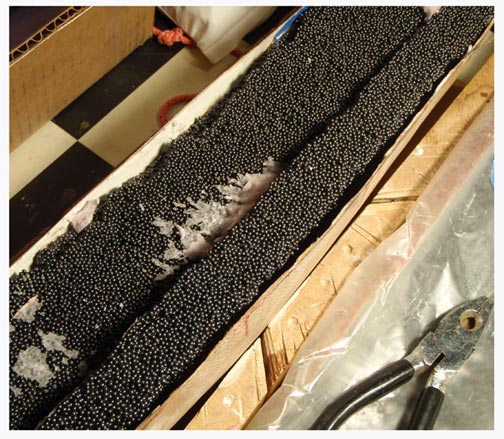 I must've been on acid when I decided to try to build the bulb this way. I don't know what the hell I was thinking.
(slight disclaimer: I haven't really "done" any acid in 35 years and I'm not even admitting that I did any, ever......and even if I did, I didn't inhale)
OK, I'll go so far as to suggest that this method COULD work, but you'd have to suspend the teeny lead balls in a matrix of epoxy and adhesive filler or something that's tough enough to stand up to enormous cycling loads. I gave it a go with a sash weight and all my body weight, and a bit more pushing on it from a door jamb, and the thing all but disintegrated...I had no illusions, whatsoever, that it wouldn't. There is no way way in hell it would last long in any sort of seaway.
Mixing it in with enough resin to withstand that kind of loading would result in a mixture much less dense than needed and the bulb would probably have to be the size of a sea kayak to be approaching class weights.
So this has been a bust and I will start over and do a melt into a mold. Like I should've done from the get-go. I have no idea what I was thinkin.' Or...in this case, not thinkin.'
 On
the other hand, I have been putting a lot of fairing material on my
keel foil and it is starting to look like something that will
eventually be near perfect.
On
the other hand, I have been putting a lot of fairing material on my
keel foil and it is starting to look like something that will
eventually be near perfect.
But you have to use a lot of fairing compound. You have to use one great big helluva lot of fairing compound.
I have a new respect for foil builders.
I am hoping my rudder goes a lot faster...having it professionally cut in blue foam by foil cutting professionals with a CNC machine was a smart move.
I hope by the end of this week to have the keel faired and painted so that I can wrap it for the sleeve layup and then start building the keelbox.
Another small glitch....I am having a bastard of a time finding a LOCAL dealer in "doorskin" ply. Chesapeake Plywood apparently has it, but they have a $250 minimum. Aircraft Spruce has a great price on it, but warns that it will be "very expensive" to ship it....without naming a price. Then if you order it anyway, you get another warning about how expensive it is going to be....that was enough for me to throw in the towel.
------------------------------------------
3.13.10......In Like a Lion
 Luckily, I looked out the window at about 7 a.m. this morning.
We have really high winds that started around 1 a.m., puffs way over 40, I am sure. The house shaking woke me up a couple times.
And from a bad direction, too. Most of our big breeze comes from the NW, but this was the building breeze from the huge storm affecting the East Coast today, a NE breeze. The hoop house is less protected in breeze from the east.
It had sprung a few hoops from the rebar that holds the thing in posiiton. I think in another 10-15 minutes it would have been gone. If it got by the willow tree, it probably would have ended up in the next county.
I have enlisted the lion to hold the thing down. I never really liked this lion but it has brought us some good luck. Now I know what it was made for.
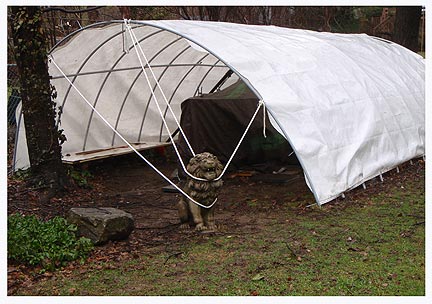
--------------------------------------
3.12.10.......Down Time
 When life gives you furlough days, make furniture! (bunks, hatches, compression posts, etc)
It's Spring Break and 4 of my 5 days off are unpaid, coutesy of the University System of Maryland. Am I complaining? Hell no. I'm damn glad they went with cost-cutting on the payroll side as opposed to mass layoffs.
Plus I get 9 straight days to mess around with epoxy, carbon fiber and E-glass tape.
Only hoping some of the days get well into the high 50's...when that happens, the hoop house warms up into the mid-high 70's and that, my friends, is glueing weather.
We also cleared out a lot of floor space in the basement, so no excuses. Except NCAA hoops...that could be a problem.
------------------------------------------------------
3.07.10....Entire Weekend: Shot

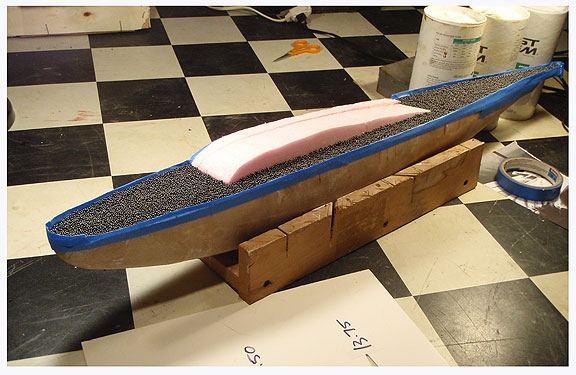
Did a few more lead pours this past weekend!
It's going to be close. It weighs about 58 pounds now. I think I can get another 12 pounds on this half. That would be up to 70. 70 x 2 = 140, figure my final keel foil weight at about 28, that's 168 and another 8-10 gets poured into the gap between the foil and the bulb slot, that would be approx 180, so I'm close. This might yet work!
A new worry....its the shot/blob/epoxy matrix tough enough to stand up to repeated load cycles once the boat actually sailed? Time will tell.
I'll definitely lay in some CF strips in high-load areas around the thru-bolts to make sure the thing stays in one piece. Major props to Ballistic Products in Minnesota who fedexed, yes that's right, FEDEX'ed me 25 pounds of shot for the same price as ground.
2.28.10....Going Ballistic!
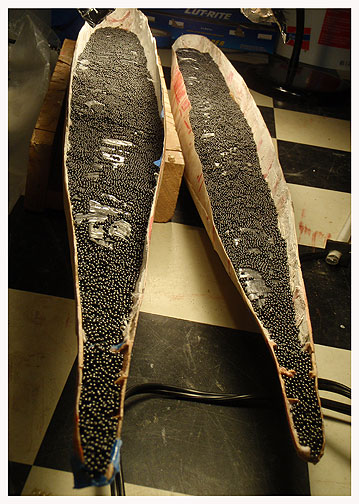 The continuing experiment I call "cold casting," progresses.
I realized that it would be smarter for me to try to end up with an intact keel bulb without having to heat a cauldron of hot bubbling lead up to 400-500 degrees and then deal with pouring it into a female mold. I'm too chicken and too capable of completely screwing up.
Look, the goal is to get a decently cast shape without ending up in the ER with 3rd degree burns and mental retardation due to lead fume exposure.
So, this is how it's working out, so far. I think it's going to be OK.
I got in touch with Ballistic Products up in Corcoran, Minnesota. Ballistic products sells shotgunner supllies. Turns out they can ship a bag of lead shot pretty cheaply through the good of USofA postal service. OK, it's more money than I wanted to spend on lead, but since I got the first 130 pounds for free, I could justify spending a little coin on some materials that are going to make my life a LOT easier (assuming this all works out).
The routine goes like this: go outside, don mask and gloves and pound strips of lead H-track (used to seat stained glass) into completely flat strips. Wrap the strips tightly into an armature and then pound all the air, trapped between the strips, out so that the result is a blob of lead approx 8 inches long and an inch thick, max.
Lay a bed on #9 shot in the fiberglass mold, mix some west-epox up with a teeny bit of MEK and mix the shot/epox into a slurry. Lay the blob in the slurry, seating it well into the bed of shot. Pour more shot on the blob, add some more epox and mix it up with one of West's black sticks. Let it cure. Let it be.
 I used #9 shot for a couple reasons.
One, Ballistic Products sells a number 9 shot that is mostly lead instead of the other stuff that is laced with antimony and other lighter metals.
Two, according to my math, the smaller the shot, the less air or epoxy it will trap, interstitially, thus resulting in a heavier matrix per cubic cm than larger shot would. Please let me know if my math is invalid.
Three, the smaller shot will also conform more closely to other surfaces like the fiberglass mold and the lead blobs.
Plus, I like the Beatles reference: Number 9....number 9....number 9
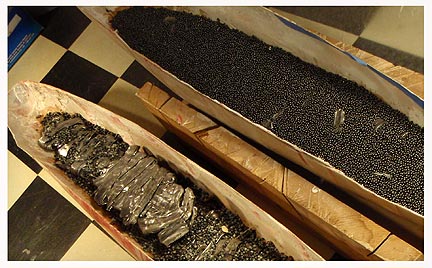
Here's one of the molds with a hard layer (kicked epoxy) of shot & blob (right) and another (left) waiting for another pour. The blobs get better with a little influence from the learning curve. This one had a bit more air space than the later ones.
Each layer of shot and blobs weighs in at about 12-15 pounds, so I am right on schedule for 2 half bulbs that weigh in at approx 75 - 80 pounds each. I hope.
The keel foil weighs 25 pounds now, so there's the 185 class limit.
2.14.10....Still Cookin'
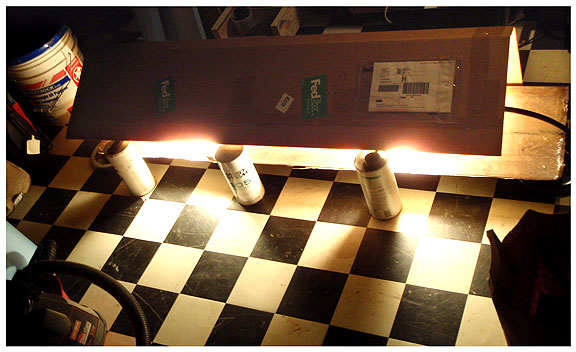
While the priority has been on shoveling and keeping the build shed upright, over the past 10 days, I have gotten a little more work done on the keel foil, mainly consisting of slathering on thick layers of micro-balloon fairing and then trying to get the basement warm enough to get the pox to kick. 'Bout the best I can do with conditions being what they are.
Bit difficult to do glass work in condits like this:
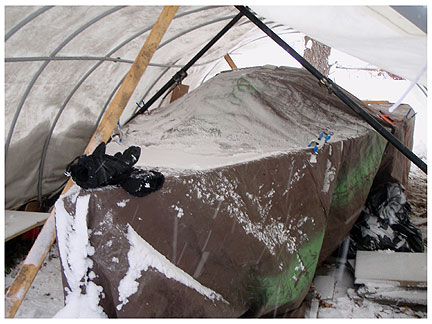
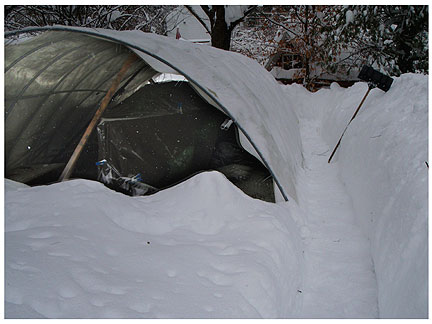
_______________________
2.06.10.....Still Kickin'
Bit of a scare when, at the height of last night's fierce snow storm, which dumped a record 28 inches in our backyard, I looked out the window and saw that the hoop house was crushed flat. I had been trying to clear it all night, but gave up around midnight, it was just snowing too hard and our power had gone off. So I sacked out for a couple hours with the intention of going out to clear it off at 3 am....but when I looked out and saw it was flat at 2:30 a.m., I said screw it, I'll deal with it in the morning.
So, at 7:30 a.m., I went out with fear in my heart and saw this. However, when I peeked under the crushed tarp, the boat looked relatively normal.
An hour of shovelling and the frame sprung back into conformation, the tarp was undamaged, and the boat was fine. Dodged another bullet!
Back in shape, pretty much.
____________________
1.30.10....Same Old
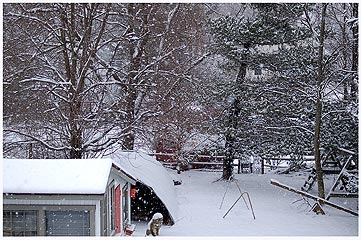
Just as the last of the monster piles of snow from the 12.18.09 storm finally bit the dust, we get another dumping. Oh well, it's another excuse to take a few hours and work indoors. Best news of all is my bud "Crabmeat" is taking a large piece of furniture out of the basement tomorrow, and that will free up room to bring the house in and glass that bastid in the (relative) warmth of the cellar.
In the meantime, the layup sked of the keel foil is done and the fairing has begun. I had enough time this morning to sand the foil before the snow hit hard, that was a bonus.
Fairing is just a mixture of 5 parts microballoon (410) to 2 parts filleting adhesive (405) to enough pox to make it as slightly less thick than peanut butter. I totally understand that there will be a lot of applications of this glop from reading Jeff and Kevin and Chris B's build-blogs.
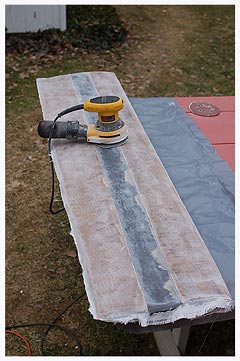
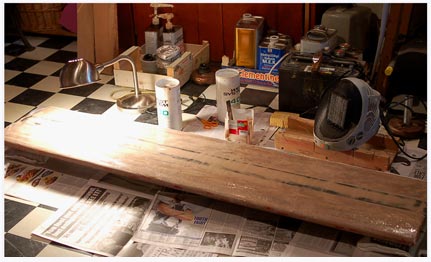 Also
going on, simultaneously, is an attempt to clear out all the
paster-crud that I mistakenly used to build the bulb plug...fine if it
was going to stay a plug, but now that it's the actual outside skin
(hopefully) I need to clean out all that paster. As it turns out,
acetic acid (found in vinegar, but also available as basic photo
darkroom chemistry in the form of Stop Bath) does wonders with
dissolving paster. So a few applications of this, as a 28% acetic acid
solution, has done a great job of scouring out all that soft, white
stuff.
Also
going on, simultaneously, is an attempt to clear out all the
paster-crud that I mistakenly used to build the bulb plug...fine if it
was going to stay a plug, but now that it's the actual outside skin
(hopefully) I need to clean out all that paster. As it turns out,
acetic acid (found in vinegar, but also available as basic photo
darkroom chemistry in the form of Stop Bath) does wonders with
dissolving paster. So a few applications of this, as a 28% acetic acid
solution, has done a great job of scouring out all that soft, white
stuff.
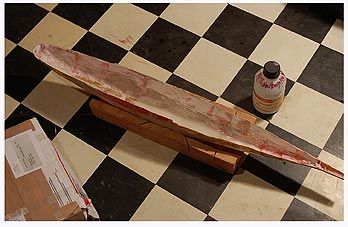 16
degrees outside and 5" of snow on the ground, so working in on these
projects is about as good as it's gonna get for a while. Come on
March....
16
degrees outside and 5" of snow on the ground, so working in on these
projects is about as good as it's gonna get for a while. Come on
March....
------------------------------------------
1.18.10......Dogfish Oven
This cold spell has made it difficult to get glue to kick in the basement. Luckily, we got a brief respite this weekend, and with the help of the Dogfish Oven, I finally got the carbon fiber strips on the keel. This week the goal is another layer of cloth and a bunch of fairing. Hope the warm weather sticks around. I need to get a "final" outer dimension before I can build the keelbox sleeve and finish the bulb.
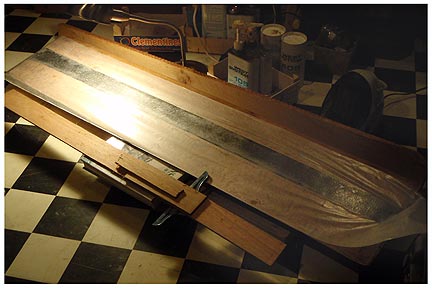
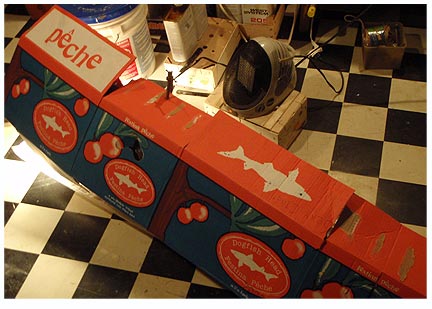
An unfolded Dogfish Head Festina Peche box works pretty well to build the heat level along the length of the keel foil. Doesn't hurt to drink a few of these while you are working, as the stuff is DFH's answer to lite beer, just 4.5 % ETOH. Works for me. The lamp finishes off anything remotely sticky in short order.
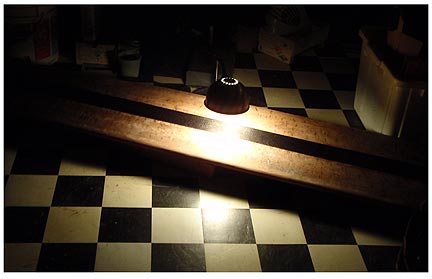
12.29.09.....The Death of "The Whale"
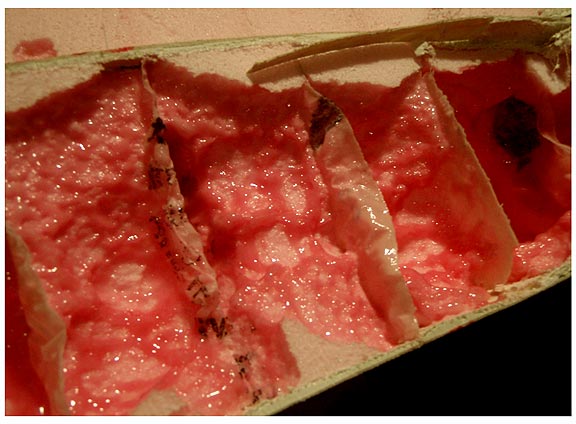 I've
been agonizing over the stupid bulb for so long, bringing it in to fair
it, taking it outside to sand, over and over and over again, the family
started calling it "The Whale." It does, in fact, look a bit like a
tiny, tan, tail-less blue whale. Or...it did, because the whale died
today. It was sliced in half and its blubber got rendered away.
I've
been agonizing over the stupid bulb for so long, bringing it in to fair
it, taking it outside to sand, over and over and over again, the family
started calling it "The Whale." It does, in fact, look a bit like a
tiny, tan, tail-less blue whale. Or...it did, because the whale died
today. It was sliced in half and its blubber got rendered away.
This is a departure as far as I can tell and I'm not sure it's going to work, but what the hell, I'm willing to give it a try.
See, I spent so much time on The Whale that I decided to glass the damn thing and just stuff it rather than use it for a plug and then have to re-fair the thing all over again. I can't pour hot lead into it b/c that will grossly deform the glass, so I have to stuff it. I think it will be possible as the lead I have can be pounded into very fine ribbons and then the ribbons can be wrapped to form very, very solid shapes. The bulb will be a tiny bit bigger than the dimensions defined by the original pdf file, and perhaps a little lighter, but I don't think the difference is going to be significant. Like I said, we'll see.
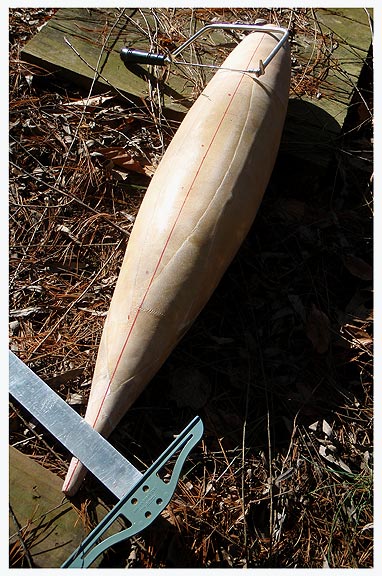
Here's the whale just before the slaughter. The ridges are where 6 oz cloth overlaps...I think I have about 2-3 layers on in most places.
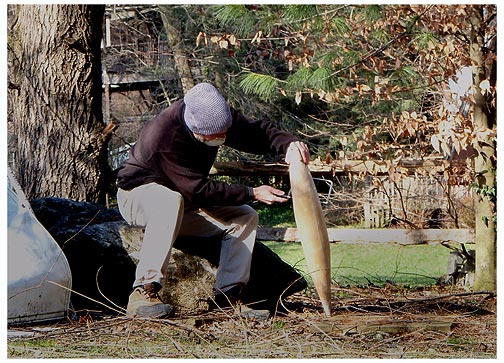
I was going to cut it in half using a friend's band saw, but that would have taken me well into early January, so I decided to just use a coping saw and be done with it. Since it's going to get glued back together, extreme accuracy doesn't really matter and the coping saw, while a pain in the ass, was adequate.
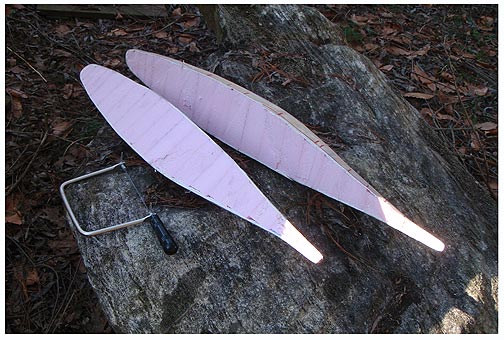
Done. Not perfect but fine for now.
The next step was to pour lacquer thinner into the pick stuff and watch it dissolve....it's pretty amazing. BTW, you might want to do it outside .
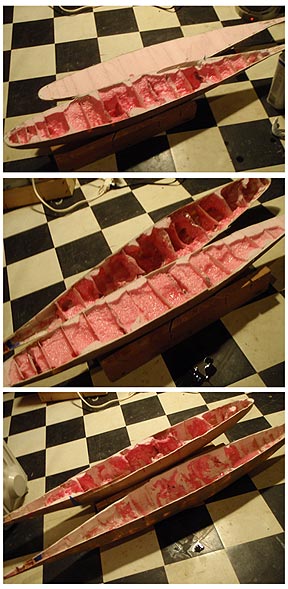 This
is the fun part. I only used about a pint of lacquer thinner to
dissolve all the pink foam in both halves. You should probably wear a
decent respirator when you do this step. I didn't and was partially
blind and coughing up blood for a good half hour afterward.
This
is the fun part. I only used about a pint of lacquer thinner to
dissolve all the pink foam in both halves. You should probably wear a
decent respirator when you do this step. I didn't and was partially
blind and coughing up blood for a good half hour afterward.
Just kidding.
Going.
Going.
Gone.
In other news, I also got a layer of 9 oz cloth on the keel foil This one turned out a helluva lot nicer than my botched first attempt.
Here's the foil after my crappy first attempt...it did get really nice clear-coat layer on it even though the glass was a toss-out. I wiped the clear coat, sanded it with 220 and 120 and then wiped it again.
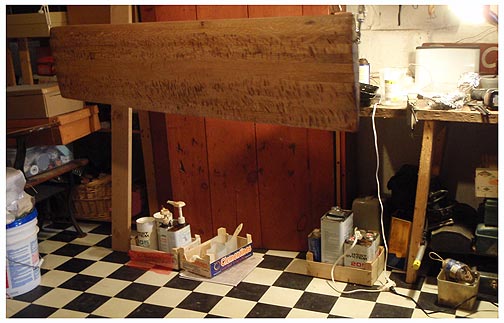
A few things: I have this suspended, using the kitchen floor joists, in the basement. One: do not use curtain hooks to clip into an eye...they don't have the strength. One gave it up while I was doing this and the keel crashed to the floor and dinged the trailing edge of the laminate...no biggie, but a pain in the ass as the cloth was already wetted out and had to be repositioned. Repositioning a big piece of wetted out cloth is a chore.
Two: mark a big piece of cloth with a Sharpie or something to get it to lay down exactly in position when it's going on something wetted out. I marked the top edge and the right side so that when I put the cloth on it would conform perfectly to the way it had been cut to fit. See above about having to reposition a big wet piece of cloth.
Three: Allow a bit more cloth. I cut this just slightly oversize, figuring on the usual expansion when the E-cloth is squeegeed out, but I wish I'd made it a half inch bigger on each side....the cloth shifted a tiny bit and even with the slightly bigger piece, a tiny shift on one side gets multiplied by two and I have a small section where the glass is a 1/4" short on the trailing edge. No big deal, I'll get it on the next layer (a 6 oz E-glass top layer) but I'll make it a point to add just a tiny bit more overlap next time.

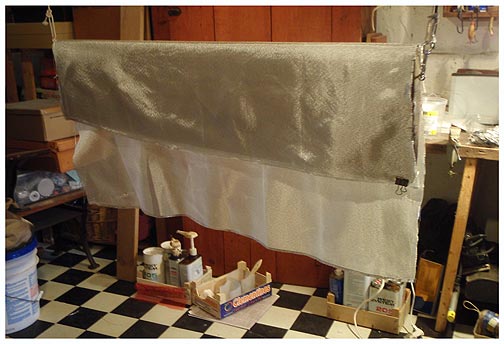
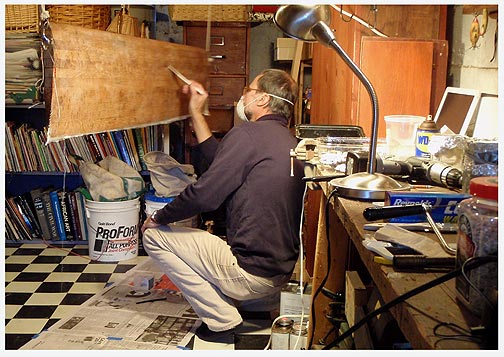 At
59 x 28 inches, this is the biggest piece of cloth I've ever dealt
with, to date. I'm happy with the way it turned out and glad I had the
chance to experiment with a big piece, on a foil, before moving on to
glass the hull and decks. I highly recommend you do the same if you are
not used to working with 10 square feet of cloth.
At
59 x 28 inches, this is the biggest piece of cloth I've ever dealt
with, to date. I'm happy with the way it turned out and glad I had the
chance to experiment with a big piece, on a foil, before moving on to
glass the hull and decks. I highly recommend you do the same if you are
not used to working with 10 square feet of cloth.
I learned a lot while doing this. Some people may have an affinity for stuff like this, but I know now that I definitely do not! I need to paintakingly plan, step by step, how I'm going to do a task as simple as this. Not sure why, maybe it's a learning disorder or something, but anyway, I also know now that I can cope with the task and stay focused...as long as I don't have to take an urgent phone call or something.
I'm SOL if that happens.
12.24.09...Christmas Spirit
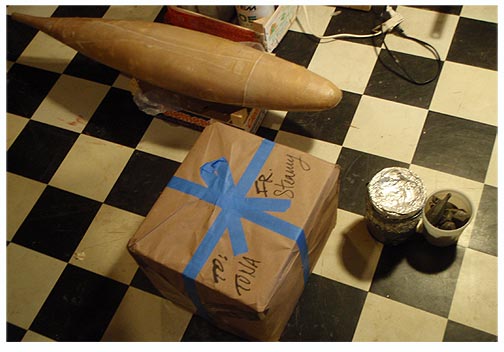
Nothing says holiday spirit more than a 30 pound box of lead, all nicely wrapped up and delivered safe and sound.
This is from my friend "Steamboat" who has generously supported the building of hull 87 by coming through with lots and lots of lead.
With a 12 pound can of shot and a few fishing weights, I'm now up to about 175 including the keel foil and not including the fiberglass shell I'm building, shown in picture. This is a departure from the other builds in that I am stuffing the bulb with lead, lead that has been pounded together rather than melted, with air pockets and voids being filled with pox and lead shotgun pellets.
We'll see how it works but I got the go-ahead from another friend who is pretty good at figuring this stuff out.
12.18.09....There's Nothing Happening Here, Just Doin' My Best, to Keep the Roof Clear.
We are getting between 20 and 30 inches of snow today and tonight. My mission, should I choose to accept it, is to keep the hoop house from collapsing.
Mission accomplished....18 inches of snew and still standing.
12.11.09...Supply Siders
If
you visit this page every now and then, it's either because you're a
friend of mine interested in the build, or you are actively engaged in
building an i550.
Either way, because most of my friends are in some way, DIY'ers, I wanted to put a plug in for Jamestown Distributors, and a link to their site. I've ordered and bought supplies for this project from several vendors, but for sheer customer satisfaction, no one comes close to JD, Their website is chock full of info, easily navigated, and their web commerce buttons work really well. Their prices are great, their shipping is amazing and the free delivery over a certain dollar amount is much appreciated.
But aside from all this, the quality of their fiberglass and CF cloth is outstanding. And the care they put into packing for shipment is top notch. If you are ordering stuff for your build from an on-line source, I strongly recommend Jamestown. Even if you don't end up buying from them, their webiste is a primer on materials and technique.
The other link is to C-Tech NZ, the CF experts in New Zealand. As the dollar continues to tank because the idiots in Washington are oblivious to the fact that you can't keep cranking trillions of dollars out on a printing press and expect people to attach any significant value to what, in essence, is quickly becoming Monopoly money, you should think about springing for a CF rig from these folks in NZ as soon as possible. They do terrific work. Even though it's not ready to step, by a long shot, I get my rig out from time to time just to look at it, because the CF layup is so gorgeous. Now that I'm starting to work with CF, I can only my layups look as pretty as theirs.
I hope you supprt these excellent companies. As a boat-building community, we are all better off if they survive in this economic environment.
12.04.09.....Easy Bake Oven
I wasted a perfect 70 degree day last weekend by screwing up royally on an attempt to put a layer of glass over my keel foil. Won't even go into the specifics, too embarassing. But like someone already said, I think it was Ron with the Icebox build, or maybe Jeff in WI, it "ain't a mistake if you can tear it apart and fix it." Or something to that affect.
Anyway, I did learn that you can heat an oak laminate foil up pretty well in a garage-bag solar oven. The intention was to get the thing hot so that the pox would have better penetration, as was suggested some time ago on the class forum.
In broad sunlight, air temp about 48 degrees, the best I saw was about 118 degrees. At that point I went with the MEK wipe and cloth layup. While the cloth layup was absolute crap, I did get a good clear-coat layer on and I'm waiting for a shipment from Jamestown Distrib to come in this week and I'll give the cloth another go. This weekend looks like a total bust, though: